
Vehicles
Brand: URO
Supplier Number: URO-012812
Quantity Available: 1
Position: Not Applicable
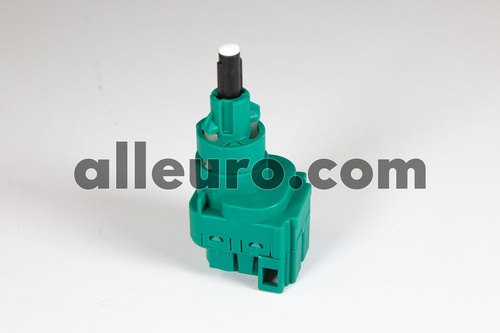
Description: NLA*BRAKE SWITCH
Description 2: BRAKE LIGHT SWITCH- BEETLE 4 pin
List Price: $15.57
Online Price: $7.70
| Year | Make | Model | Submodel | Liter |
|---|---|---|---|---|
| 1999 | Volkswagen | EuroVan | GLS | 2.8 |
| Notes: 4 Pin Connector | ||||
| 1999 | Volkswagen | EuroVan | MV | 2.8 |
| Notes: 4 Pin Connector | ||||
| 1999 | Volkswagen | Golf | GL | 1.9 |
| Notes: 4-Pin Special care must be taken during installation to prevent damage and obtain proper electrical contact Prior to installation pull plunger to full extension, use and apply lubricant to plunger. Keep pedal in up position. Push switch in and seat into opening pressing against pedal. Once seated secure switch by turning it to the right approximately 45 degrees. This action turns the plunger shoe into the correct position to make contacts operate. | ||||
| 1999 | Volkswagen | Golf | GL | 2.0 |
| Notes: 4 Pin Connector | ||||
| 1999 | Volkswagen | Golf | GL | 2.0 |
| Notes: 4-Pin Special care must be taken during installation to prevent damage and obtain proper electrical contact Prior to installation pull plunger to full extension, use and apply lubricant to plunger. Keep pedal in up position. Push switch in and seat into opening pressing against pedal. Once seated secure switch by turning it to the right approximately 45 degrees. This action turns the plunger shoe into the correct position to make contacts operate. | ||||
| 1999 | Volkswagen | Golf | GLS | 2.0 |
| Notes: 4 Pin Connector | ||||
| 1999 | Volkswagen | Golf | GLS | 2.0 |
| Notes: 4-Pin Special care must be taken during installation to prevent damage and obtain proper electrical contact Prior to installation pull plunger to full extension, use and apply lubricant to plunger. Keep pedal in up position. Push switch in and seat into opening pressing against pedal. Once seated secure switch by turning it to the right approximately 45 degrees. This action turns the plunger shoe into the correct position to make contacts operate. | ||||
| 1999 | Volkswagen | Golf | GTI | 2.0 |
| Notes: 4 Pin Connector | ||||
| 1999 | Volkswagen | Golf | GTI | 2.0 |
| Notes: 4-Pin Special care must be taken during installation to prevent damage and obtain proper electrical contact Prior to installation pull plunger to full extension, use and apply lubricant to plunger. Keep pedal in up position. Push switch in and seat into opening pressing against pedal. Once seated secure switch by turning it to the right approximately 45 degrees. This action turns the plunger shoe into the correct position to make contacts operate. | ||||
| 1999 | Volkswagen | Golf | GTI | 2.8 |
| Notes: 4 Pin Connector | ||||
| 1999 | Volkswagen | Golf | GTI | 2.8 |
| Notes: 4-Pin Special care must be taken during installation to prevent damage and obtain proper electrical contact Prior to installation pull plunger to full extension, use and apply lubricant to plunger. Keep pedal in up position. Push switch in and seat into opening pressing against pedal. Once seated secure switch by turning it to the right approximately 45 degrees. This action turns the plunger shoe into the correct position to make contacts operate. | ||||
| 1999 | Volkswagen | Golf | GTI VR6 | 2.8 |
| Notes: 4-Pin Special care must be taken during installation to prevent damage and obtain proper electrical contact Prior to installation pull plunger to full extension, use and apply lubricant to plunger. Keep pedal in up position. Push switch in and seat into opening pressing against pedal. Once seated secure switch by turning it to the right approximately 45 degrees. This action turns the plunger shoe into the correct position to make contacts operate. | ||||
| 1999 | Volkswagen | Golf | MI | 1.8 |
| Notes: 4-Pin Special care must be taken during installation to prevent damage and obtain proper electrical contact Prior to installation pull plunger to full extension, use and apply lubricant to plunger. Keep pedal in up position. Push switch in and seat into opening pressing against pedal. Once seated secure switch by turning it to the right approximately 45 degrees. This action turns the plunger shoe into the correct position to make contacts operate. | ||||
| 1999 | Volkswagen | Golf | TDI | 1.9 |
| Notes: 4 Pin Connector | ||||
| 1999 | Volkswagen | Golf | TDI | 1.9 |
| Notes: 4-Pin Special care must be taken during installation to prevent damage and obtain proper electrical contact Prior to installation pull plunger to full extension, use and apply lubricant to plunger. Keep pedal in up position. Push switch in and seat into opening pressing against pedal. Once seated secure switch by turning it to the right approximately 45 degrees. This action turns the plunger shoe into the correct position to make contacts operate. | ||||
| 1999 | Volkswagen | Golf | Wolfsburg Edition | 2.0 |
| Notes: 4-Pin Special care must be taken during installation to prevent damage and obtain proper electrical contact Prior to installation pull plunger to full extension, use and apply lubricant to plunger. Keep pedal in up position. Push switch in and seat into opening pressing against pedal. Once seated secure switch by turning it to the right approximately 45 degrees. This action turns the plunger shoe into the correct position to make contacts operate. | ||||
| 1999 | Volkswagen | Jetta | Base | 2.0 |
| Notes: 4-Pin Special care must be taken during installation to prevent damage and obtain proper electrical contact Prior to installation pull plunger to full extension, use and apply lubricant to plunger. Keep pedal in up position. Push switch in and seat into opening pressing against pedal. Once seated secure switch by turning it to the right approximately 45 degrees. This action turns the plunger shoe into the correct position to make contacts operate. | ||||
| 1999 | Volkswagen | Jetta | CL | 1.8 |
| Notes: 4-Pin Special care must be taken during installation to prevent damage and obtain proper electrical contact Prior to installation pull plunger to full extension, use and apply lubricant to plunger. Keep pedal in up position. Push switch in and seat into opening pressing against pedal. Once seated secure switch by turning it to the right approximately 45 degrees. This action turns the plunger shoe into the correct position to make contacts operate. | ||||
| 1999 | Volkswagen | Jetta | CL | 2.0 |
| Notes: 4-Pin Special care must be taken during installation to prevent damage and obtain proper electrical contact Prior to installation pull plunger to full extension, use and apply lubricant to plunger. Keep pedal in up position. Push switch in and seat into opening pressing against pedal. Once seated secure switch by turning it to the right approximately 45 degrees. This action turns the plunger shoe into the correct position to make contacts operate. | ||||
| 1999 | Volkswagen | Jetta | GL | 2.0 |
| Notes: 4-Pin Special care must be taken during installation to prevent damage and obtain proper electrical contact Prior to installation pull plunger to full extension, use and apply lubricant to plunger. Keep pedal in up position. Push switch in and seat into opening pressing against pedal. Once seated secure switch by turning it to the right approximately 45 degrees. This action turns the plunger shoe into the correct position to make contacts operate. | ||||
| 1999 | Volkswagen | Jetta | GLS | 2.0 |
| Notes: 4-Pin Special care must be taken during installation to prevent damage and obtain proper electrical contact Prior to installation pull plunger to full extension, use and apply lubricant to plunger. Keep pedal in up position. Push switch in and seat into opening pressing against pedal. Once seated secure switch by turning it to the right approximately 45 degrees. This action turns the plunger shoe into the correct position to make contacts operate. | ||||
| 1999 | Volkswagen | Jetta | GLS | 2.8 |
| Notes: 4-Pin Special care must be taken during installation to prevent damage and obtain proper electrical contact Prior to installation pull plunger to full extension, use and apply lubricant to plunger. Keep pedal in up position. Push switch in and seat into opening pressing against pedal. Once seated secure switch by turning it to the right approximately 45 degrees. This action turns the plunger shoe into the correct position to make contacts operate. | ||||
| 1999 | Volkswagen | Jetta | GLS Confort | 2.0 |
| Notes: 4-Pin Special care must be taken during installation to prevent damage and obtain proper electrical contact Prior to installation pull plunger to full extension, use and apply lubricant to plunger. Keep pedal in up position. Push switch in and seat into opening pressing against pedal. Once seated secure switch by turning it to the right approximately 45 degrees. This action turns the plunger shoe into the correct position to make contacts operate. | ||||
| 1999 | Volkswagen | Jetta | GLS VR6 | 1.8 |
| Notes: 4-Pin Special care must be taken during installation to prevent damage and obtain proper electrical contact Prior to installation pull plunger to full extension, use and apply lubricant to plunger. Keep pedal in up position. Push switch in and seat into opening pressing against pedal. Once seated secure switch by turning it to the right approximately 45 degrees. This action turns the plunger shoe into the correct position to make contacts operate. | ||||
| 1999 | Volkswagen | Jetta | GLS VR6 | 2.8 |
| Notes: 4-Pin Special care must be taken during installation to prevent damage and obtain proper electrical contact Prior to installation pull plunger to full extension, use and apply lubricant to plunger. Keep pedal in up position. Push switch in and seat into opening pressing against pedal. Once seated secure switch by turning it to the right approximately 45 degrees. This action turns the plunger shoe into the correct position to make contacts operate. | ||||
| 1999 | Volkswagen | Jetta | GLX | 2.8 |
| Notes: 4-Pin Special care must be taken during installation to prevent damage and obtain proper electrical contact Prior to installation pull plunger to full extension, use and apply lubricant to plunger. Keep pedal in up position. Push switch in and seat into opening pressing against pedal. Once seated secure switch by turning it to the right approximately 45 degrees. This action turns the plunger shoe into the correct position to make contacts operate. | ||||
| 1999 | Volkswagen | Jetta | GLX VR6 | 1.8 |
| Notes: 4-Pin Special care must be taken during installation to prevent damage and obtain proper electrical contact Prior to installation pull plunger to full extension, use and apply lubricant to plunger. Keep pedal in up position. Push switch in and seat into opening pressing against pedal. Once seated secure switch by turning it to the right approximately 45 degrees. This action turns the plunger shoe into the correct position to make contacts operate. | ||||
| 1999 | Volkswagen | Jetta | GLX VR6 | 2.8 |
| Notes: 4-Pin Special care must be taken during installation to prevent damage and obtain proper electrical contact Prior to installation pull plunger to full extension, use and apply lubricant to plunger. Keep pedal in up position. Push switch in and seat into opening pressing against pedal. Once seated secure switch by turning it to the right approximately 45 degrees. This action turns the plunger shoe into the correct position to make contacts operate. | ||||
| 1999 | Volkswagen | Jetta | TDI | 1.9 |
| Notes: 4-Pin Special care must be taken during installation to prevent damage and obtain proper electrical contact Prior to installation pull plunger to full extension, use and apply lubricant to plunger. Keep pedal in up position. Push switch in and seat into opening pressing against pedal. Once seated secure switch by turning it to the right approximately 45 degrees. This action turns the plunger shoe into the correct position to make contacts operate. | ||||
| 1999 | Volkswagen | Jetta | VR6 Carat | 1.8 |
| Notes: 4-Pin Special care must be taken during installation to prevent damage and obtain proper electrical contact Prior to installation pull plunger to full extension, use and apply lubricant to plunger. Keep pedal in up position. Push switch in and seat into opening pressing against pedal. Once seated secure switch by turning it to the right approximately 45 degrees. This action turns the plunger shoe into the correct position to make contacts operate. | ||||
| 1999 | Volkswagen | Jetta | VR6 Carat | 2.8 |
| Notes: 4-Pin Special care must be taken during installation to prevent damage and obtain proper electrical contact Prior to installation pull plunger to full extension, use and apply lubricant to plunger. Keep pedal in up position. Push switch in and seat into opening pressing against pedal. Once seated secure switch by turning it to the right approximately 45 degrees. This action turns the plunger shoe into the correct position to make contacts operate. | ||||
| 1999 | Volkswagen | Jetta | Wolfsburg Edition | 2.0 |
| Notes: 4-Pin Special care must be taken during installation to prevent damage and obtain proper electrical contact Prior to installation pull plunger to full extension, use and apply lubricant to plunger. Keep pedal in up position. Push switch in and seat into opening pressing against pedal. Once seated secure switch by turning it to the right approximately 45 degrees. This action turns the plunger shoe into the correct position to make contacts operate. | ||||
| 2000 | Audi | TT | Base | 1.8 |
| Notes: 4 Pin Connector | ||||
| 2000 | Audi | TT | Base | 1.8 |
| Notes: 4-Pin Special care must be taken during installation to prevent damage and obtain proper electrical contact Prior to installation pull plunger to full extension, use and apply lubricant to plunger. Keep pedal in up position. Push switch in and seat into opening pressing against pedal. Once seated secure switch by turning it to the right approximately 45 degrees. This action turns the plunger shoe into the correct position to make contacts operate. | ||||
| 2000 | Audi | TT Quattro | Base | 1.8 |
| Notes: 4 Pin Connector | ||||
| 2000 | Audi | TT Quattro | Base | 1.8 |
| Notes: 4-Pin Special care must be taken during installation to prevent damage and obtain proper electrical contact Prior to installation pull plunger to full extension, use and apply lubricant to plunger. Keep pedal in up position. Push switch in and seat into opening pressing against pedal. Once seated secure switch by turning it to the right approximately 45 degrees. This action turns the plunger shoe into the correct position to make contacts operate. | ||||
| 2000 | Volkswagen | EuroVan | GLS | 2.8 |
| Notes: 4 Pin Connector | ||||
| 2000 | Volkswagen | EuroVan | MV | 2.8 |
| Notes: 4 Pin Connector | ||||
| 2000 | Volkswagen | EuroVan | VR6 | 2.8 |
| Notes: 4 Pin Connector | ||||
| 2000 | Volkswagen | Golf | Base | 2.0 |
| Notes: 4-Pin Special care must be taken during installation to prevent damage and obtain proper electrical contact Prior to installation pull plunger to full extension, use and apply lubricant to plunger. Keep pedal in up position. Push switch in and seat into opening pressing against pedal. Once seated secure switch by turning it to the right approximately 45 degrees. This action turns the plunger shoe into the correct position to make contacts operate. | ||||
| 2000 | Volkswagen | Golf | Confort | 2.0 |
| Notes: 4-Pin Special care must be taken during installation to prevent damage and obtain proper electrical contact Prior to installation pull plunger to full extension, use and apply lubricant to plunger. Keep pedal in up position. Push switch in and seat into opening pressing against pedal. Once seated secure switch by turning it to the right approximately 45 degrees. This action turns the plunger shoe into the correct position to make contacts operate. | ||||
| 2000 | Volkswagen | Golf | GL | 1.9 |
| Notes: 4 Pin Connector | ||||
| 2000 | Volkswagen | Golf | GL | 1.9 |
| Notes: 4-Pin Special care must be taken during installation to prevent damage and obtain proper electrical contact Prior to installation pull plunger to full extension, use and apply lubricant to plunger. Keep pedal in up position. Push switch in and seat into opening pressing against pedal. Once seated secure switch by turning it to the right approximately 45 degrees. This action turns the plunger shoe into the correct position to make contacts operate. | ||||
| 2000 | Volkswagen | Golf | GL | 2.0 |
| Notes: 4 Pin Connector | ||||
| 2000 | Volkswagen | Golf | GL | 2.0 |
| Notes: 4-Pin Special care must be taken during installation to prevent damage and obtain proper electrical contact Prior to installation pull plunger to full extension, use and apply lubricant to plunger. Keep pedal in up position. Push switch in and seat into opening pressing against pedal. Once seated secure switch by turning it to the right approximately 45 degrees. This action turns the plunger shoe into the correct position to make contacts operate. | ||||
| 2000 | Volkswagen | Golf | GLS | 1.8 |
| Notes: 4 Pin Connector | ||||
| 2000 | Volkswagen | Golf | GLS | 1.8 |
| Notes: 4-Pin Special care must be taken during installation to prevent damage and obtain proper electrical contact Prior to installation pull plunger to full extension, use and apply lubricant to plunger. Keep pedal in up position. Push switch in and seat into opening pressing against pedal. Once seated secure switch by turning it to the right approximately 45 degrees. This action turns the plunger shoe into the correct position to make contacts operate. | ||||
| 2000 | Volkswagen | Golf | GLS | 1.9 |
| Notes: 4 Pin Connector | ||||
| 2000 | Volkswagen | Golf | GLS | 1.9 |
| Notes: 4-Pin Special care must be taken during installation to prevent damage and obtain proper electrical contact Prior to installation pull plunger to full extension, use and apply lubricant to plunger. Keep pedal in up position. Push switch in and seat into opening pressing against pedal. Once seated secure switch by turning it to the right approximately 45 degrees. This action turns the plunger shoe into the correct position to make contacts operate. | ||||
| 2000 | Volkswagen | Golf | GLS | 2.0 |
| Notes: 4 Pin Connector | ||||
| 2000 | Volkswagen | Golf | GLS | 2.0 |
| Notes: 4-Pin Special care must be taken during installation to prevent damage and obtain proper electrical contact Prior to installation pull plunger to full extension, use and apply lubricant to plunger. Keep pedal in up position. Push switch in and seat into opening pressing against pedal. Once seated secure switch by turning it to the right approximately 45 degrees. This action turns the plunger shoe into the correct position to make contacts operate. | ||||
| 2000 | Volkswagen | Golf | GTI | 2.0 |
| Notes: 4-Pin Special care must be taken during installation to prevent damage and obtain proper electrical contact Prior to installation pull plunger to full extension, use and apply lubricant to plunger. Keep pedal in up position. Push switch in and seat into opening pressing against pedal. Once seated secure switch by turning it to the right approximately 45 degrees. This action turns the plunger shoe into the correct position to make contacts operate. | ||||
| 2000 | Volkswagen | Golf | GTI GLS | 1.8 |
| Notes: 4 Pin Connector | ||||
| 2000 | Volkswagen | Golf | GTI GLS | 1.8 |
| Notes: 4-Pin Special care must be taken during installation to prevent damage and obtain proper electrical contact Prior to installation pull plunger to full extension, use and apply lubricant to plunger. Keep pedal in up position. Push switch in and seat into opening pressing against pedal. Once seated secure switch by turning it to the right approximately 45 degrees. This action turns the plunger shoe into the correct position to make contacts operate. | ||||
| 2000 | Volkswagen | Golf | GTI GLS | 2.0 |
| Notes: 4 Pin Connector | ||||
| 2000 | Volkswagen | Golf | GTI GLS | 2.0 |
| Notes: 4-Pin Special care must be taken during installation to prevent damage and obtain proper electrical contact Prior to installation pull plunger to full extension, use and apply lubricant to plunger. Keep pedal in up position. Push switch in and seat into opening pressing against pedal. Once seated secure switch by turning it to the right approximately 45 degrees. This action turns the plunger shoe into the correct position to make contacts operate. | ||||
| 2000 | Volkswagen | Golf | GTI GLX | 2.8 |
| Notes: 4 Pin Connector | ||||
| 2000 | Volkswagen | Golf | GTI GLX | 2.8 |
| Notes: 4-Pin Special care must be taken during installation to prevent damage and obtain proper electrical contact Prior to installation pull plunger to full extension, use and apply lubricant to plunger. Keep pedal in up position. Push switch in and seat into opening pressing against pedal. Once seated secure switch by turning it to the right approximately 45 degrees. This action turns the plunger shoe into the correct position to make contacts operate. | ||||
| 2000 | Volkswagen | Golf | Lujo | 2.0 |
| Notes: 4-Pin Special care must be taken during installation to prevent damage and obtain proper electrical contact Prior to installation pull plunger to full extension, use and apply lubricant to plunger. Keep pedal in up position. Push switch in and seat into opening pressing against pedal. Once seated secure switch by turning it to the right approximately 45 degrees. This action turns the plunger shoe into the correct position to make contacts operate. | ||||
| 2000 | Volkswagen | Golf | Verano | 2.0 |
| Notes: 4-Pin Special care must be taken during installation to prevent damage and obtain proper electrical contact Prior to installation pull plunger to full extension, use and apply lubricant to plunger. Keep pedal in up position. Push switch in and seat into opening pressing against pedal. Once seated secure switch by turning it to the right approximately 45 degrees. This action turns the plunger shoe into the correct position to make contacts operate. | ||||
| 2000 | Volkswagen | Jetta | GL | 2.0 |
| Notes: 4-Pin Special care must be taken during installation to prevent damage and obtain proper electrical contact Prior to installation pull plunger to full extension, use and apply lubricant to plunger. Keep pedal in up position. Push switch in and seat into opening pressing against pedal. Once seated secure switch by turning it to the right approximately 45 degrees. This action turns the plunger shoe into the correct position to make contacts operate. | ||||
| 2000 | Volkswagen | Jetta | GL Confort | 2.0 |
| Notes: 4-Pin Special care must be taken during installation to prevent damage and obtain proper electrical contact Prior to installation pull plunger to full extension, use and apply lubricant to plunger. Keep pedal in up position. Push switch in and seat into opening pressing against pedal. Once seated secure switch by turning it to the right approximately 45 degrees. This action turns the plunger shoe into the correct position to make contacts operate. | ||||
| 2000 | Volkswagen | Jetta | GLS | 1.8 |
| Notes: 4-Pin Special care must be taken during installation to prevent damage and obtain proper electrical contact Prior to installation pull plunger to full extension, use and apply lubricant to plunger. Keep pedal in up position. Push switch in and seat into opening pressing against pedal. Once seated secure switch by turning it to the right approximately 45 degrees. This action turns the plunger shoe into the correct position to make contacts operate. | ||||
| 2000 | Volkswagen | Jetta | GLS | 2.0 |
| Notes: 4-Pin Special care must be taken during installation to prevent damage and obtain proper electrical contact Prior to installation pull plunger to full extension, use and apply lubricant to plunger. Keep pedal in up position. Push switch in and seat into opening pressing against pedal. Once seated secure switch by turning it to the right approximately 45 degrees. This action turns the plunger shoe into the correct position to make contacts operate. | ||||
| 2000 | Volkswagen | Jetta | GLS | 2.8 |
| Notes: 4-Pin Special care must be taken during installation to prevent damage and obtain proper electrical contact Prior to installation pull plunger to full extension, use and apply lubricant to plunger. Keep pedal in up position. Push switch in and seat into opening pressing against pedal. Once seated secure switch by turning it to the right approximately 45 degrees. This action turns the plunger shoe into the correct position to make contacts operate. | ||||
| 2000 | Volkswagen | Jetta | GLS Turbo | 1.8 |
| Notes: 4-Pin Special care must be taken during installation to prevent damage and obtain proper electrical contact Prior to installation pull plunger to full extension, use and apply lubricant to plunger. Keep pedal in up position. Push switch in and seat into opening pressing against pedal. Once seated secure switch by turning it to the right approximately 45 degrees. This action turns the plunger shoe into the correct position to make contacts operate. | ||||
| 2000 | Volkswagen | Jetta | GLS VR6 | 2.8 |
| Notes: 4-Pin Special care must be taken during installation to prevent damage and obtain proper electrical contact Prior to installation pull plunger to full extension, use and apply lubricant to plunger. Keep pedal in up position. Push switch in and seat into opening pressing against pedal. Once seated secure switch by turning it to the right approximately 45 degrees. This action turns the plunger shoe into the correct position to make contacts operate. | ||||
| 2000 | Volkswagen | Jetta | GLX | 2.8 |
| Notes: 4-Pin Special care must be taken during installation to prevent damage and obtain proper electrical contact Prior to installation pull plunger to full extension, use and apply lubricant to plunger. Keep pedal in up position. Push switch in and seat into opening pressing against pedal. Once seated secure switch by turning it to the right approximately 45 degrees. This action turns the plunger shoe into the correct position to make contacts operate. | ||||
| 2000 | Volkswagen | Jetta | GLX VR6 | 2.8 |
| Notes: 4-Pin Special care must be taken during installation to prevent damage and obtain proper electrical contact Prior to installation pull plunger to full extension, use and apply lubricant to plunger. Keep pedal in up position. Push switch in and seat into opening pressing against pedal. Once seated secure switch by turning it to the right approximately 45 degrees. This action turns the plunger shoe into the correct position to make contacts operate. | ||||
| 2000 | Volkswagen | Jetta | TDI | 1.9 |
| Notes: 4-Pin Special care must be taken during installation to prevent damage and obtain proper electrical contact Prior to installation pull plunger to full extension, use and apply lubricant to plunger. Keep pedal in up position. Push switch in and seat into opening pressing against pedal. Once seated secure switch by turning it to the right approximately 45 degrees. This action turns the plunger shoe into the correct position to make contacts operate. | ||||
| 2001 | Audi | TT | Base | 1.8 |
| Notes: 4 Pin Connector | ||||
| 2001 | Audi | TT | Base | 1.8 |
| Notes: 4-Pin Special care must be taken during installation to prevent damage and obtain proper electrical contact Prior to installation pull plunger to full extension, use and apply lubricant to plunger. Keep pedal in up position. Push switch in and seat into opening pressing against pedal. Once seated secure switch by turning it to the right approximately 45 degrees. This action turns the plunger shoe into the correct position to make contacts operate. | ||||
| 2001 | Audi | TT Quattro | Base | 1.8 |
| Notes: 4 Pin Connector | ||||
| 2001 | Audi | TT Quattro | Base | 1.8 |
| Notes: 4-Pin Special care must be taken during installation to prevent damage and obtain proper electrical contact Prior to installation pull plunger to full extension, use and apply lubricant to plunger. Keep pedal in up position. Push switch in and seat into opening pressing against pedal. Once seated secure switch by turning it to the right approximately 45 degrees. This action turns the plunger shoe into the correct position to make contacts operate. | ||||
| 2001 | Volkswagen | Beetle | GL | 1.8 |
| Notes: 4 Pin Connector Chassis Range: From # 1C-1-430001 | ||||
| 2001 | Volkswagen | Beetle | GL | 1.8 |
| Notes: 4-Pin Special care must be taken during installation to prevent damage and obtain proper electrical contact Prior to installation pull plunger to full extension, use and apply lubricant to plunger. Keep pedal in up position. Push switch in and seat into opening pressing against pedal. Once seated secure switch by turning it to the right approximately 45 degrees. This action turns the plunger shoe into the correct position to make contacts operate. | ||||
| 2001 | Volkswagen | Beetle | GL | 1.9 |
| Notes: 4 Pin Connector Chassis Range: From # 1C-1-430001 | ||||
| 2001 | Volkswagen | Beetle | GL | 1.9 |
| Notes: 4-Pin Special care must be taken during installation to prevent damage and obtain proper electrical contact Prior to installation pull plunger to full extension, use and apply lubricant to plunger. Keep pedal in up position. Push switch in and seat into opening pressing against pedal. Once seated secure switch by turning it to the right approximately 45 degrees. This action turns the plunger shoe into the correct position to make contacts operate. | ||||
| 2001 | Volkswagen | Beetle | GL | 2.0 |
| Notes: 4 Pin Connector Chassis Range: From # 1C-1-430001 | ||||
| 2001 | Volkswagen | Beetle | GL | 2.0 |
| Notes: 4-Pin Special care must be taken during installation to prevent damage and obtain proper electrical contact Prior to installation pull plunger to full extension, use and apply lubricant to plunger. Keep pedal in up position. Push switch in and seat into opening pressing against pedal. Once seated secure switch by turning it to the right approximately 45 degrees. This action turns the plunger shoe into the correct position to make contacts operate. | ||||
| 2001 | Volkswagen | Beetle | GLS | 1.8 |
| Notes: 4 Pin Connector Chassis Range: From # 1C-1-430001 | ||||
| 2001 | Volkswagen | Beetle | GLS | 1.8 |
| Notes: 4-Pin Special care must be taken during installation to prevent damage and obtain proper electrical contact Prior to installation pull plunger to full extension, use and apply lubricant to plunger. Keep pedal in up position. Push switch in and seat into opening pressing against pedal. Once seated secure switch by turning it to the right approximately 45 degrees. This action turns the plunger shoe into the correct position to make contacts operate. | ||||
| 2001 | Volkswagen | Beetle | GLS | 1.9 |
| Notes: 4 Pin Connector Chassis Range: From # 1C-1-430001 | ||||
| 2001 | Volkswagen | Beetle | GLS | 1.9 |
| Notes: 4-Pin Special care must be taken during installation to prevent damage and obtain proper electrical contact Prior to installation pull plunger to full extension, use and apply lubricant to plunger. Keep pedal in up position. Push switch in and seat into opening pressing against pedal. Once seated secure switch by turning it to the right approximately 45 degrees. This action turns the plunger shoe into the correct position to make contacts operate. | ||||
| 2001 | Volkswagen | Beetle | GLS | 2.0 |
| Notes: 4 Pin Connector Chassis Range: From # 1C-1-430001 | ||||
| 2001 | Volkswagen | Beetle | GLS | 2.0 |
| Notes: 4-Pin Special care must be taken during installation to prevent damage and obtain proper electrical contact Prior to installation pull plunger to full extension, use and apply lubricant to plunger. Keep pedal in up position. Push switch in and seat into opening pressing against pedal. Once seated secure switch by turning it to the right approximately 45 degrees. This action turns the plunger shoe into the correct position to make contacts operate. | ||||
| 2001 | Volkswagen | Beetle | GLS Turbo | 1.8 |
| Notes: 4 Pin Connector Chassis Range: From # 1C-1-430001 | ||||
| 2001 | Volkswagen | Beetle | GLS Turbo | 1.8 |
| Notes: 4-Pin Special care must be taken during installation to prevent damage and obtain proper electrical contact Prior to installation pull plunger to full extension, use and apply lubricant to plunger. Keep pedal in up position. Push switch in and seat into opening pressing against pedal. Once seated secure switch by turning it to the right approximately 45 degrees. This action turns the plunger shoe into the correct position to make contacts operate. | ||||
| 2001 | Volkswagen | Beetle | GLX | 1.8 |
| Notes: 4 Pin Connector Chassis Range: From # 1C-1-430001 | ||||
| 2001 | Volkswagen | Beetle | GLX | 1.8 |
| Notes: 4-Pin Special care must be taken during installation to prevent damage and obtain proper electrical contact Prior to installation pull plunger to full extension, use and apply lubricant to plunger. Keep pedal in up position. Push switch in and seat into opening pressing against pedal. Once seated secure switch by turning it to the right approximately 45 degrees. This action turns the plunger shoe into the correct position to make contacts operate. | ||||
| 2001 | Volkswagen | Beetle | GLX Sport Turbo | 1.8 |
| Notes: 4 Pin Connector Chassis Range: From # 1C-1-430001 | ||||
| 2001 | Volkswagen | Beetle | GLX Sport Turbo | 1.8 |
| Notes: 4-Pin Special care must be taken during installation to prevent damage and obtain proper electrical contact Prior to installation pull plunger to full extension, use and apply lubricant to plunger. Keep pedal in up position. Push switch in and seat into opening pressing against pedal. Once seated secure switch by turning it to the right approximately 45 degrees. This action turns the plunger shoe into the correct position to make contacts operate. | ||||
| 2001 | Volkswagen | Beetle | GLX Turbo | 1.8 |
| Notes: 4 Pin Connector Chassis Range: From # 1C-1-430001 | ||||
| 2001 | Volkswagen | Beetle | GLX Turbo | 1.8 |
| Notes: 4-Pin Special care must be taken during installation to prevent damage and obtain proper electrical contact Prior to installation pull plunger to full extension, use and apply lubricant to plunger. Keep pedal in up position. Push switch in and seat into opening pressing against pedal. Once seated secure switch by turning it to the right approximately 45 degrees. This action turns the plunger shoe into the correct position to make contacts operate. | ||||
| 2001 | Volkswagen | Beetle | Sport | 1.8 |
| Notes: 4 Pin Connector Chassis Range: From # 1C-1-430001 | ||||
| 2001 | Volkswagen | Beetle | Sport | 1.8 |
| Notes: 4-Pin Special care must be taken during installation to prevent damage and obtain proper electrical contact Prior to installation pull plunger to full extension, use and apply lubricant to plunger. Keep pedal in up position. Push switch in and seat into opening pressing against pedal. Once seated secure switch by turning it to the right approximately 45 degrees. This action turns the plunger shoe into the correct position to make contacts operate. | ||||
| 2001 | Volkswagen | Beetle | Sport | 1.9 |
| Notes: 4 Pin Connector Chassis Range: From # 1C-1-430001 | ||||
| 2001 | Volkswagen | Beetle | Sport | 1.9 |
| Notes: 4-Pin Special care must be taken during installation to prevent damage and obtain proper electrical contact Prior to installation pull plunger to full extension, use and apply lubricant to plunger. Keep pedal in up position. Push switch in and seat into opening pressing against pedal. Once seated secure switch by turning it to the right approximately 45 degrees. This action turns the plunger shoe into the correct position to make contacts operate. | ||||
| 2001 | Volkswagen | Beetle | Sport | 2.0 |
| Notes: 4 Pin Connector Chassis Range: From # 1C-1-430001 | ||||
| 2001 | Volkswagen | Beetle | Sport | 2.0 |
| Notes: 4-Pin Special care must be taken during installation to prevent damage and obtain proper electrical contact Prior to installation pull plunger to full extension, use and apply lubricant to plunger. Keep pedal in up position. Push switch in and seat into opening pressing against pedal. Once seated secure switch by turning it to the right approximately 45 degrees. This action turns the plunger shoe into the correct position to make contacts operate. | ||||
| 2001 | Volkswagen | EuroVan | Base | 2.5 |
| Notes: 4 Pin Connector | ||||
| 2001 | Volkswagen | EuroVan | GLS | 2.8 |
| Notes: 4 Pin Connector | ||||
| 2001 | Volkswagen | EuroVan | MV | 2.8 |
| Notes: 4 Pin Connector | ||||
| 2001 | Volkswagen | Golf | Base | 2.0 |
| Notes: 4-Pin Special care must be taken during installation to prevent damage and obtain proper electrical contact Prior to installation pull plunger to full extension, use and apply lubricant to plunger. Keep pedal in up position. Push switch in and seat into opening pressing against pedal. Once seated secure switch by turning it to the right approximately 45 degrees. This action turns the plunger shoe into the correct position to make contacts operate. | ||||
| 2001 | Volkswagen | Golf | Confort | 2.0 |
| Notes: 4-Pin Special care must be taken during installation to prevent damage and obtain proper electrical contact Prior to installation pull plunger to full extension, use and apply lubricant to plunger. Keep pedal in up position. Push switch in and seat into opening pressing against pedal. Once seated secure switch by turning it to the right approximately 45 degrees. This action turns the plunger shoe into the correct position to make contacts operate. | ||||
| 2001 | Volkswagen | Golf | GL | 1.9 |
| Notes: 4 Pin Connector | ||||
| 2001 | Volkswagen | Golf | GL | 1.9 |
| Notes: 4-Pin Special care must be taken during installation to prevent damage and obtain proper electrical contact Prior to installation pull plunger to full extension, use and apply lubricant to plunger. Keep pedal in up position. Push switch in and seat into opening pressing against pedal. Once seated secure switch by turning it to the right approximately 45 degrees. This action turns the plunger shoe into the correct position to make contacts operate. | ||||
| 2001 | Volkswagen | Golf | GL | 2.0 |
| Notes: 4 Pin Connector | ||||
| 2001 | Volkswagen | Golf | GL | 2.0 |
| Notes: 4-Pin Special care must be taken during installation to prevent damage and obtain proper electrical contact Prior to installation pull plunger to full extension, use and apply lubricant to plunger. Keep pedal in up position. Push switch in and seat into opening pressing against pedal. Once seated secure switch by turning it to the right approximately 45 degrees. This action turns the plunger shoe into the correct position to make contacts operate. | ||||
| 2001 | Volkswagen | Golf | GLS | 1.8 |
| Notes: 4 Pin Connector | ||||
| 2001 | Volkswagen | Golf | GLS | 1.8 |
| Notes: 4-Pin Special care must be taken during installation to prevent damage and obtain proper electrical contact Prior to installation pull plunger to full extension, use and apply lubricant to plunger. Keep pedal in up position. Push switch in and seat into opening pressing against pedal. Once seated secure switch by turning it to the right approximately 45 degrees. This action turns the plunger shoe into the correct position to make contacts operate. | ||||
| 2001 | Volkswagen | Golf | GLS | 1.9 |
| Notes: 4 Pin Connector | ||||
| 2001 | Volkswagen | Golf | GLS | 1.9 |
| Notes: 4-Pin Special care must be taken during installation to prevent damage and obtain proper electrical contact Prior to installation pull plunger to full extension, use and apply lubricant to plunger. Keep pedal in up position. Push switch in and seat into opening pressing against pedal. Once seated secure switch by turning it to the right approximately 45 degrees. This action turns the plunger shoe into the correct position to make contacts operate. | ||||
| 2001 | Volkswagen | Golf | GLS | 2.0 |
| Notes: 4 Pin Connector | ||||
| 2001 | Volkswagen | Golf | GLS | 2.0 |
| Notes: 4-Pin Special care must be taken during installation to prevent damage and obtain proper electrical contact Prior to installation pull plunger to full extension, use and apply lubricant to plunger. Keep pedal in up position. Push switch in and seat into opening pressing against pedal. Once seated secure switch by turning it to the right approximately 45 degrees. This action turns the plunger shoe into the correct position to make contacts operate. | ||||
| 2001 | Volkswagen | Golf | GTI | 2.0 |
| Notes: 4-Pin Special care must be taken during installation to prevent damage and obtain proper electrical contact Prior to installation pull plunger to full extension, use and apply lubricant to plunger. Keep pedal in up position. Push switch in and seat into opening pressing against pedal. Once seated secure switch by turning it to the right approximately 45 degrees. This action turns the plunger shoe into the correct position to make contacts operate. | ||||
| 2001 | Volkswagen | Golf | GTI GLS | 1.8 |
| Notes: 4 Pin Connector | ||||
| 2001 | Volkswagen | Golf | GTI GLS | 1.8 |
| Notes: 4-Pin Special care must be taken during installation to prevent damage and obtain proper electrical contact Prior to installation pull plunger to full extension, use and apply lubricant to plunger. Keep pedal in up position. Push switch in and seat into opening pressing against pedal. Once seated secure switch by turning it to the right approximately 45 degrees. This action turns the plunger shoe into the correct position to make contacts operate. | ||||
| 2001 | Volkswagen | Golf | GTI GLX | 2.8 |
| Notes: 4 Pin Connector | ||||
| 2001 | Volkswagen | Golf | GTI GLX | 2.8 |
| Notes: 4-Pin Special care must be taken during installation to prevent damage and obtain proper electrical contact Prior to installation pull plunger to full extension, use and apply lubricant to plunger. Keep pedal in up position. Push switch in and seat into opening pressing against pedal. Once seated secure switch by turning it to the right approximately 45 degrees. This action turns the plunger shoe into the correct position to make contacts operate. | ||||
| 2001 | Volkswagen | Golf | GTI Turbo | 1.8 |
| Notes: 4-Pin Special care must be taken during installation to prevent damage and obtain proper electrical contact Prior to installation pull plunger to full extension, use and apply lubricant to plunger. Keep pedal in up position. Push switch in and seat into opening pressing against pedal. Once seated secure switch by turning it to the right approximately 45 degrees. This action turns the plunger shoe into the correct position to make contacts operate. | ||||
| 2001 | Volkswagen | Golf | Lujo | 2.0 |
| Notes: 4-Pin Special care must be taken during installation to prevent damage and obtain proper electrical contact Prior to installation pull plunger to full extension, use and apply lubricant to plunger. Keep pedal in up position. Push switch in and seat into opening pressing against pedal. Once seated secure switch by turning it to the right approximately 45 degrees. This action turns the plunger shoe into the correct position to make contacts operate. | ||||
| 2001 | Volkswagen | Golf | Verano | 2.0 |
| Notes: 4-Pin Special care must be taken during installation to prevent damage and obtain proper electrical contact Prior to installation pull plunger to full extension, use and apply lubricant to plunger. Keep pedal in up position. Push switch in and seat into opening pressing against pedal. Once seated secure switch by turning it to the right approximately 45 degrees. This action turns the plunger shoe into the correct position to make contacts operate. | ||||
| 2001 | Volkswagen | Jetta | GL | 2.0 |
| Notes: 4 Pin Connector Chassis Range: From # 9M-1-075841 | ||||
| 2001 | Volkswagen | Jetta | GL | 2.0 |
| Notes: 4-Pin Special care must be taken during installation to prevent damage and obtain proper electrical contact Prior to installation pull plunger to full extension, use and apply lubricant to plunger. Keep pedal in up position. Push switch in and seat into opening pressing against pedal. Once seated secure switch by turning it to the right approximately 45 degrees. This action turns the plunger shoe into the correct position to make contacts operate. | ||||
| 2001 | Volkswagen | Jetta | GL Confort | 2.0 |
| Notes: 4-Pin Special care must be taken during installation to prevent damage and obtain proper electrical contact Prior to installation pull plunger to full extension, use and apply lubricant to plunger. Keep pedal in up position. Push switch in and seat into opening pressing against pedal. Once seated secure switch by turning it to the right approximately 45 degrees. This action turns the plunger shoe into the correct position to make contacts operate. | ||||
| 2001 | Volkswagen | Jetta | GL Variant | 2.0 |
| Notes: 4-Pin Special care must be taken during installation to prevent damage and obtain proper electrical contact Prior to installation pull plunger to full extension, use and apply lubricant to plunger. Keep pedal in up position. Push switch in and seat into opening pressing against pedal. Once seated secure switch by turning it to the right approximately 45 degrees. This action turns the plunger shoe into the correct position to make contacts operate. | ||||
| 2001 | Volkswagen | Jetta | GLS | 1.8 |
| Notes: 4 Pin Connector Chassis Range: From # 9M-1-075841 | ||||
| 2001 | Volkswagen | Jetta | GLS | 1.8 |
| Notes: 4-Pin Special care must be taken during installation to prevent damage and obtain proper electrical contact Prior to installation pull plunger to full extension, use and apply lubricant to plunger. Keep pedal in up position. Push switch in and seat into opening pressing against pedal. Once seated secure switch by turning it to the right approximately 45 degrees. This action turns the plunger shoe into the correct position to make contacts operate. | ||||
| 2001 | Volkswagen | Jetta | GLS | 2.0 |
| Notes: 4 Pin Connector Chassis Range: From # 9M-1-075841 | ||||
| 2001 | Volkswagen | Jetta | GLS | 2.0 |
| Notes: 4-Pin Special care must be taken during installation to prevent damage and obtain proper electrical contact Prior to installation pull plunger to full extension, use and apply lubricant to plunger. Keep pedal in up position. Push switch in and seat into opening pressing against pedal. Once seated secure switch by turning it to the right approximately 45 degrees. This action turns the plunger shoe into the correct position to make contacts operate. | ||||
| 2001 | Volkswagen | Jetta | GLS | 2.8 |
| Notes: 4 Pin Connector | ||||
| 2001 | Volkswagen | Jetta | GLS | 2.8 |
| Notes: 4 Pin Connector Chassis Range: From # 9M-1-075841 | ||||
| 2001 | Volkswagen | Jetta | GLS | 2.8 |
| Notes: 4-Pin Special care must be taken during installation to prevent damage and obtain proper electrical contact Prior to installation pull plunger to full extension, use and apply lubricant to plunger. Keep pedal in up position. Push switch in and seat into opening pressing against pedal. Once seated secure switch by turning it to the right approximately 45 degrees. This action turns the plunger shoe into the correct position to make contacts operate. | ||||
| 2001 | Volkswagen | Jetta | GLS Turbo | 1.8 |
| Notes: 4-Pin Special care must be taken during installation to prevent damage and obtain proper electrical contact Prior to installation pull plunger to full extension, use and apply lubricant to plunger. Keep pedal in up position. Push switch in and seat into opening pressing against pedal. Once seated secure switch by turning it to the right approximately 45 degrees. This action turns the plunger shoe into the correct position to make contacts operate. | ||||
| 2001 | Volkswagen | Jetta | GLS Variant | 2.0 |
| Notes: 4-Pin Special care must be taken during installation to prevent damage and obtain proper electrical contact Prior to installation pull plunger to full extension, use and apply lubricant to plunger. Keep pedal in up position. Push switch in and seat into opening pressing against pedal. Once seated secure switch by turning it to the right approximately 45 degrees. This action turns the plunger shoe into the correct position to make contacts operate. | ||||
| 2001 | Volkswagen | Jetta | GLS Wolfsburg | 2.0 |
| Notes: 4-Pin Special care must be taken during installation to prevent damage and obtain proper electrical contact Prior to installation pull plunger to full extension, use and apply lubricant to plunger. Keep pedal in up position. Push switch in and seat into opening pressing against pedal. Once seated secure switch by turning it to the right approximately 45 degrees. This action turns the plunger shoe into the correct position to make contacts operate. | ||||
| 2001 | Volkswagen | Jetta | GLX | 2.8 |
| Notes: 4 Pin Connector | ||||
| 2001 | Volkswagen | Jetta | GLX | 2.8 |
| Notes: 4-Pin Special care must be taken during installation to prevent damage and obtain proper electrical contact Prior to installation pull plunger to full extension, use and apply lubricant to plunger. Keep pedal in up position. Push switch in and seat into opening pressing against pedal. Once seated secure switch by turning it to the right approximately 45 degrees. This action turns the plunger shoe into the correct position to make contacts operate. | ||||
| 2001 | Volkswagen | Jetta | GLX VR6 | 2.8 |
| Notes: 4-Pin Special care must be taken during installation to prevent damage and obtain proper electrical contact Prior to installation pull plunger to full extension, use and apply lubricant to plunger. Keep pedal in up position. Push switch in and seat into opening pressing against pedal. Once seated secure switch by turning it to the right approximately 45 degrees. This action turns the plunger shoe into the correct position to make contacts operate. | ||||
| 2001 | Volkswagen | Jetta | TDI | 1.9 |
| Notes: 4 Pin Connector Chassis Range: From # 9M-1-075841 | ||||
| 2001 | Volkswagen | Jetta | TDI | 1.9 |
| Notes: 4-Pin Special care must be taken during installation to prevent damage and obtain proper electrical contact Prior to installation pull plunger to full extension, use and apply lubricant to plunger. Keep pedal in up position. Push switch in and seat into opening pressing against pedal. Once seated secure switch by turning it to the right approximately 45 degrees. This action turns the plunger shoe into the correct position to make contacts operate. | ||||
| 2001 | Volkswagen | Jetta | Wolfsburg Edition | 1.8 |
| Notes: 4 Pin Connector Chassis Range: From # 9M-1-075841 | ||||
| 2001 | Volkswagen | Jetta | Wolfsburg Edition | 1.8 |
| Notes: 4-Pin Special care must be taken during installation to prevent damage and obtain proper electrical contact Prior to installation pull plunger to full extension, use and apply lubricant to plunger. Keep pedal in up position. Push switch in and seat into opening pressing against pedal. Once seated secure switch by turning it to the right approximately 45 degrees. This action turns the plunger shoe into the correct position to make contacts operate. | ||||
| 2002 | Audi | TT | Base | 1.8 |
| Notes: 4 Pin Connector | ||||
| 2002 | Audi | TT | Base | 1.8 |
| Notes: 4-Pin Special care must be taken during installation to prevent damage and obtain proper electrical contact Prior to installation pull plunger to full extension, use and apply lubricant to plunger. Keep pedal in up position. Push switch in and seat into opening pressing against pedal. Once seated secure switch by turning it to the right approximately 45 degrees. This action turns the plunger shoe into the correct position to make contacts operate. | ||||
| 2002 | Audi | TT Quattro | ALMS Edition | 1.8 |
| Notes: 4 Pin Connector | ||||
| 2002 | Audi | TT Quattro | ALMS Edition | 1.8 |
| Notes: 4-Pin Special care must be taken during installation to prevent damage and obtain proper electrical contact Prior to installation pull plunger to full extension, use and apply lubricant to plunger. Keep pedal in up position. Push switch in and seat into opening pressing against pedal. Once seated secure switch by turning it to the right approximately 45 degrees. This action turns the plunger shoe into the correct position to make contacts operate. | ||||
| 2002 | Audi | TT Quattro | Base | 1.8 |
| Notes: 4 Pin Connector | ||||
| 2002 | Audi | TT Quattro | Base | 1.8 |
| Notes: 4-Pin Special care must be taken during installation to prevent damage and obtain proper electrical contact Prior to installation pull plunger to full extension, use and apply lubricant to plunger. Keep pedal in up position. Push switch in and seat into opening pressing against pedal. Once seated secure switch by turning it to the right approximately 45 degrees. This action turns the plunger shoe into the correct position to make contacts operate. | ||||
| 2002 | Volkswagen | Beetle | GL | 1.8 |
| Notes: 4 Pin Connector | ||||
| 2002 | Volkswagen | Beetle | GL | 1.8 |
| Notes: 4-Pin Special care must be taken during installation to prevent damage and obtain proper electrical contact Prior to installation pull plunger to full extension, use and apply lubricant to plunger. Keep pedal in up position. Push switch in and seat into opening pressing against pedal. Once seated secure switch by turning it to the right approximately 45 degrees. This action turns the plunger shoe into the correct position to make contacts operate. | ||||
| 2002 | Volkswagen | Beetle | GL | 1.9 |
| Notes: 4 Pin Connector | ||||
| 2002 | Volkswagen | Beetle | GL | 1.9 |
| Notes: 4-Pin Special care must be taken during installation to prevent damage and obtain proper electrical contact Prior to installation pull plunger to full extension, use and apply lubricant to plunger. Keep pedal in up position. Push switch in and seat into opening pressing against pedal. Once seated secure switch by turning it to the right approximately 45 degrees. This action turns the plunger shoe into the correct position to make contacts operate. | ||||
| 2002 | Volkswagen | Beetle | GL | 2.0 |
| Notes: 4 Pin Connector | ||||
| 2002 | Volkswagen | Beetle | GL | 2.0 |
| Notes: 4-Pin Special care must be taken during installation to prevent damage and obtain proper electrical contact Prior to installation pull plunger to full extension, use and apply lubricant to plunger. Keep pedal in up position. Push switch in and seat into opening pressing against pedal. Once seated secure switch by turning it to the right approximately 45 degrees. This action turns the plunger shoe into the correct position to make contacts operate. | ||||
| 2002 | Volkswagen | Beetle | GLS | 1.8 |
| Notes: 4 Pin Connector | ||||
| 2002 | Volkswagen | Beetle | GLS | 1.8 |
| Notes: 4-Pin Special care must be taken during installation to prevent damage and obtain proper electrical contact Prior to installation pull plunger to full extension, use and apply lubricant to plunger. Keep pedal in up position. Push switch in and seat into opening pressing against pedal. Once seated secure switch by turning it to the right approximately 45 degrees. This action turns the plunger shoe into the correct position to make contacts operate. | ||||
| 2002 | Volkswagen | Beetle | GLS | 1.9 |
| Notes: 4 Pin Connector | ||||
| 2002 | Volkswagen | Beetle | GLS | 1.9 |
| Notes: 4-Pin Special care must be taken during installation to prevent damage and obtain proper electrical contact Prior to installation pull plunger to full extension, use and apply lubricant to plunger. Keep pedal in up position. Push switch in and seat into opening pressing against pedal. Once seated secure switch by turning it to the right approximately 45 degrees. This action turns the plunger shoe into the correct position to make contacts operate. | ||||
| 2002 | Volkswagen | Beetle | GLS | 2.0 |
| Notes: 4 Pin Connector | ||||
| 2002 | Volkswagen | Beetle | GLS | 2.0 |
| Notes: 4-Pin Special care must be taken during installation to prevent damage and obtain proper electrical contact Prior to installation pull plunger to full extension, use and apply lubricant to plunger. Keep pedal in up position. Push switch in and seat into opening pressing against pedal. Once seated secure switch by turning it to the right approximately 45 degrees. This action turns the plunger shoe into the correct position to make contacts operate. | ||||
| 2002 | Volkswagen | Beetle | GLS Sport Turbo | 1.8 |
| Notes: 4 Pin Connector | ||||
| 2002 | Volkswagen | Beetle | GLS Sport Turbo | 1.8 |
| Notes: 4-Pin Special care must be taken during installation to prevent damage and obtain proper electrical contact Prior to installation pull plunger to full extension, use and apply lubricant to plunger. Keep pedal in up position. Push switch in and seat into opening pressing against pedal. Once seated secure switch by turning it to the right approximately 45 degrees. This action turns the plunger shoe into the correct position to make contacts operate. | ||||
| 2002 | Volkswagen | Beetle | GLX | 1.8 |
| Notes: 4 Pin Connector | ||||
| 2002 | Volkswagen | Beetle | GLX | 1.8 |
| Notes: 4-Pin Special care must be taken during installation to prevent damage and obtain proper electrical contact Prior to installation pull plunger to full extension, use and apply lubricant to plunger. Keep pedal in up position. Push switch in and seat into opening pressing against pedal. Once seated secure switch by turning it to the right approximately 45 degrees. This action turns the plunger shoe into the correct position to make contacts operate. | ||||
| 2002 | Volkswagen | Beetle | GLX Sport Turbo | 1.8 |
| Notes: 4 Pin Connector | ||||
| 2002 | Volkswagen | Beetle | GLX Sport Turbo | 1.8 |
| Notes: 4-Pin Special care must be taken during installation to prevent damage and obtain proper electrical contact Prior to installation pull plunger to full extension, use and apply lubricant to plunger. Keep pedal in up position. Push switch in and seat into opening pressing against pedal. Once seated secure switch by turning it to the right approximately 45 degrees. This action turns the plunger shoe into the correct position to make contacts operate. | ||||
| 2002 | Volkswagen | Beetle | Sport | 1.8 |
| Notes: 4 Pin Connector | ||||
| 2002 | Volkswagen | Beetle | Sport | 1.8 |
| Notes: 4-Pin Special care must be taken during installation to prevent damage and obtain proper electrical contact Prior to installation pull plunger to full extension, use and apply lubricant to plunger. Keep pedal in up position. Push switch in and seat into opening pressing against pedal. Once seated secure switch by turning it to the right approximately 45 degrees. This action turns the plunger shoe into the correct position to make contacts operate. | ||||
| 2002 | Volkswagen | Beetle | Sport | 1.9 |
| Notes: 4 Pin Connector | ||||
| 2002 | Volkswagen | Beetle | Sport | 1.9 |
| Notes: 4-Pin Special care must be taken during installation to prevent damage and obtain proper electrical contact Prior to installation pull plunger to full extension, use and apply lubricant to plunger. Keep pedal in up position. Push switch in and seat into opening pressing against pedal. Once seated secure switch by turning it to the right approximately 45 degrees. This action turns the plunger shoe into the correct position to make contacts operate. | ||||
| 2002 | Volkswagen | Beetle | Sport | 2.0 |
| Notes: 4 Pin Connector | ||||
| 2002 | Volkswagen | Beetle | Sport | 2.0 |
| Notes: 4-Pin Special care must be taken during installation to prevent damage and obtain proper electrical contact Prior to installation pull plunger to full extension, use and apply lubricant to plunger. Keep pedal in up position. Push switch in and seat into opening pressing against pedal. Once seated secure switch by turning it to the right approximately 45 degrees. This action turns the plunger shoe into the correct position to make contacts operate. | ||||
| 2002 | Volkswagen | Beetle | Turbo S | 1.8 |
| Notes: 4 Pin Connector | ||||
| 2002 | Volkswagen | Beetle | Turbo S | 1.8 |
| Notes: 4-Pin Special care must be taken during installation to prevent damage and obtain proper electrical contact Prior to installation pull plunger to full extension, use and apply lubricant to plunger. Keep pedal in up position. Push switch in and seat into opening pressing against pedal. Once seated secure switch by turning it to the right approximately 45 degrees. This action turns the plunger shoe into the correct position to make contacts operate. | ||||
| 2002 | Volkswagen | EuroVan | Base | 2.5 |
| Notes: 4 Pin Connector | ||||
| 2002 | Volkswagen | EuroVan | GLS | 2.8 |
| Notes: 4 Pin Connector | ||||
| 2002 | Volkswagen | EuroVan | MV | 2.8 |
| Notes: 4 Pin Connector | ||||
| 2002 | Volkswagen | Golf | Base | 2.0 |
| Notes: 4-Pin Special care must be taken during installation to prevent damage and obtain proper electrical contact Prior to installation pull plunger to full extension, use and apply lubricant to plunger. Keep pedal in up position. Push switch in and seat into opening pressing against pedal. Once seated secure switch by turning it to the right approximately 45 degrees. This action turns the plunger shoe into the correct position to make contacts operate. | ||||
| 2002 | Volkswagen | Golf | Confort | 2.0 |
| Notes: 4-Pin Special care must be taken during installation to prevent damage and obtain proper electrical contact Prior to installation pull plunger to full extension, use and apply lubricant to plunger. Keep pedal in up position. Push switch in and seat into opening pressing against pedal. Once seated secure switch by turning it to the right approximately 45 degrees. This action turns the plunger shoe into the correct position to make contacts operate. | ||||
| 2002 | Volkswagen | Golf | GL | 1.9 |
| Notes: 4 Pin Connector | ||||
| 2002 | Volkswagen | Golf | GL | 1.9 |
| Notes: 4-Pin Special care must be taken during installation to prevent damage and obtain proper electrical contact Prior to installation pull plunger to full extension, use and apply lubricant to plunger. Keep pedal in up position. Push switch in and seat into opening pressing against pedal. Once seated secure switch by turning it to the right approximately 45 degrees. This action turns the plunger shoe into the correct position to make contacts operate. | ||||
| 2002 | Volkswagen | Golf | GL | 2.0 |
| Notes: 4 Pin Connector | ||||
| 2002 | Volkswagen | Golf | GL | 2.0 |
| Notes: 4-Pin Special care must be taken during installation to prevent damage and obtain proper electrical contact Prior to installation pull plunger to full extension, use and apply lubricant to plunger. Keep pedal in up position. Push switch in and seat into opening pressing against pedal. Once seated secure switch by turning it to the right approximately 45 degrees. This action turns the plunger shoe into the correct position to make contacts operate. | ||||
| 2002 | Volkswagen | Golf | GLS | 1.9 |
| Notes: 4 Pin Connector | ||||
| 2002 | Volkswagen | Golf | GLS | 1.9 |
| Notes: 4-Pin Special care must be taken during installation to prevent damage and obtain proper electrical contact Prior to installation pull plunger to full extension, use and apply lubricant to plunger. Keep pedal in up position. Push switch in and seat into opening pressing against pedal. Once seated secure switch by turning it to the right approximately 45 degrees. This action turns the plunger shoe into the correct position to make contacts operate. | ||||
| 2002 | Volkswagen | Golf | GLS | 2.0 |
| Notes: 4 Pin Connector | ||||
| 2002 | Volkswagen | Golf | GLS | 2.0 |
| Notes: 4-Pin Special care must be taken during installation to prevent damage and obtain proper electrical contact Prior to installation pull plunger to full extension, use and apply lubricant to plunger. Keep pedal in up position. Push switch in and seat into opening pressing against pedal. Once seated secure switch by turning it to the right approximately 45 degrees. This action turns the plunger shoe into the correct position to make contacts operate. | ||||
| 2002 | Volkswagen | Golf | GTI | 2.0 |
| Notes: 4-Pin Special care must be taken during installation to prevent damage and obtain proper electrical contact Prior to installation pull plunger to full extension, use and apply lubricant to plunger. Keep pedal in up position. Push switch in and seat into opening pressing against pedal. Once seated secure switch by turning it to the right approximately 45 degrees. This action turns the plunger shoe into the correct position to make contacts operate. | ||||
| 2002 | Volkswagen | Golf | GTI 1.8T | 1.8 |
| Notes: 4 Pin Connector | ||||
| 2002 | Volkswagen | Golf | GTI 1.8T | 1.8 |
| Notes: 4-Pin Special care must be taken during installation to prevent damage and obtain proper electrical contact Prior to installation pull plunger to full extension, use and apply lubricant to plunger. Keep pedal in up position. Push switch in and seat into opening pressing against pedal. Once seated secure switch by turning it to the right approximately 45 degrees. This action turns the plunger shoe into the correct position to make contacts operate. | ||||
| 2002 | Volkswagen | Golf | GTI 337 | 1.8 |
| Notes: 4 Pin Connector | ||||
| 2002 | Volkswagen | Golf | GTI 337 | 1.8 |
| Notes: 4-Pin Special care must be taken during installation to prevent damage and obtain proper electrical contact Prior to installation pull plunger to full extension, use and apply lubricant to plunger. Keep pedal in up position. Push switch in and seat into opening pressing against pedal. Once seated secure switch by turning it to the right approximately 45 degrees. This action turns the plunger shoe into the correct position to make contacts operate. | ||||
| 2002 | Volkswagen | Golf | GTI Turbo | 1.8 |
| Notes: 4-Pin Special care must be taken during installation to prevent damage and obtain proper electrical contact Prior to installation pull plunger to full extension, use and apply lubricant to plunger. Keep pedal in up position. Push switch in and seat into opening pressing against pedal. Once seated secure switch by turning it to the right approximately 45 degrees. This action turns the plunger shoe into the correct position to make contacts operate. | ||||
| 2002 | Volkswagen | Golf | GTI VR6 | 2.8 |
| Notes: 4 Pin Connector | ||||
| 2002 | Volkswagen | Golf | GTI VR6 | 2.8 |
| Notes: 4-Pin Special care must be taken during installation to prevent damage and obtain proper electrical contact Prior to installation pull plunger to full extension, use and apply lubricant to plunger. Keep pedal in up position. Push switch in and seat into opening pressing against pedal. Once seated secure switch by turning it to the right approximately 45 degrees. This action turns the plunger shoe into the correct position to make contacts operate. | ||||
| 2002 | Volkswagen | Golf | Lujo | 2.0 |
| Notes: 4-Pin Special care must be taken during installation to prevent damage and obtain proper electrical contact Prior to installation pull plunger to full extension, use and apply lubricant to plunger. Keep pedal in up position. Push switch in and seat into opening pressing against pedal. Once seated secure switch by turning it to the right approximately 45 degrees. This action turns the plunger shoe into the correct position to make contacts operate. | ||||
| 2002 | Volkswagen | Golf | Verano | 2.0 |
| Notes: 4-Pin Special care must be taken during installation to prevent damage and obtain proper electrical contact Prior to installation pull plunger to full extension, use and apply lubricant to plunger. Keep pedal in up position. Push switch in and seat into opening pressing against pedal. Once seated secure switch by turning it to the right approximately 45 degrees. This action turns the plunger shoe into the correct position to make contacts operate. | ||||
| 2002 | Volkswagen | Jetta | Confortline | 2.0 |
| Notes: 4-Pin Special care must be taken during installation to prevent damage and obtain proper electrical contact Prior to installation pull plunger to full extension, use and apply lubricant to plunger. Keep pedal in up position. Push switch in and seat into opening pressing against pedal. Once seated secure switch by turning it to the right approximately 45 degrees. This action turns the plunger shoe into the correct position to make contacts operate. | ||||
| 2002 | Volkswagen | Jetta | Europa | 2.0 |
| Notes: 4-Pin Special care must be taken during installation to prevent damage and obtain proper electrical contact Prior to installation pull plunger to full extension, use and apply lubricant to plunger. Keep pedal in up position. Push switch in and seat into opening pressing against pedal. Once seated secure switch by turning it to the right approximately 45 degrees. This action turns the plunger shoe into the correct position to make contacts operate. | ||||
| 2002 | Volkswagen | Jetta | GL | 2.0 |
| Notes: 4 Pin Connector | ||||
| 2002 | Volkswagen | Jetta | GL | 2.0 |
| Notes: 4-Pin Special care must be taken during installation to prevent damage and obtain proper electrical contact Prior to installation pull plunger to full extension, use and apply lubricant to plunger. Keep pedal in up position. Push switch in and seat into opening pressing against pedal. Once seated secure switch by turning it to the right approximately 45 degrees. This action turns the plunger shoe into the correct position to make contacts operate. | ||||
| 2002 | Volkswagen | Jetta | GL Confort | 2.0 |
| Notes: 4-Pin Special care must be taken during installation to prevent damage and obtain proper electrical contact Prior to installation pull plunger to full extension, use and apply lubricant to plunger. Keep pedal in up position. Push switch in and seat into opening pressing against pedal. Once seated secure switch by turning it to the right approximately 45 degrees. This action turns the plunger shoe into the correct position to make contacts operate. | ||||
| 2002 | Volkswagen | Jetta | GLI | 2.8 |
| Notes: 4 Pin Connector | ||||
| 2002 | Volkswagen | Jetta | GLI | 2.8 |
| Notes: 4-Pin Special care must be taken during installation to prevent damage and obtain proper electrical contact Prior to installation pull plunger to full extension, use and apply lubricant to plunger. Keep pedal in up position. Push switch in and seat into opening pressing against pedal. Once seated secure switch by turning it to the right approximately 45 degrees. This action turns the plunger shoe into the correct position to make contacts operate. | ||||
| 2002 | Volkswagen | Jetta | GLS | 1.8 |
| Notes: 4 Pin Connector | ||||
| 2002 | Volkswagen | Jetta | GLS | 1.8 |
| Notes: 4-Pin Special care must be taken during installation to prevent damage and obtain proper electrical contact Prior to installation pull plunger to full extension, use and apply lubricant to plunger. Keep pedal in up position. Push switch in and seat into opening pressing against pedal. Once seated secure switch by turning it to the right approximately 45 degrees. This action turns the plunger shoe into the correct position to make contacts operate. | ||||
| 2002 | Volkswagen | Jetta | GLS | 2.0 |
| Notes: 4 Pin Connector | ||||
| 2002 | Volkswagen | Jetta | GLS | 2.0 |
| Notes: 4-Pin Special care must be taken during installation to prevent damage and obtain proper electrical contact Prior to installation pull plunger to full extension, use and apply lubricant to plunger. Keep pedal in up position. Push switch in and seat into opening pressing against pedal. Once seated secure switch by turning it to the right approximately 45 degrees. This action turns the plunger shoe into the correct position to make contacts operate. | ||||
| 2002 | Volkswagen | Jetta | GLS | 2.8 |
| Notes: 4 Pin Connector | ||||
| 2002 | Volkswagen | Jetta | GLS | 2.8 |
| Notes: 4-Pin Special care must be taken during installation to prevent damage and obtain proper electrical contact Prior to installation pull plunger to full extension, use and apply lubricant to plunger. Keep pedal in up position. Push switch in and seat into opening pressing against pedal. Once seated secure switch by turning it to the right approximately 45 degrees. This action turns the plunger shoe into the correct position to make contacts operate. | ||||
| 2002 | Volkswagen | Jetta | GLX | 2.8 |
| Notes: 4 Pin Connector | ||||
| 2002 | Volkswagen | Jetta | GLX | 2.8 |
| Notes: 4-Pin Special care must be taken during installation to prevent damage and obtain proper electrical contact Prior to installation pull plunger to full extension, use and apply lubricant to plunger. Keep pedal in up position. Push switch in and seat into opening pressing against pedal. Once seated secure switch by turning it to the right approximately 45 degrees. This action turns the plunger shoe into the correct position to make contacts operate. | ||||
| 2002 | Volkswagen | Jetta | GLX VR6 | 2.8 |
| Notes: 4-Pin Special care must be taken during installation to prevent damage and obtain proper electrical contact Prior to installation pull plunger to full extension, use and apply lubricant to plunger. Keep pedal in up position. Push switch in and seat into opening pressing against pedal. Once seated secure switch by turning it to the right approximately 45 degrees. This action turns the plunger shoe into the correct position to make contacts operate. | ||||
| 2002 | Volkswagen | Jetta | Highline | 2.8 |
| Notes: 4-Pin Special care must be taken during installation to prevent damage and obtain proper electrical contact Prior to installation pull plunger to full extension, use and apply lubricant to plunger. Keep pedal in up position. Push switch in and seat into opening pressing against pedal. Once seated secure switch by turning it to the right approximately 45 degrees. This action turns the plunger shoe into the correct position to make contacts operate. | ||||
| 2002 | Volkswagen | Jetta | Sportline | 1.8 |
| Notes: 4-Pin Special care must be taken during installation to prevent damage and obtain proper electrical contact Prior to installation pull plunger to full extension, use and apply lubricant to plunger. Keep pedal in up position. Push switch in and seat into opening pressing against pedal. Once seated secure switch by turning it to the right approximately 45 degrees. This action turns the plunger shoe into the correct position to make contacts operate. | ||||
| 2002 | Volkswagen | Jetta | TDI | 1.9 |
| Notes: 4 Pin Connector | ||||
| 2002 | Volkswagen | Jetta | TDI | 1.9 |
| Notes: 4-Pin Special care must be taken during installation to prevent damage and obtain proper electrical contact Prior to installation pull plunger to full extension, use and apply lubricant to plunger. Keep pedal in up position. Push switch in and seat into opening pressing against pedal. Once seated secure switch by turning it to the right approximately 45 degrees. This action turns the plunger shoe into the correct position to make contacts operate. | ||||
| 2002 | Volkswagen | Jetta | Trendline | 2.0 |
| Notes: 4-Pin Special care must be taken during installation to prevent damage and obtain proper electrical contact Prior to installation pull plunger to full extension, use and apply lubricant to plunger. Keep pedal in up position. Push switch in and seat into opening pressing against pedal. Once seated secure switch by turning it to the right approximately 45 degrees. This action turns the plunger shoe into the correct position to make contacts operate. | ||||
| 2002 | Volkswagen | Jetta | Variant Comfortline | 2.0 |
| Notes: 4-Pin Special care must be taken during installation to prevent damage and obtain proper electrical contact Prior to installation pull plunger to full extension, use and apply lubricant to plunger. Keep pedal in up position. Push switch in and seat into opening pressing against pedal. Once seated secure switch by turning it to the right approximately 45 degrees. This action turns the plunger shoe into the correct position to make contacts operate. | ||||
| 2002 | Volkswagen | Jetta | Variant Trendline | 2.0 |
| Notes: 4-Pin Special care must be taken during installation to prevent damage and obtain proper electrical contact Prior to installation pull plunger to full extension, use and apply lubricant to plunger. Keep pedal in up position. Push switch in and seat into opening pressing against pedal. Once seated secure switch by turning it to the right approximately 45 degrees. This action turns the plunger shoe into the correct position to make contacts operate. | ||||
| 2003 | Audi | TT | Base | 1.8 |
| Notes: 4 Pin Connector | ||||
| 2003 | Audi | TT | Base | 1.8 |
| Notes: 4-Pin Special care must be taken during installation to prevent damage and obtain proper electrical contact Prior to installation pull plunger to full extension, use and apply lubricant to plunger. Keep pedal in up position. Push switch in and seat into opening pressing against pedal. Once seated secure switch by turning it to the right approximately 45 degrees. This action turns the plunger shoe into the correct position to make contacts operate. | ||||
| 2003 | Audi | TT Quattro | Base | 1.8 |
| Notes: 4 Pin Connector | ||||
| 2003 | Audi | TT Quattro | Base | 1.8 |
| Notes: 4-Pin Special care must be taken during installation to prevent damage and obtain proper electrical contact Prior to installation pull plunger to full extension, use and apply lubricant to plunger. Keep pedal in up position. Push switch in and seat into opening pressing against pedal. Once seated secure switch by turning it to the right approximately 45 degrees. This action turns the plunger shoe into the correct position to make contacts operate. | ||||
| 2003 | Audi | TT Quattro | S Line | 1.8 |
| Notes: 4 Pin Connector | ||||
| 2003 | Audi | TT Quattro | S Line | 1.8 |
| Notes: 4-Pin Special care must be taken during installation to prevent damage and obtain proper electrical contact Prior to installation pull plunger to full extension, use and apply lubricant to plunger. Keep pedal in up position. Push switch in and seat into opening pressing against pedal. Once seated secure switch by turning it to the right approximately 45 degrees. This action turns the plunger shoe into the correct position to make contacts operate. | ||||
| 2003 | Volkswagen | Beetle | Cabrio | 2.0 |
| Notes: 4 Pin Connector | ||||
| 2003 | Volkswagen | Beetle | Cabrio | 2.0 |
| Notes: 4-Pin Special care must be taken during installation to prevent damage and obtain proper electrical contact Prior to installation pull plunger to full extension, use and apply lubricant to plunger. Keep pedal in up position. Push switch in and seat into opening pressing against pedal. Once seated secure switch by turning it to the right approximately 45 degrees. This action turns the plunger shoe into the correct position to make contacts operate. | ||||
| 2003 | Volkswagen | Beetle | GL | 1.8 |
| Notes: 4 Pin Connector | ||||
| 2003 | Volkswagen | Beetle | GL | 1.8 |
| Notes: 4-Pin Special care must be taken during installation to prevent damage and obtain proper electrical contact Prior to installation pull plunger to full extension, use and apply lubricant to plunger. Keep pedal in up position. Push switch in and seat into opening pressing against pedal. Once seated secure switch by turning it to the right approximately 45 degrees. This action turns the plunger shoe into the correct position to make contacts operate. | ||||
| 2003 | Volkswagen | Beetle | GL | 1.9 |
| Notes: 4 Pin Connector | ||||
| 2003 | Volkswagen | Beetle | GL | 1.9 |
| Notes: 4-Pin Special care must be taken during installation to prevent damage and obtain proper electrical contact Prior to installation pull plunger to full extension, use and apply lubricant to plunger. Keep pedal in up position. Push switch in and seat into opening pressing against pedal. Once seated secure switch by turning it to the right approximately 45 degrees. This action turns the plunger shoe into the correct position to make contacts operate. | ||||
| 2003 | Volkswagen | Beetle | GL | 2.0 |
| Notes: 4 Pin Connector | ||||
| 2003 | Volkswagen | Beetle | GL | 2.0 |
| Notes: 4-Pin Special care must be taken during installation to prevent damage and obtain proper electrical contact Prior to installation pull plunger to full extension, use and apply lubricant to plunger. Keep pedal in up position. Push switch in and seat into opening pressing against pedal. Once seated secure switch by turning it to the right approximately 45 degrees. This action turns the plunger shoe into the correct position to make contacts operate. | ||||
| 2003 | Volkswagen | Beetle | GLS | 1.8 |
| Notes: 4 Pin Connector | ||||
| 2003 | Volkswagen | Beetle | GLS | 1.8 |
| Notes: 4-Pin Special care must be taken during installation to prevent damage and obtain proper electrical contact Prior to installation pull plunger to full extension, use and apply lubricant to plunger. Keep pedal in up position. Push switch in and seat into opening pressing against pedal. Once seated secure switch by turning it to the right approximately 45 degrees. This action turns the plunger shoe into the correct position to make contacts operate. | ||||
| 2003 | Volkswagen | Beetle | GLS | 1.9 |
| Notes: 4 Pin Connector | ||||
| 2003 | Volkswagen | Beetle | GLS | 1.9 |
| Notes: 4-Pin Special care must be taken during installation to prevent damage and obtain proper electrical contact Prior to installation pull plunger to full extension, use and apply lubricant to plunger. Keep pedal in up position. Push switch in and seat into opening pressing against pedal. Once seated secure switch by turning it to the right approximately 45 degrees. This action turns the plunger shoe into the correct position to make contacts operate. | ||||
| 2003 | Volkswagen | Beetle | GLS | 2.0 |
| Notes: 4 Pin Connector | ||||
| 2003 | Volkswagen | Beetle | GLS | 2.0 |
| Notes: 4-Pin Special care must be taken during installation to prevent damage and obtain proper electrical contact Prior to installation pull plunger to full extension, use and apply lubricant to plunger. Keep pedal in up position. Push switch in and seat into opening pressing against pedal. Once seated secure switch by turning it to the right approximately 45 degrees. This action turns the plunger shoe into the correct position to make contacts operate. | ||||
| 2003 | Volkswagen | Beetle | GLS Edicion especial | 2.0 |
| Notes: 4 Pin Connector | ||||
| 2003 | Volkswagen | Beetle | GLS Edicion especial | 2.0 |
| Notes: 4-Pin Special care must be taken during installation to prevent damage and obtain proper electrical contact Prior to installation pull plunger to full extension, use and apply lubricant to plunger. Keep pedal in up position. Push switch in and seat into opening pressing against pedal. Once seated secure switch by turning it to the right approximately 45 degrees. This action turns the plunger shoe into the correct position to make contacts operate. | ||||
| 2003 | Volkswagen | Beetle | GLS Sport | 2.0 |
| Notes: 4 Pin Connector | ||||
| 2003 | Volkswagen | Beetle | GLS Sport | 2.0 |
| Notes: 4-Pin Special care must be taken during installation to prevent damage and obtain proper electrical contact Prior to installation pull plunger to full extension, use and apply lubricant to plunger. Keep pedal in up position. Push switch in and seat into opening pressing against pedal. Once seated secure switch by turning it to the right approximately 45 degrees. This action turns the plunger shoe into the correct position to make contacts operate. | ||||
| 2003 | Volkswagen | Beetle | GLS Sport Turbo | 1.8 |
| Notes: 4 Pin Connector | ||||
| 2003 | Volkswagen | Beetle | GLS Sport Turbo | 1.8 |
| Notes: 4-Pin Special care must be taken during installation to prevent damage and obtain proper electrical contact Prior to installation pull plunger to full extension, use and apply lubricant to plunger. Keep pedal in up position. Push switch in and seat into opening pressing against pedal. Once seated secure switch by turning it to the right approximately 45 degrees. This action turns the plunger shoe into the correct position to make contacts operate. | ||||
| 2003 | Volkswagen | Beetle | GLX | 1.8 |
| Notes: 4 Pin Connector | ||||
| 2003 | Volkswagen | Beetle | GLX | 1.8 |
| Notes: 4-Pin Special care must be taken during installation to prevent damage and obtain proper electrical contact Prior to installation pull plunger to full extension, use and apply lubricant to plunger. Keep pedal in up position. Push switch in and seat into opening pressing against pedal. Once seated secure switch by turning it to the right approximately 45 degrees. This action turns the plunger shoe into the correct position to make contacts operate. | ||||
| 2003 | Volkswagen | Beetle | GLX Sport Turbo | 1.8 |
| Notes: 4 Pin Connector | ||||
| 2003 | Volkswagen | Beetle | GLX Sport Turbo | 1.8 |
| Notes: 4-Pin Special care must be taken during installation to prevent damage and obtain proper electrical contact Prior to installation pull plunger to full extension, use and apply lubricant to plunger. Keep pedal in up position. Push switch in and seat into opening pressing against pedal. Once seated secure switch by turning it to the right approximately 45 degrees. This action turns the plunger shoe into the correct position to make contacts operate. | ||||
| 2003 | Volkswagen | Beetle | Turbo S | 1.8 |
| Notes: 4 Pin Connector | ||||
| 2003 | Volkswagen | Beetle | Turbo S | 1.8 |
| Notes: 4-Pin Special care must be taken during installation to prevent damage and obtain proper electrical contact Prior to installation pull plunger to full extension, use and apply lubricant to plunger. Keep pedal in up position. Push switch in and seat into opening pressing against pedal. Once seated secure switch by turning it to the right approximately 45 degrees. This action turns the plunger shoe into the correct position to make contacts operate. | ||||
| 2003 | Volkswagen | EuroVan | Base | 2.5 |
| Notes: 4 Pin Connector | ||||
| 2003 | Volkswagen | EuroVan | GLS | 2.8 |
| Notes: 4 Pin Connector | ||||
| 2003 | Volkswagen | EuroVan | MV | 2.8 |
| Notes: 4 Pin Connector | ||||
| 2003 | Volkswagen | Golf | Comfortline | 2.0 |
| Notes: 4 Pin Connector | ||||
| 2003 | Volkswagen | Golf | Comfortline | 2.0 |
| Notes: 4-Pin Special care must be taken during installation to prevent damage and obtain proper electrical contact Prior to installation pull plunger to full extension, use and apply lubricant to plunger. Keep pedal in up position. Push switch in and seat into opening pressing against pedal. Once seated secure switch by turning it to the right approximately 45 degrees. This action turns the plunger shoe into the correct position to make contacts operate. | ||||
| 2003 | Volkswagen | Golf | Europa | 2.0 |
| Notes: 4 Pin Connector | ||||
| 2003 | Volkswagen | Golf | Europa | 2.0 |
| Notes: 4-Pin Special care must be taken during installation to prevent damage and obtain proper electrical contact Prior to installation pull plunger to full extension, use and apply lubricant to plunger. Keep pedal in up position. Push switch in and seat into opening pressing against pedal. Once seated secure switch by turning it to the right approximately 45 degrees. This action turns the plunger shoe into the correct position to make contacts operate. | ||||
| 2003 | Volkswagen | Golf | GL | 1.9 |
| Notes: 4 Pin Connector | ||||
| 2003 | Volkswagen | Golf | GL | 1.9 |
| Notes: 4-Pin Special care must be taken during installation to prevent damage and obtain proper electrical contact Prior to installation pull plunger to full extension, use and apply lubricant to plunger. Keep pedal in up position. Push switch in and seat into opening pressing against pedal. Once seated secure switch by turning it to the right approximately 45 degrees. This action turns the plunger shoe into the correct position to make contacts operate. | ||||
| 2003 | Volkswagen | Golf | GL | 2.0 |
| Notes: 4 Pin Connector | ||||
| 2003 | Volkswagen | Golf | GL | 2.0 |
| Notes: 4-Pin Special care must be taken during installation to prevent damage and obtain proper electrical contact Prior to installation pull plunger to full extension, use and apply lubricant to plunger. Keep pedal in up position. Push switch in and seat into opening pressing against pedal. Once seated secure switch by turning it to the right approximately 45 degrees. This action turns the plunger shoe into the correct position to make contacts operate. | ||||
| 2003 | Volkswagen | Golf | GLS | 1.9 |
| Notes: 4 Pin Connector | ||||
| 2003 | Volkswagen | Golf | GLS | 1.9 |
| Notes: 4-Pin Special care must be taken during installation to prevent damage and obtain proper electrical contact Prior to installation pull plunger to full extension, use and apply lubricant to plunger. Keep pedal in up position. Push switch in and seat into opening pressing against pedal. Once seated secure switch by turning it to the right approximately 45 degrees. This action turns the plunger shoe into the correct position to make contacts operate. | ||||
| 2003 | Volkswagen | Golf | GLS | 2.0 |
| Notes: 4 Pin Connector | ||||
| 2003 | Volkswagen | Golf | GLS | 2.0 |
| Notes: 4-Pin Special care must be taken during installation to prevent damage and obtain proper electrical contact Prior to installation pull plunger to full extension, use and apply lubricant to plunger. Keep pedal in up position. Push switch in and seat into opening pressing against pedal. Once seated secure switch by turning it to the right approximately 45 degrees. This action turns the plunger shoe into the correct position to make contacts operate. | ||||
| 2003 | Volkswagen | Golf | GTI | 2.0 |
| Notes: 4 Pin Connector | ||||
| 2003 | Volkswagen | Golf | GTI | 2.0 |
| Notes: 4-Pin Special care must be taken during installation to prevent damage and obtain proper electrical contact Prior to installation pull plunger to full extension, use and apply lubricant to plunger. Keep pedal in up position. Push switch in and seat into opening pressing against pedal. Once seated secure switch by turning it to the right approximately 45 degrees. This action turns the plunger shoe into the correct position to make contacts operate. | ||||
| 2003 | Volkswagen | Golf | GTI 1.8T | 1.8 |
| Notes: 4 Pin Connector | ||||
| 2003 | Volkswagen | Golf | GTI 1.8T | 1.8 |
| Notes: 4-Pin Special care must be taken during installation to prevent damage and obtain proper electrical contact Prior to installation pull plunger to full extension, use and apply lubricant to plunger. Keep pedal in up position. Push switch in and seat into opening pressing against pedal. Once seated secure switch by turning it to the right approximately 45 degrees. This action turns the plunger shoe into the correct position to make contacts operate. | ||||
| 2003 | Volkswagen | Golf | GTI 20th Anniversary | 1.8 |
| Notes: 4 Pin Connector | ||||
| 2003 | Volkswagen | Golf | GTI 20th Anniversary | 1.8 |
| Notes: 4-Pin Special care must be taken during installation to prevent damage and obtain proper electrical contact Prior to installation pull plunger to full extension, use and apply lubricant to plunger. Keep pedal in up position. Push switch in and seat into opening pressing against pedal. Once seated secure switch by turning it to the right approximately 45 degrees. This action turns the plunger shoe into the correct position to make contacts operate. | ||||
| 2003 | Volkswagen | Golf | GTI Turbo | 1.8 |
| Notes: 4 Pin Connector | ||||
| 2003 | Volkswagen | Golf | GTI Turbo | 1.8 |
| Notes: 4-Pin Special care must be taken during installation to prevent damage and obtain proper electrical contact Prior to installation pull plunger to full extension, use and apply lubricant to plunger. Keep pedal in up position. Push switch in and seat into opening pressing against pedal. Once seated secure switch by turning it to the right approximately 45 degrees. This action turns the plunger shoe into the correct position to make contacts operate. | ||||
| 2003 | Volkswagen | Golf | GTI VR6 | 2.8 |
| Notes: 4 Pin Connector | ||||
| 2003 | Volkswagen | Golf | GTI VR6 | 2.8 |
| Notes: 4-Pin Special care must be taken during installation to prevent damage and obtain proper electrical contact Prior to installation pull plunger to full extension, use and apply lubricant to plunger. Keep pedal in up position. Push switch in and seat into opening pressing against pedal. Once seated secure switch by turning it to the right approximately 45 degrees. This action turns the plunger shoe into the correct position to make contacts operate. | ||||
| 2003 | Volkswagen | Golf | Trendline | 2.0 |
| Notes: 4 Pin Connector | ||||
| 2003 | Volkswagen | Golf | Trendline | 2.0 |
| Notes: 4-Pin Special care must be taken during installation to prevent damage and obtain proper electrical contact Prior to installation pull plunger to full extension, use and apply lubricant to plunger. Keep pedal in up position. Push switch in and seat into opening pressing against pedal. Once seated secure switch by turning it to the right approximately 45 degrees. This action turns the plunger shoe into the correct position to make contacts operate. | ||||
| 2003 | Volkswagen | Jetta | Confortline | 2.0 |
| Notes: 4-Pin Special care must be taken during installation to prevent damage and obtain proper electrical contact Prior to installation pull plunger to full extension, use and apply lubricant to plunger. Keep pedal in up position. Push switch in and seat into opening pressing against pedal. Once seated secure switch by turning it to the right approximately 45 degrees. This action turns the plunger shoe into the correct position to make contacts operate. | ||||
| 2003 | Volkswagen | Jetta | Edicion Limitada | 2.0 |
| Notes: 4-Pin Special care must be taken during installation to prevent damage and obtain proper electrical contact Prior to installation pull plunger to full extension, use and apply lubricant to plunger. Keep pedal in up position. Push switch in and seat into opening pressing against pedal. Once seated secure switch by turning it to the right approximately 45 degrees. This action turns the plunger shoe into the correct position to make contacts operate. | ||||
| 2003 | Volkswagen | Jetta | Europa | 2.0 |
| Notes: 4-Pin Special care must be taken during installation to prevent damage and obtain proper electrical contact Prior to installation pull plunger to full extension, use and apply lubricant to plunger. Keep pedal in up position. Push switch in and seat into opening pressing against pedal. Once seated secure switch by turning it to the right approximately 45 degrees. This action turns the plunger shoe into the correct position to make contacts operate. | ||||
| 2003 | Volkswagen | Jetta | Europa Wolfsburg | 2.0 |
| Notes: 4-Pin Special care must be taken during installation to prevent damage and obtain proper electrical contact Prior to installation pull plunger to full extension, use and apply lubricant to plunger. Keep pedal in up position. Push switch in and seat into opening pressing against pedal. Once seated secure switch by turning it to the right approximately 45 degrees. This action turns the plunger shoe into the correct position to make contacts operate. | ||||
| 2003 | Volkswagen | Jetta | GL | 1.8 |
| Notes: 4 Pin Connector | ||||
| 2003 | Volkswagen | Jetta | GL | 1.8 |
| Notes: 4-Pin Special care must be taken during installation to prevent damage and obtain proper electrical contact Prior to installation pull plunger to full extension, use and apply lubricant to plunger. Keep pedal in up position. Push switch in and seat into opening pressing against pedal. Once seated secure switch by turning it to the right approximately 45 degrees. This action turns the plunger shoe into the correct position to make contacts operate. | ||||
| 2003 | Volkswagen | Jetta | GL | 2.0 |
| Notes: 4 Pin Connector | ||||
| 2003 | Volkswagen | Jetta | GL | 2.0 |
| Notes: 4-Pin Special care must be taken during installation to prevent damage and obtain proper electrical contact Prior to installation pull plunger to full extension, use and apply lubricant to plunger. Keep pedal in up position. Push switch in and seat into opening pressing against pedal. Once seated secure switch by turning it to the right approximately 45 degrees. This action turns the plunger shoe into the correct position to make contacts operate. | ||||
| 2003 | Volkswagen | Jetta | GLI | 2.8 |
| Notes: 4 Pin Connector | ||||
| 2003 | Volkswagen | Jetta | GLI | 2.8 |
| Notes: 4-Pin Special care must be taken during installation to prevent damage and obtain proper electrical contact Prior to installation pull plunger to full extension, use and apply lubricant to plunger. Keep pedal in up position. Push switch in and seat into opening pressing against pedal. Once seated secure switch by turning it to the right approximately 45 degrees. This action turns the plunger shoe into the correct position to make contacts operate. | ||||
| 2003 | Volkswagen | Jetta | GLS | 1.8 |
| Notes: 4 Pin Connector | ||||
| 2003 | Volkswagen | Jetta | GLS | 1.8 |
| Notes: 4-Pin Special care must be taken during installation to prevent damage and obtain proper electrical contact Prior to installation pull plunger to full extension, use and apply lubricant to plunger. Keep pedal in up position. Push switch in and seat into opening pressing against pedal. Once seated secure switch by turning it to the right approximately 45 degrees. This action turns the plunger shoe into the correct position to make contacts operate. | ||||
| 2003 | Volkswagen | Jetta | GLS | 2.0 |
| Notes: 4 Pin Connector | ||||
| 2003 | Volkswagen | Jetta | GLS | 2.0 |
| Notes: 4-Pin Special care must be taken during installation to prevent damage and obtain proper electrical contact Prior to installation pull plunger to full extension, use and apply lubricant to plunger. Keep pedal in up position. Push switch in and seat into opening pressing against pedal. Once seated secure switch by turning it to the right approximately 45 degrees. This action turns the plunger shoe into the correct position to make contacts operate. | ||||
| 2003 | Volkswagen | Jetta | GLX | 2.8 |
| Notes: 4 Pin Connector | ||||
| 2003 | Volkswagen | Jetta | GLX | 2.8 |
| Notes: 4-Pin Special care must be taken during installation to prevent damage and obtain proper electrical contact Prior to installation pull plunger to full extension, use and apply lubricant to plunger. Keep pedal in up position. Push switch in and seat into opening pressing against pedal. Once seated secure switch by turning it to the right approximately 45 degrees. This action turns the plunger shoe into the correct position to make contacts operate. | ||||
| 2003 | Volkswagen | Jetta | Highline | 2.0 |
| Notes: 4-Pin Special care must be taken during installation to prevent damage and obtain proper electrical contact Prior to installation pull plunger to full extension, use and apply lubricant to plunger. Keep pedal in up position. Push switch in and seat into opening pressing against pedal. Once seated secure switch by turning it to the right approximately 45 degrees. This action turns the plunger shoe into the correct position to make contacts operate. | ||||
| 2003 | Volkswagen | Jetta | Jazz | 2.0 |
| Notes: 4-Pin Special care must be taken during installation to prevent damage and obtain proper electrical contact Prior to installation pull plunger to full extension, use and apply lubricant to plunger. Keep pedal in up position. Push switch in and seat into opening pressing against pedal. Once seated secure switch by turning it to the right approximately 45 degrees. This action turns the plunger shoe into the correct position to make contacts operate. | ||||
| 2003 | Volkswagen | Jetta | Sportline | 1.8 |
| Notes: 4-Pin Special care must be taken during installation to prevent damage and obtain proper electrical contact Prior to installation pull plunger to full extension, use and apply lubricant to plunger. Keep pedal in up position. Push switch in and seat into opening pressing against pedal. Once seated secure switch by turning it to the right approximately 45 degrees. This action turns the plunger shoe into the correct position to make contacts operate. | ||||
| 2003 | Volkswagen | Jetta | TDI | 1.9 |
| Notes: 4 Pin Connector | ||||
| 2003 | Volkswagen | Jetta | TDI | 1.9 |
| Notes: 4-Pin Special care must be taken during installation to prevent damage and obtain proper electrical contact Prior to installation pull plunger to full extension, use and apply lubricant to plunger. Keep pedal in up position. Push switch in and seat into opening pressing against pedal. Once seated secure switch by turning it to the right approximately 45 degrees. This action turns the plunger shoe into the correct position to make contacts operate. | ||||
| 2003 | Volkswagen | Jetta | Trendline | 2.0 |
| Notes: 4-Pin Special care must be taken during installation to prevent damage and obtain proper electrical contact Prior to installation pull plunger to full extension, use and apply lubricant to plunger. Keep pedal in up position. Push switch in and seat into opening pressing against pedal. Once seated secure switch by turning it to the right approximately 45 degrees. This action turns the plunger shoe into the correct position to make contacts operate. | ||||
| 2003 | Volkswagen | Jetta | Trendline Wolfsburg | 2.0 |
| Notes: 4-Pin Special care must be taken during installation to prevent damage and obtain proper electrical contact Prior to installation pull plunger to full extension, use and apply lubricant to plunger. Keep pedal in up position. Push switch in and seat into opening pressing against pedal. Once seated secure switch by turning it to the right approximately 45 degrees. This action turns the plunger shoe into the correct position to make contacts operate. | ||||
| 2003 | Volkswagen | Jetta | Variant Comfortline | 2.0 |
| Notes: 4-Pin Special care must be taken during installation to prevent damage and obtain proper electrical contact Prior to installation pull plunger to full extension, use and apply lubricant to plunger. Keep pedal in up position. Push switch in and seat into opening pressing against pedal. Once seated secure switch by turning it to the right approximately 45 degrees. This action turns the plunger shoe into the correct position to make contacts operate. | ||||
| 2003 | Volkswagen | Jetta | Variant Trendline | 2.0 |
| Notes: 4-Pin Special care must be taken during installation to prevent damage and obtain proper electrical contact Prior to installation pull plunger to full extension, use and apply lubricant to plunger. Keep pedal in up position. Push switch in and seat into opening pressing against pedal. Once seated secure switch by turning it to the right approximately 45 degrees. This action turns the plunger shoe into the correct position to make contacts operate. | ||||
| 2003 | Volkswagen | Jetta | Wolfsburg Edition | 1.8 |
| Notes: 4 Pin Connector | ||||
| 2003 | Volkswagen | Jetta | Wolfsburg Edition | 1.8 |
| Notes: 4-Pin Special care must be taken during installation to prevent damage and obtain proper electrical contact Prior to installation pull plunger to full extension, use and apply lubricant to plunger. Keep pedal in up position. Push switch in and seat into opening pressing against pedal. Once seated secure switch by turning it to the right approximately 45 degrees. This action turns the plunger shoe into the correct position to make contacts operate. | ||||
| 2004 | Audi | TT | Base | 1.8 |
| Notes: 4 Pin Connector | ||||
| 2004 | Audi | TT | Base | 1.8 |
| Notes: 4-Pin Special care must be taken during installation to prevent damage and obtain proper electrical contact Prior to installation pull plunger to full extension, use and apply lubricant to plunger. Keep pedal in up position. Push switch in and seat into opening pressing against pedal. Once seated secure switch by turning it to the right approximately 45 degrees. This action turns the plunger shoe into the correct position to make contacts operate. | ||||
| 2004 | Audi | TT Quattro | Base | 1.8 |
| Notes: 4 Pin Connector | ||||
| 2004 | Audi | TT Quattro | Base | 1.8 |
| Notes: 4-Pin Special care must be taken during installation to prevent damage and obtain proper electrical contact Prior to installation pull plunger to full extension, use and apply lubricant to plunger. Keep pedal in up position. Push switch in and seat into opening pressing against pedal. Once seated secure switch by turning it to the right approximately 45 degrees. This action turns the plunger shoe into the correct position to make contacts operate. | ||||
| 2004 | Audi | TT Quattro | Base | 3.2 |
| Notes: 4 Pin Connector | ||||
| 2004 | Audi | TT Quattro | Base | 3.2 |
| Notes: 4-Pin Special care must be taken during installation to prevent damage and obtain proper electrical contact Prior to installation pull plunger to full extension, use and apply lubricant to plunger. Keep pedal in up position. Push switch in and seat into opening pressing against pedal. Once seated secure switch by turning it to the right approximately 45 degrees. This action turns the plunger shoe into the correct position to make contacts operate. | ||||
| 2004 | Audi | TT Quattro | S Line | 1.8 |
| Notes: 4 Pin Connector | ||||
| 2004 | Audi | TT Quattro | S Line | 1.8 |
| Notes: 4-Pin Special care must be taken during installation to prevent damage and obtain proper electrical contact Prior to installation pull plunger to full extension, use and apply lubricant to plunger. Keep pedal in up position. Push switch in and seat into opening pressing against pedal. Once seated secure switch by turning it to the right approximately 45 degrees. This action turns the plunger shoe into the correct position to make contacts operate. | ||||
| 2004 | Volkswagen | Beetle | Cabrio | 2.0 |
| Notes: 4 Pin Connector | ||||
| 2004 | Volkswagen | Beetle | Cabrio | 2.0 |
| Notes: 4-Pin Special care must be taken during installation to prevent damage and obtain proper electrical contact Prior to installation pull plunger to full extension, use and apply lubricant to plunger. Keep pedal in up position. Push switch in and seat into opening pressing against pedal. Once seated secure switch by turning it to the right approximately 45 degrees. This action turns the plunger shoe into the correct position to make contacts operate. | ||||
| 2004 | Volkswagen | Beetle | GL | 1.9 |
| Notes: 4 Pin Connector | ||||
| 2004 | Volkswagen | Beetle | GL | 1.9 |
| Notes: 4-Pin Special care must be taken during installation to prevent damage and obtain proper electrical contact Prior to installation pull plunger to full extension, use and apply lubricant to plunger. Keep pedal in up position. Push switch in and seat into opening pressing against pedal. Once seated secure switch by turning it to the right approximately 45 degrees. This action turns the plunger shoe into the correct position to make contacts operate. | ||||
| 2004 | Volkswagen | Beetle | GL | 2.0 |
| Notes: 4 Pin Connector | ||||
| 2004 | Volkswagen | Beetle | GL | 2.0 |
| Notes: 4-Pin Special care must be taken during installation to prevent damage and obtain proper electrical contact Prior to installation pull plunger to full extension, use and apply lubricant to plunger. Keep pedal in up position. Push switch in and seat into opening pressing against pedal. Once seated secure switch by turning it to the right approximately 45 degrees. This action turns the plunger shoe into the correct position to make contacts operate. | ||||
| 2004 | Volkswagen | Beetle | GLS | 1.8 |
| Notes: 4 Pin Connector | ||||
| 2004 | Volkswagen | Beetle | GLS | 1.8 |
| Notes: 4-Pin Special care must be taken during installation to prevent damage and obtain proper electrical contact Prior to installation pull plunger to full extension, use and apply lubricant to plunger. Keep pedal in up position. Push switch in and seat into opening pressing against pedal. Once seated secure switch by turning it to the right approximately 45 degrees. This action turns the plunger shoe into the correct position to make contacts operate. | ||||
| 2004 | Volkswagen | Beetle | GLS | 1.9 |
| Notes: 4 Pin Connector | ||||
| 2004 | Volkswagen | Beetle | GLS | 1.9 |
| Notes: 4-Pin Special care must be taken during installation to prevent damage and obtain proper electrical contact Prior to installation pull plunger to full extension, use and apply lubricant to plunger. Keep pedal in up position. Push switch in and seat into opening pressing against pedal. Once seated secure switch by turning it to the right approximately 45 degrees. This action turns the plunger shoe into the correct position to make contacts operate. | ||||
| 2004 | Volkswagen | Beetle | GLS | 2.0 |
| Notes: 4 Pin Connector | ||||
| 2004 | Volkswagen | Beetle | GLS | 2.0 |
| Notes: 4-Pin Special care must be taken during installation to prevent damage and obtain proper electrical contact Prior to installation pull plunger to full extension, use and apply lubricant to plunger. Keep pedal in up position. Push switch in and seat into opening pressing against pedal. Once seated secure switch by turning it to the right approximately 45 degrees. This action turns the plunger shoe into the correct position to make contacts operate. | ||||
| 2004 | Volkswagen | Beetle | GLS Sport Turbo | 1.8 |
| Notes: 4 Pin Connector | ||||
| 2004 | Volkswagen | Beetle | GLS Sport Turbo | 1.8 |
| Notes: 4-Pin Special care must be taken during installation to prevent damage and obtain proper electrical contact Prior to installation pull plunger to full extension, use and apply lubricant to plunger. Keep pedal in up position. Push switch in and seat into opening pressing against pedal. Once seated secure switch by turning it to the right approximately 45 degrees. This action turns the plunger shoe into the correct position to make contacts operate. | ||||
| 2004 | Volkswagen | Beetle | GLX | 1.8 |
| Notes: 4 Pin Connector | ||||
| 2004 | Volkswagen | Beetle | GLX | 1.8 |
| Notes: 4-Pin Special care must be taken during installation to prevent damage and obtain proper electrical contact Prior to installation pull plunger to full extension, use and apply lubricant to plunger. Keep pedal in up position. Push switch in and seat into opening pressing against pedal. Once seated secure switch by turning it to the right approximately 45 degrees. This action turns the plunger shoe into the correct position to make contacts operate. | ||||
| 2004 | Volkswagen | Beetle | GLX Sport Turbo | 1.8 |
| Notes: 4 Pin Connector | ||||
| 2004 | Volkswagen | Beetle | GLX Sport Turbo | 1.8 |
| Notes: 4-Pin Special care must be taken during installation to prevent damage and obtain proper electrical contact Prior to installation pull plunger to full extension, use and apply lubricant to plunger. Keep pedal in up position. Push switch in and seat into opening pressing against pedal. Once seated secure switch by turning it to the right approximately 45 degrees. This action turns the plunger shoe into the correct position to make contacts operate. | ||||
| 2004 | Volkswagen | Beetle | Turbo S | 1.8 |
| Notes: 4 Pin Connector | ||||
| 2004 | Volkswagen | Beetle | Turbo S | 1.8 |
| Notes: 4-Pin Special care must be taken during installation to prevent damage and obtain proper electrical contact Prior to installation pull plunger to full extension, use and apply lubricant to plunger. Keep pedal in up position. Push switch in and seat into opening pressing against pedal. Once seated secure switch by turning it to the right approximately 45 degrees. This action turns the plunger shoe into the correct position to make contacts operate. | ||||
| 2004 | Volkswagen | Golf | Comfortline | 2.0 |
| Notes: 4-Pin Special care must be taken during installation to prevent damage and obtain proper electrical contact Prior to installation pull plunger to full extension, use and apply lubricant to plunger. Keep pedal in up position. Push switch in and seat into opening pressing against pedal. Once seated secure switch by turning it to the right approximately 45 degrees. This action turns the plunger shoe into the correct position to make contacts operate. | ||||
| 2004 | Volkswagen | Golf | Europa | 2.0 |
| Notes: 4-Pin Special care must be taken during installation to prevent damage and obtain proper electrical contact Prior to installation pull plunger to full extension, use and apply lubricant to plunger. Keep pedal in up position. Push switch in and seat into opening pressing against pedal. Once seated secure switch by turning it to the right approximately 45 degrees. This action turns the plunger shoe into the correct position to make contacts operate. | ||||
| 2004 | Volkswagen | Golf | GL | 2.0 |
| Notes: 4 Pin Connector | ||||
| 2004 | Volkswagen | Golf | GL | 2.0 |
| Notes: 4-Pin Special care must be taken during installation to prevent damage and obtain proper electrical contact Prior to installation pull plunger to full extension, use and apply lubricant to plunger. Keep pedal in up position. Push switch in and seat into opening pressing against pedal. Once seated secure switch by turning it to the right approximately 45 degrees. This action turns the plunger shoe into the correct position to make contacts operate. | ||||
| 2004 | Volkswagen | Golf | GL TDI | 1.9 |
| Notes: 4 Pin Connector | ||||
| 2004 | Volkswagen | Golf | GL TDI | 1.9 |
| Notes: 4-Pin Special care must be taken during installation to prevent damage and obtain proper electrical contact Prior to installation pull plunger to full extension, use and apply lubricant to plunger. Keep pedal in up position. Push switch in and seat into opening pressing against pedal. Once seated secure switch by turning it to the right approximately 45 degrees. This action turns the plunger shoe into the correct position to make contacts operate. | ||||
| 2004 | Volkswagen | Golf | GLS | 2.0 |
| Notes: 4 Pin Connector | ||||
| 2004 | Volkswagen | Golf | GLS | 2.0 |
| Notes: 4-Pin Special care must be taken during installation to prevent damage and obtain proper electrical contact Prior to installation pull plunger to full extension, use and apply lubricant to plunger. Keep pedal in up position. Push switch in and seat into opening pressing against pedal. Once seated secure switch by turning it to the right approximately 45 degrees. This action turns the plunger shoe into the correct position to make contacts operate. | ||||
| 2004 | Volkswagen | Golf | GLS TDI | 1.9 |
| Notes: 4 Pin Connector | ||||
| 2004 | Volkswagen | Golf | GLS TDI | 1.9 |
| Notes: 4-Pin Special care must be taken during installation to prevent damage and obtain proper electrical contact Prior to installation pull plunger to full extension, use and apply lubricant to plunger. Keep pedal in up position. Push switch in and seat into opening pressing against pedal. Once seated secure switch by turning it to the right approximately 45 degrees. This action turns the plunger shoe into the correct position to make contacts operate. | ||||
| 2004 | Volkswagen | Golf | GTI | 1.8 |
| Notes: 4-Pin Special care must be taken during installation to prevent damage and obtain proper electrical contact Prior to installation pull plunger to full extension, use and apply lubricant to plunger. Keep pedal in up position. Push switch in and seat into opening pressing against pedal. Once seated secure switch by turning it to the right approximately 45 degrees. This action turns the plunger shoe into the correct position to make contacts operate. | ||||
| 2004 | Volkswagen | Golf | GTI 1.8T | 1.8 |
| Notes: 4 Pin Connector | ||||
| 2004 | Volkswagen | Golf | GTI 1.8T | 1.8 |
| Notes: 4-Pin Special care must be taken during installation to prevent damage and obtain proper electrical contact Prior to installation pull plunger to full extension, use and apply lubricant to plunger. Keep pedal in up position. Push switch in and seat into opening pressing against pedal. Once seated secure switch by turning it to the right approximately 45 degrees. This action turns the plunger shoe into the correct position to make contacts operate. | ||||
| 2004 | Volkswagen | Golf | GTI VR6 | 2.8 |
| Notes: 4 Pin Connector | ||||
| 2004 | Volkswagen | Golf | GTI VR6 | 2.8 |
| Notes: 4-Pin Special care must be taken during installation to prevent damage and obtain proper electrical contact Prior to installation pull plunger to full extension, use and apply lubricant to plunger. Keep pedal in up position. Push switch in and seat into opening pressing against pedal. Once seated secure switch by turning it to the right approximately 45 degrees. This action turns the plunger shoe into the correct position to make contacts operate. | ||||
| 2004 | Volkswagen | Golf | Trendline | 2.0 |
| Notes: 4-Pin Special care must be taken during installation to prevent damage and obtain proper electrical contact Prior to installation pull plunger to full extension, use and apply lubricant to plunger. Keep pedal in up position. Push switch in and seat into opening pressing against pedal. Once seated secure switch by turning it to the right approximately 45 degrees. This action turns the plunger shoe into the correct position to make contacts operate. | ||||
| 2004 | Volkswagen | Jetta | Comfortline | 2.0 |
| Notes: 4-Pin Special care must be taken during installation to prevent damage and obtain proper electrical contact Prior to installation pull plunger to full extension, use and apply lubricant to plunger. Keep pedal in up position. Push switch in and seat into opening pressing against pedal. Once seated secure switch by turning it to the right approximately 45 degrees. This action turns the plunger shoe into the correct position to make contacts operate. | ||||
| 2004 | Volkswagen | Jetta | Europa | 2.0 |
| Notes: 4-Pin Special care must be taken during installation to prevent damage and obtain proper electrical contact Prior to installation pull plunger to full extension, use and apply lubricant to plunger. Keep pedal in up position. Push switch in and seat into opening pressing against pedal. Once seated secure switch by turning it to the right approximately 45 degrees. This action turns the plunger shoe into the correct position to make contacts operate. | ||||
| 2004 | Volkswagen | Jetta | Europa 50 Aniversario | 2.0 |
| Notes: 4-Pin Special care must be taken during installation to prevent damage and obtain proper electrical contact Prior to installation pull plunger to full extension, use and apply lubricant to plunger. Keep pedal in up position. Push switch in and seat into opening pressing against pedal. Once seated secure switch by turning it to the right approximately 45 degrees. This action turns the plunger shoe into the correct position to make contacts operate. | ||||
| 2004 | Volkswagen | Jetta | GL | 1.8 |
| Notes: 4 Pin Connector | ||||
| 2004 | Volkswagen | Jetta | GL | 1.8 |
| Notes: 4-Pin Special care must be taken during installation to prevent damage and obtain proper electrical contact Prior to installation pull plunger to full extension, use and apply lubricant to plunger. Keep pedal in up position. Push switch in and seat into opening pressing against pedal. Once seated secure switch by turning it to the right approximately 45 degrees. This action turns the plunger shoe into the correct position to make contacts operate. | ||||
| 2004 | Volkswagen | Jetta | GL | 2.0 |
| Notes: 4 Pin Connector | ||||
| 2004 | Volkswagen | Jetta | GL | 2.0 |
| Notes: 4-Pin Special care must be taken during installation to prevent damage and obtain proper electrical contact Prior to installation pull plunger to full extension, use and apply lubricant to plunger. Keep pedal in up position. Push switch in and seat into opening pressing against pedal. Once seated secure switch by turning it to the right approximately 45 degrees. This action turns the plunger shoe into the correct position to make contacts operate. | ||||
| 2004 | Volkswagen | Jetta | GLI | 1.8 |
| Notes: 4 Pin Connector | ||||
| 2004 | Volkswagen | Jetta | GLI | 1.8 |
| Notes: 4-Pin Special care must be taken during installation to prevent damage and obtain proper electrical contact Prior to installation pull plunger to full extension, use and apply lubricant to plunger. Keep pedal in up position. Push switch in and seat into opening pressing against pedal. Once seated secure switch by turning it to the right approximately 45 degrees. This action turns the plunger shoe into the correct position to make contacts operate. | ||||
| 2004 | Volkswagen | Jetta | GLI | 2.8 |
| Notes: 4 Pin Connector | ||||
| 2004 | Volkswagen | Jetta | GLI | 2.8 |
| Notes: 4-Pin Special care must be taken during installation to prevent damage and obtain proper electrical contact Prior to installation pull plunger to full extension, use and apply lubricant to plunger. Keep pedal in up position. Push switch in and seat into opening pressing against pedal. Once seated secure switch by turning it to the right approximately 45 degrees. This action turns the plunger shoe into the correct position to make contacts operate. | ||||
| 2004 | Volkswagen | Jetta | GLI 50 Aniversario | 1.8 |
| Notes: 4-Pin Special care must be taken during installation to prevent damage and obtain proper electrical contact Prior to installation pull plunger to full extension, use and apply lubricant to plunger. Keep pedal in up position. Push switch in and seat into opening pressing against pedal. Once seated secure switch by turning it to the right approximately 45 degrees. This action turns the plunger shoe into the correct position to make contacts operate. | ||||
| 2004 | Volkswagen | Jetta | GLS | 1.8 |
| Notes: 4 Pin Connector | ||||
| 2004 | Volkswagen | Jetta | GLS | 1.8 |
| Notes: 4-Pin Special care must be taken during installation to prevent damage and obtain proper electrical contact Prior to installation pull plunger to full extension, use and apply lubricant to plunger. Keep pedal in up position. Push switch in and seat into opening pressing against pedal. Once seated secure switch by turning it to the right approximately 45 degrees. This action turns the plunger shoe into the correct position to make contacts operate. | ||||
| 2004 | Volkswagen | Jetta | GLS | 2.0 |
| Notes: 4 Pin Connector | ||||
| 2004 | Volkswagen | Jetta | GLS | 2.0 |
| Notes: 4-Pin Special care must be taken during installation to prevent damage and obtain proper electrical contact Prior to installation pull plunger to full extension, use and apply lubricant to plunger. Keep pedal in up position. Push switch in and seat into opening pressing against pedal. Once seated secure switch by turning it to the right approximately 45 degrees. This action turns the plunger shoe into the correct position to make contacts operate. | ||||
| 2004 | Volkswagen | Jetta | GLS | 2.8 |
| Notes: 4 Pin Connector | ||||
| 2004 | Volkswagen | Jetta | GLS | 2.8 |
| Notes: 4-Pin Special care must be taken during installation to prevent damage and obtain proper electrical contact Prior to installation pull plunger to full extension, use and apply lubricant to plunger. Keep pedal in up position. Push switch in and seat into opening pressing against pedal. Once seated secure switch by turning it to the right approximately 45 degrees. This action turns the plunger shoe into the correct position to make contacts operate. | ||||
| 2004 | Volkswagen | Jetta | Sportline | 1.8 |
| Notes: 4-Pin Special care must be taken during installation to prevent damage and obtain proper electrical contact Prior to installation pull plunger to full extension, use and apply lubricant to plunger. Keep pedal in up position. Push switch in and seat into opening pressing against pedal. Once seated secure switch by turning it to the right approximately 45 degrees. This action turns the plunger shoe into the correct position to make contacts operate. | ||||
| 2004 | Volkswagen | Jetta | TDI | 1.9 |
| Notes: 4 Pin Connector | ||||
| 2004 | Volkswagen | Jetta | TDI | 1.9 |
| Notes: 4-Pin Special care must be taken during installation to prevent damage and obtain proper electrical contact Prior to installation pull plunger to full extension, use and apply lubricant to plunger. Keep pedal in up position. Push switch in and seat into opening pressing against pedal. Once seated secure switch by turning it to the right approximately 45 degrees. This action turns the plunger shoe into the correct position to make contacts operate. | ||||
| 2004 | Volkswagen | Jetta | Trendline | 2.0 |
| Notes: 4-Pin Special care must be taken during installation to prevent damage and obtain proper electrical contact Prior to installation pull plunger to full extension, use and apply lubricant to plunger. Keep pedal in up position. Push switch in and seat into opening pressing against pedal. Once seated secure switch by turning it to the right approximately 45 degrees. This action turns the plunger shoe into the correct position to make contacts operate. | ||||
| 2004 | Volkswagen | R32 | Base | 3.2 |
| Notes: 4 Pin Connector | ||||
| 2004 | Volkswagen | Touareg | TDI | 4.9 |
| Notes: 4-Pin Special care must be taken during installation to prevent damage and obtain proper electrical contact Prior to installation pull plunger to full extension, use and apply lubricant to plunger. Keep pedal in up position. Push switch in and seat into opening pressing against pedal. Once seated secure switch by turning it to the right approximately 45 degrees. This action turns the plunger shoe into the correct position to make contacts operate. | ||||
| 2004 | Volkswagen | Touareg | V6 | 3.2 |
| Notes: 4-Pin Special care must be taken during installation to prevent damage and obtain proper electrical contact Prior to installation pull plunger to full extension, use and apply lubricant to plunger. Keep pedal in up position. Push switch in and seat into opening pressing against pedal. Once seated secure switch by turning it to the right approximately 45 degrees. This action turns the plunger shoe into the correct position to make contacts operate. | ||||
| 2004 | Volkswagen | Touareg | V6 Premium | 3.2 |
| Notes: 4-Pin Special care must be taken during installation to prevent damage and obtain proper electrical contact Prior to installation pull plunger to full extension, use and apply lubricant to plunger. Keep pedal in up position. Push switch in and seat into opening pressing against pedal. Once seated secure switch by turning it to the right approximately 45 degrees. This action turns the plunger shoe into the correct position to make contacts operate. | ||||
| 2004 | Volkswagen | Touareg | V8 | 4.2 |
| Notes: 4-Pin Special care must be taken during installation to prevent damage and obtain proper electrical contact Prior to installation pull plunger to full extension, use and apply lubricant to plunger. Keep pedal in up position. Push switch in and seat into opening pressing against pedal. Once seated secure switch by turning it to the right approximately 45 degrees. This action turns the plunger shoe into the correct position to make contacts operate. | ||||
| 2005 | Audi | TT | Base | 1.8 |
| Notes: 4 Pin Connector | ||||
| 2005 | Audi | TT | Base | 1.8 |
| Notes: 4-Pin Special care must be taken during installation to prevent damage and obtain proper electrical contact Prior to installation pull plunger to full extension, use and apply lubricant to plunger. Keep pedal in up position. Push switch in and seat into opening pressing against pedal. Once seated secure switch by turning it to the right approximately 45 degrees. This action turns the plunger shoe into the correct position to make contacts operate. | ||||
| 2005 | Audi | TT | Sport | 1.8 |
| Notes: 4 Pin Connector | ||||
| 2005 | Audi | TT | Sport | 1.8 |
| Notes: 4-Pin Special care must be taken during installation to prevent damage and obtain proper electrical contact Prior to installation pull plunger to full extension, use and apply lubricant to plunger. Keep pedal in up position. Push switch in and seat into opening pressing against pedal. Once seated secure switch by turning it to the right approximately 45 degrees. This action turns the plunger shoe into the correct position to make contacts operate. | ||||
| 2005 | Audi | TT Quattro | Base | 1.8 |
| Notes: 4 Pin Connector | ||||
| 2005 | Audi | TT Quattro | Base | 1.8 |
| Notes: 4-Pin Special care must be taken during installation to prevent damage and obtain proper electrical contact Prior to installation pull plunger to full extension, use and apply lubricant to plunger. Keep pedal in up position. Push switch in and seat into opening pressing against pedal. Once seated secure switch by turning it to the right approximately 45 degrees. This action turns the plunger shoe into the correct position to make contacts operate. | ||||
| 2005 | Audi | TT Quattro | Base | 3.2 |
| Notes: 4 Pin Connector | ||||
| 2005 | Audi | TT Quattro | Base | 3.2 |
| Notes: 4-Pin Special care must be taken during installation to prevent damage and obtain proper electrical contact Prior to installation pull plunger to full extension, use and apply lubricant to plunger. Keep pedal in up position. Push switch in and seat into opening pressing against pedal. Once seated secure switch by turning it to the right approximately 45 degrees. This action turns the plunger shoe into the correct position to make contacts operate. | ||||
| 2005 | Audi | TT Quattro | S Line | 1.8 |
| Notes: 4 Pin Connector | ||||
| 2005 | Audi | TT Quattro | S Line | 1.8 |
| Notes: 4-Pin Special care must be taken during installation to prevent damage and obtain proper electrical contact Prior to installation pull plunger to full extension, use and apply lubricant to plunger. Keep pedal in up position. Push switch in and seat into opening pressing against pedal. Once seated secure switch by turning it to the right approximately 45 degrees. This action turns the plunger shoe into the correct position to make contacts operate. | ||||
| 2005 | Volkswagen | Beetle | Cabrio | 2.0 |
| Notes: 4 Pin Connector | ||||
| 2005 | Volkswagen | Beetle | Cabrio | 2.0 |
| Notes: 4-Pin Special care must be taken during installation to prevent damage and obtain proper electrical contact Prior to installation pull plunger to full extension, use and apply lubricant to plunger. Keep pedal in up position. Push switch in and seat into opening pressing against pedal. Once seated secure switch by turning it to the right approximately 45 degrees. This action turns the plunger shoe into the correct position to make contacts operate. | ||||
| 2005 | Volkswagen | Beetle | GL | 2.0 |
| Notes: 4 Pin Connector | ||||
| 2005 | Volkswagen | Beetle | GL | 2.0 |
| Notes: 4-Pin Special care must be taken during installation to prevent damage and obtain proper electrical contact Prior to installation pull plunger to full extension, use and apply lubricant to plunger. Keep pedal in up position. Push switch in and seat into opening pressing against pedal. Once seated secure switch by turning it to the right approximately 45 degrees. This action turns the plunger shoe into the correct position to make contacts operate. | ||||
| 2005 | Volkswagen | Beetle | GLS | 1.8 |
| Notes: 4 Pin Connector | ||||
| 2005 | Volkswagen | Beetle | GLS | 1.8 |
| Notes: 4-Pin Special care must be taken during installation to prevent damage and obtain proper electrical contact Prior to installation pull plunger to full extension, use and apply lubricant to plunger. Keep pedal in up position. Push switch in and seat into opening pressing against pedal. Once seated secure switch by turning it to the right approximately 45 degrees. This action turns the plunger shoe into the correct position to make contacts operate. | ||||
| 2005 | Volkswagen | Beetle | GLS | 2.0 |
| Notes: 4 Pin Connector | ||||
| 2005 | Volkswagen | Beetle | GLS | 2.0 |
| Notes: 4-Pin Special care must be taken during installation to prevent damage and obtain proper electrical contact Prior to installation pull plunger to full extension, use and apply lubricant to plunger. Keep pedal in up position. Push switch in and seat into opening pressing against pedal. Once seated secure switch by turning it to the right approximately 45 degrees. This action turns the plunger shoe into the correct position to make contacts operate. | ||||
| 2005 | Volkswagen | Beetle | GLS Sport Turbo | 1.8 |
| Notes: 4 Pin Connector | ||||
| 2005 | Volkswagen | Beetle | GLS Sport Turbo | 1.8 |
| Notes: 4-Pin Special care must be taken during installation to prevent damage and obtain proper electrical contact Prior to installation pull plunger to full extension, use and apply lubricant to plunger. Keep pedal in up position. Push switch in and seat into opening pressing against pedal. Once seated secure switch by turning it to the right approximately 45 degrees. This action turns the plunger shoe into the correct position to make contacts operate. | ||||
| 2005 | Volkswagen | Beetle | GLS TDI | 1.9 |
| Notes: 4 Pin Connector | ||||
| 2005 | Volkswagen | Beetle | GLS TDI | 1.9 |
| Notes: 4-Pin Special care must be taken during installation to prevent damage and obtain proper electrical contact Prior to installation pull plunger to full extension, use and apply lubricant to plunger. Keep pedal in up position. Push switch in and seat into opening pressing against pedal. Once seated secure switch by turning it to the right approximately 45 degrees. This action turns the plunger shoe into the correct position to make contacts operate. | ||||
| 2005 | Volkswagen | Beetle | GLX Sport Turbo | 1.8 |
| Notes: 4 Pin Connector | ||||
| 2005 | Volkswagen | Beetle | GLX Sport Turbo | 1.8 |
| Notes: 4-Pin Special care must be taken during installation to prevent damage and obtain proper electrical contact Prior to installation pull plunger to full extension, use and apply lubricant to plunger. Keep pedal in up position. Push switch in and seat into opening pressing against pedal. Once seated secure switch by turning it to the right approximately 45 degrees. This action turns the plunger shoe into the correct position to make contacts operate. | ||||
| 2005 | Volkswagen | Beetle | Turbo S | 1.8 |
| Notes: 4 Pin Connector | ||||
| 2005 | Volkswagen | Beetle | Turbo S | 1.8 |
| Notes: 4-Pin Special care must be taken during installation to prevent damage and obtain proper electrical contact Prior to installation pull plunger to full extension, use and apply lubricant to plunger. Keep pedal in up position. Push switch in and seat into opening pressing against pedal. Once seated secure switch by turning it to the right approximately 45 degrees. This action turns the plunger shoe into the correct position to make contacts operate. | ||||
| 2005 | Volkswagen | Golf | Comfortline | 2.0 |
| Notes: 4 Pin Connector | ||||
| 2005 | Volkswagen | Golf | Comfortline | 2.0 |
| Notes: 4-Pin Special care must be taken during installation to prevent damage and obtain proper electrical contact Prior to installation pull plunger to full extension, use and apply lubricant to plunger. Keep pedal in up position. Push switch in and seat into opening pressing against pedal. Once seated secure switch by turning it to the right approximately 45 degrees. This action turns the plunger shoe into the correct position to make contacts operate. | ||||
| 2005 | Volkswagen | Golf | Europa | 2.0 |
| Notes: 4 Pin Connector | ||||
| 2005 | Volkswagen | Golf | Europa | 2.0 |
| Notes: 4-Pin Special care must be taken during installation to prevent damage and obtain proper electrical contact Prior to installation pull plunger to full extension, use and apply lubricant to plunger. Keep pedal in up position. Push switch in and seat into opening pressing against pedal. Once seated secure switch by turning it to the right approximately 45 degrees. This action turns the plunger shoe into the correct position to make contacts operate. | ||||
| 2005 | Volkswagen | Golf | GL | 2.0 |
| Notes: 4 Pin Connector | ||||
| 2005 | Volkswagen | Golf | GL | 2.0 |
| Notes: 4-Pin Special care must be taken during installation to prevent damage and obtain proper electrical contact Prior to installation pull plunger to full extension, use and apply lubricant to plunger. Keep pedal in up position. Push switch in and seat into opening pressing against pedal. Once seated secure switch by turning it to the right approximately 45 degrees. This action turns the plunger shoe into the correct position to make contacts operate. | ||||
| 2005 | Volkswagen | Golf | GLS | 2.0 |
| Notes: 4 Pin Connector | ||||
| 2005 | Volkswagen | Golf | GLS | 2.0 |
| Notes: 4-Pin Special care must be taken during installation to prevent damage and obtain proper electrical contact Prior to installation pull plunger to full extension, use and apply lubricant to plunger. Keep pedal in up position. Push switch in and seat into opening pressing against pedal. Once seated secure switch by turning it to the right approximately 45 degrees. This action turns the plunger shoe into the correct position to make contacts operate. | ||||
| 2005 | Volkswagen | Golf | GTI | 1.8 |
| Notes: 4 Pin Connector | ||||
| 2005 | Volkswagen | Golf | GTI | 1.8 |
| Notes: 4-Pin Special care must be taken during installation to prevent damage and obtain proper electrical contact Prior to installation pull plunger to full extension, use and apply lubricant to plunger. Keep pedal in up position. Push switch in and seat into opening pressing against pedal. Once seated secure switch by turning it to the right approximately 45 degrees. This action turns the plunger shoe into the correct position to make contacts operate. | ||||
| 2005 | Volkswagen | Golf | GTI 1.8T | 1.8 |
| Notes: 4 Pin Connector | ||||
| 2005 | Volkswagen | Golf | GTI 1.8T | 1.8 |
| Notes: 4-Pin Special care must be taken during installation to prevent damage and obtain proper electrical contact Prior to installation pull plunger to full extension, use and apply lubricant to plunger. Keep pedal in up position. Push switch in and seat into opening pressing against pedal. Once seated secure switch by turning it to the right approximately 45 degrees. This action turns the plunger shoe into the correct position to make contacts operate. | ||||
| 2005 | Volkswagen | Golf | GTI VR6 | 2.8 |
| Notes: 4 Pin Connector | ||||
| 2005 | Volkswagen | Golf | GTI VR6 | 2.8 |
| Notes: 4-Pin Special care must be taken during installation to prevent damage and obtain proper electrical contact Prior to installation pull plunger to full extension, use and apply lubricant to plunger. Keep pedal in up position. Push switch in and seat into opening pressing against pedal. Once seated secure switch by turning it to the right approximately 45 degrees. This action turns the plunger shoe into the correct position to make contacts operate. | ||||
| 2005 | Volkswagen | Golf | TDI | 1.9 |
| Notes: 4 Pin Connector | ||||
| 2005 | Volkswagen | Golf | TDI | 1.9 |
| Notes: 4-Pin Special care must be taken during installation to prevent damage and obtain proper electrical contact Prior to installation pull plunger to full extension, use and apply lubricant to plunger. Keep pedal in up position. Push switch in and seat into opening pressing against pedal. Once seated secure switch by turning it to the right approximately 45 degrees. This action turns the plunger shoe into the correct position to make contacts operate. | ||||
| 2005 | Volkswagen | Golf | Trendline | 2.0 |
| Notes: 4 Pin Connector | ||||
| 2005 | Volkswagen | Golf | Trendline | 2.0 |
| Notes: 4-Pin Special care must be taken during installation to prevent damage and obtain proper electrical contact Prior to installation pull plunger to full extension, use and apply lubricant to plunger. Keep pedal in up position. Push switch in and seat into opening pressing against pedal. Once seated secure switch by turning it to the right approximately 45 degrees. This action turns the plunger shoe into the correct position to make contacts operate. | ||||
| 2005 | Volkswagen | Jetta | 2.5 | 2.5 |
| Notes: 4-Pin Special care must be taken during installation to prevent damage and obtain proper electrical contact Prior to installation pull plunger to full extension, use and apply lubricant to plunger. Keep pedal in up position. Push switch in and seat into opening pressing against pedal. Once seated secure switch by turning it to the right approximately 45 degrees. This action turns the plunger shoe into the correct position to make contacts operate. | ||||
| 2005 | Volkswagen | Jetta | Comfortline | 2.0 |
| Notes: 4-Pin Special care must be taken during installation to prevent damage and obtain proper electrical contact Prior to installation pull plunger to full extension, use and apply lubricant to plunger. Keep pedal in up position. Push switch in and seat into opening pressing against pedal. Once seated secure switch by turning it to the right approximately 45 degrees. This action turns the plunger shoe into the correct position to make contacts operate. | ||||
| 2005 | Volkswagen | Jetta | Europa | 2.0 |
| Notes: 4-Pin Special care must be taken during installation to prevent damage and obtain proper electrical contact Prior to installation pull plunger to full extension, use and apply lubricant to plunger. Keep pedal in up position. Push switch in and seat into opening pressing against pedal. Once seated secure switch by turning it to the right approximately 45 degrees. This action turns the plunger shoe into the correct position to make contacts operate. | ||||
| 2005 | Volkswagen | Jetta | GL | 1.8 |
| Notes: 4 Pin Connector | ||||
| 2005 | Volkswagen | Jetta | GL | 1.8 |
| Notes: 4-Pin Special care must be taken during installation to prevent damage and obtain proper electrical contact Prior to installation pull plunger to full extension, use and apply lubricant to plunger. Keep pedal in up position. Push switch in and seat into opening pressing against pedal. Once seated secure switch by turning it to the right approximately 45 degrees. This action turns the plunger shoe into the correct position to make contacts operate. | ||||
| 2005 | Volkswagen | Jetta | GL | 2.0 |
| Notes: 4 Pin Connector | ||||
| 2005 | Volkswagen | Jetta | GL | 2.0 |
| Notes: 4-Pin Special care must be taken during installation to prevent damage and obtain proper electrical contact Prior to installation pull plunger to full extension, use and apply lubricant to plunger. Keep pedal in up position. Push switch in and seat into opening pressing against pedal. Once seated secure switch by turning it to the right approximately 45 degrees. This action turns the plunger shoe into the correct position to make contacts operate. | ||||
| 2005 | Volkswagen | Jetta | GL TDI | 1.9 |
| Notes: 4 Pin Connector | ||||
| 2005 | Volkswagen | Jetta | GL TDI | 1.9 |
| Notes: 4-Pin Special care must be taken during installation to prevent damage and obtain proper electrical contact Prior to installation pull plunger to full extension, use and apply lubricant to plunger. Keep pedal in up position. Push switch in and seat into opening pressing against pedal. Once seated secure switch by turning it to the right approximately 45 degrees. This action turns the plunger shoe into the correct position to make contacts operate. | ||||
| 2005 | Volkswagen | Jetta | GLI | 1.8 |
| Notes: 4 Pin Connector | ||||
| 2005 | Volkswagen | Jetta | GLI | 1.8 |
| Notes: 4-Pin Special care must be taken during installation to prevent damage and obtain proper electrical contact Prior to installation pull plunger to full extension, use and apply lubricant to plunger. Keep pedal in up position. Push switch in and seat into opening pressing against pedal. Once seated secure switch by turning it to the right approximately 45 degrees. This action turns the plunger shoe into the correct position to make contacts operate. | ||||
| 2005 | Volkswagen | Jetta | GLS | 1.8 |
| Notes: 4 Pin Connector | ||||
| 2005 | Volkswagen | Jetta | GLS | 1.8 |
| Notes: 4-Pin Special care must be taken during installation to prevent damage and obtain proper electrical contact Prior to installation pull plunger to full extension, use and apply lubricant to plunger. Keep pedal in up position. Push switch in and seat into opening pressing against pedal. Once seated secure switch by turning it to the right approximately 45 degrees. This action turns the plunger shoe into the correct position to make contacts operate. | ||||
| 2005 | Volkswagen | Jetta | GLS | 2.0 |
| Notes: 4 Pin Connector | ||||
| 2005 | Volkswagen | Jetta | GLS | 2.0 |
| Notes: 4-Pin Special care must be taken during installation to prevent damage and obtain proper electrical contact Prior to installation pull plunger to full extension, use and apply lubricant to plunger. Keep pedal in up position. Push switch in and seat into opening pressing against pedal. Once seated secure switch by turning it to the right approximately 45 degrees. This action turns the plunger shoe into the correct position to make contacts operate. | ||||
| 2005 | Volkswagen | Jetta | GLS TDI | 1.9 |
| Notes: 4 Pin Connector | ||||
| 2005 | Volkswagen | Jetta | GLS TDI | 1.9 |
| Notes: 4-Pin Special care must be taken during installation to prevent damage and obtain proper electrical contact Prior to installation pull plunger to full extension, use and apply lubricant to plunger. Keep pedal in up position. Push switch in and seat into opening pressing against pedal. Once seated secure switch by turning it to the right approximately 45 degrees. This action turns the plunger shoe into the correct position to make contacts operate. | ||||
| 2005 | Volkswagen | Jetta | Limited Edition | 2.0 |
| Notes: 4-Pin Special care must be taken during installation to prevent damage and obtain proper electrical contact Prior to installation pull plunger to full extension, use and apply lubricant to plunger. Keep pedal in up position. Push switch in and seat into opening pressing against pedal. Once seated secure switch by turning it to the right approximately 45 degrees. This action turns the plunger shoe into the correct position to make contacts operate. | ||||
| 2005 | Volkswagen | Jetta | Special Edition | 2.0 |
| Notes: 4-Pin Special care must be taken during installation to prevent damage and obtain proper electrical contact Prior to installation pull plunger to full extension, use and apply lubricant to plunger. Keep pedal in up position. Push switch in and seat into opening pressing against pedal. Once seated secure switch by turning it to the right approximately 45 degrees. This action turns the plunger shoe into the correct position to make contacts operate. | ||||
| 2005 | Volkswagen | Jetta | Sportline | 1.8 |
| Notes: 4-Pin Special care must be taken during installation to prevent damage and obtain proper electrical contact Prior to installation pull plunger to full extension, use and apply lubricant to plunger. Keep pedal in up position. Push switch in and seat into opening pressing against pedal. Once seated secure switch by turning it to the right approximately 45 degrees. This action turns the plunger shoe into the correct position to make contacts operate. | ||||
| 2005 | Volkswagen | Jetta | Summer Edition | 2.0 |
| Notes: 4-Pin Special care must be taken during installation to prevent damage and obtain proper electrical contact Prior to installation pull plunger to full extension, use and apply lubricant to plunger. Keep pedal in up position. Push switch in and seat into opening pressing against pedal. Once seated secure switch by turning it to the right approximately 45 degrees. This action turns the plunger shoe into the correct position to make contacts operate. | ||||
| 2005 | Volkswagen | Jetta | TDI | 1.9 |
| Notes: 4-Pin Special care must be taken during installation to prevent damage and obtain proper electrical contact Prior to installation pull plunger to full extension, use and apply lubricant to plunger. Keep pedal in up position. Push switch in and seat into opening pressing against pedal. Once seated secure switch by turning it to the right approximately 45 degrees. This action turns the plunger shoe into the correct position to make contacts operate. | ||||
| 2005 | Volkswagen | Jetta | Trendline | 2.0 |
| Notes: 4-Pin Special care must be taken during installation to prevent damage and obtain proper electrical contact Prior to installation pull plunger to full extension, use and apply lubricant to plunger. Keep pedal in up position. Push switch in and seat into opening pressing against pedal. Once seated secure switch by turning it to the right approximately 45 degrees. This action turns the plunger shoe into the correct position to make contacts operate. | ||||
| 2005 | Volkswagen | Touareg | Base | 3.2 |
| Notes: 4-Pin Special care must be taken during installation to prevent damage and obtain proper electrical contact Prior to installation pull plunger to full extension, use and apply lubricant to plunger. Keep pedal in up position. Push switch in and seat into opening pressing against pedal. Once seated secure switch by turning it to the right approximately 45 degrees. This action turns the plunger shoe into the correct position to make contacts operate. | ||||
| 2005 | Volkswagen | Touareg | Base | 4.2 |
| Notes: 4-Pin Special care must be taken during installation to prevent damage and obtain proper electrical contact Prior to installation pull plunger to full extension, use and apply lubricant to plunger. Keep pedal in up position. Push switch in and seat into opening pressing against pedal. Once seated secure switch by turning it to the right approximately 45 degrees. This action turns the plunger shoe into the correct position to make contacts operate. | ||||
| 2005 | Volkswagen | Touareg | V6 | 3.2 |
| Notes: 4-Pin Special care must be taken during installation to prevent damage and obtain proper electrical contact Prior to installation pull plunger to full extension, use and apply lubricant to plunger. Keep pedal in up position. Push switch in and seat into opening pressing against pedal. Once seated secure switch by turning it to the right approximately 45 degrees. This action turns the plunger shoe into the correct position to make contacts operate. | ||||
| 2005 | Volkswagen | Touareg | V6 Premium | 3.2 |
| Notes: 4-Pin Special care must be taken during installation to prevent damage and obtain proper electrical contact Prior to installation pull plunger to full extension, use and apply lubricant to plunger. Keep pedal in up position. Push switch in and seat into opening pressing against pedal. Once seated secure switch by turning it to the right approximately 45 degrees. This action turns the plunger shoe into the correct position to make contacts operate. | ||||
| 2005 | Volkswagen | Touareg | V8 | 4.2 |
| Notes: 4-Pin Special care must be taken during installation to prevent damage and obtain proper electrical contact Prior to installation pull plunger to full extension, use and apply lubricant to plunger. Keep pedal in up position. Push switch in and seat into opening pressing against pedal. Once seated secure switch by turning it to the right approximately 45 degrees. This action turns the plunger shoe into the correct position to make contacts operate. | ||||
| 2006 | Audi | TT | Base | 1.8 |
| Notes: 4 Pin Connector | ||||
| 2006 | Audi | TT | Base | 1.8 |
| Notes: 4-Pin Special care must be taken during installation to prevent damage and obtain proper electrical contact Prior to installation pull plunger to full extension, use and apply lubricant to plunger. Keep pedal in up position. Push switch in and seat into opening pressing against pedal. Once seated secure switch by turning it to the right approximately 45 degrees. This action turns the plunger shoe into the correct position to make contacts operate. | ||||
| 2006 | Audi | TT | Classic Edition | 1.8 |
| Notes: 4 Pin Connector | ||||
| 2006 | Audi | TT | Classic Edition | 1.8 |
| Notes: 4-Pin Special care must be taken during installation to prevent damage and obtain proper electrical contact Prior to installation pull plunger to full extension, use and apply lubricant to plunger. Keep pedal in up position. Push switch in and seat into opening pressing against pedal. Once seated secure switch by turning it to the right approximately 45 degrees. This action turns the plunger shoe into the correct position to make contacts operate. | ||||
| 2006 | Audi | TT | Sport | 1.8 |
| Notes: 4 Pin Connector | ||||
| 2006 | Audi | TT | Sport | 1.8 |
| Notes: 4-Pin Special care must be taken during installation to prevent damage and obtain proper electrical contact Prior to installation pull plunger to full extension, use and apply lubricant to plunger. Keep pedal in up position. Push switch in and seat into opening pressing against pedal. Once seated secure switch by turning it to the right approximately 45 degrees. This action turns the plunger shoe into the correct position to make contacts operate. | ||||
| 2006 | Audi | TT Quattro | Base | 1.8 |
| Notes: 4 Pin Connector | ||||
| 2006 | Audi | TT Quattro | Base | 1.8 |
| Notes: 4-Pin Special care must be taken during installation to prevent damage and obtain proper electrical contact Prior to installation pull plunger to full extension, use and apply lubricant to plunger. Keep pedal in up position. Push switch in and seat into opening pressing against pedal. Once seated secure switch by turning it to the right approximately 45 degrees. This action turns the plunger shoe into the correct position to make contacts operate. | ||||
| 2006 | Audi | TT Quattro | Base | 3.2 |
| Notes: 4 Pin Connector | ||||
| 2006 | Audi | TT Quattro | Base | 3.2 |
| Notes: 4-Pin Special care must be taken during installation to prevent damage and obtain proper electrical contact Prior to installation pull plunger to full extension, use and apply lubricant to plunger. Keep pedal in up position. Push switch in and seat into opening pressing against pedal. Once seated secure switch by turning it to the right approximately 45 degrees. This action turns the plunger shoe into the correct position to make contacts operate. | ||||
| 2006 | Audi | TT Quattro | S Line | 1.8 |
| Notes: 4 Pin Connector | ||||
| 2006 | Audi | TT Quattro | S Line | 1.8 |
| Notes: 4-Pin Special care must be taken during installation to prevent damage and obtain proper electrical contact Prior to installation pull plunger to full extension, use and apply lubricant to plunger. Keep pedal in up position. Push switch in and seat into opening pressing against pedal. Once seated secure switch by turning it to the right approximately 45 degrees. This action turns the plunger shoe into the correct position to make contacts operate. | ||||
| 2006 | Audi | TT Quattro | Special Edition | 3.2 |
| Notes: 4 Pin Connector | ||||
| 2006 | Audi | TT Quattro | Special Edition | 3.2 |
| Notes: 4-Pin Special care must be taken during installation to prevent damage and obtain proper electrical contact Prior to installation pull plunger to full extension, use and apply lubricant to plunger. Keep pedal in up position. Push switch in and seat into opening pressing against pedal. Once seated secure switch by turning it to the right approximately 45 degrees. This action turns the plunger shoe into the correct position to make contacts operate. | ||||
| 2006 | Volkswagen | Beetle | 2.5 | 2.5 |
| Notes: 4 Pin Connector | ||||
| 2006 | Volkswagen | Beetle | 2.5 | 2.5 |
| Notes: 4-Pin Special care must be taken during installation to prevent damage and obtain proper electrical contact Prior to installation pull plunger to full extension, use and apply lubricant to plunger. Keep pedal in up position. Push switch in and seat into opening pressing against pedal. Once seated secure switch by turning it to the right approximately 45 degrees. This action turns the plunger shoe into the correct position to make contacts operate. | ||||
| 2006 | Volkswagen | Beetle | Cabrio | 2.0 |
| Notes: 4 Pin Connector | ||||
| 2006 | Volkswagen | Beetle | Cabrio | 2.0 |
| Notes: 4-Pin Special care must be taken during installation to prevent damage and obtain proper electrical contact Prior to installation pull plunger to full extension, use and apply lubricant to plunger. Keep pedal in up position. Push switch in and seat into opening pressing against pedal. Once seated secure switch by turning it to the right approximately 45 degrees. This action turns the plunger shoe into the correct position to make contacts operate. | ||||
| 2006 | Volkswagen | Beetle | GLS | 2.0 |
| Notes: 4 Pin Connector | ||||
| 2006 | Volkswagen | Beetle | GLS | 2.0 |
| Notes: 4-Pin Special care must be taken during installation to prevent damage and obtain proper electrical contact Prior to installation pull plunger to full extension, use and apply lubricant to plunger. Keep pedal in up position. Push switch in and seat into opening pressing against pedal. Once seated secure switch by turning it to the right approximately 45 degrees. This action turns the plunger shoe into the correct position to make contacts operate. | ||||
| 2006 | Volkswagen | Beetle | Sport | 2.0 |
| Notes: 4 Pin Connector | ||||
| 2006 | Volkswagen | Beetle | Sport | 2.0 |
| Notes: 4-Pin Special care must be taken during installation to prevent damage and obtain proper electrical contact Prior to installation pull plunger to full extension, use and apply lubricant to plunger. Keep pedal in up position. Push switch in and seat into opening pressing against pedal. Once seated secure switch by turning it to the right approximately 45 degrees. This action turns the plunger shoe into the correct position to make contacts operate. | ||||
| 2006 | Volkswagen | Beetle | Sport GLX | 2.0 |
| Notes: 4 Pin Connector | ||||
| 2006 | Volkswagen | Beetle | Sport GLX | 2.0 |
| Notes: 4-Pin Special care must be taken during installation to prevent damage and obtain proper electrical contact Prior to installation pull plunger to full extension, use and apply lubricant to plunger. Keep pedal in up position. Push switch in and seat into opening pressing against pedal. Once seated secure switch by turning it to the right approximately 45 degrees. This action turns the plunger shoe into the correct position to make contacts operate. | ||||
| 2006 | Volkswagen | Beetle | TDI | 1.9 |
| Notes: 4 Pin Connector | ||||
| 2006 | Volkswagen | Beetle | TDI | 1.9 |
| Notes: 4-Pin Special care must be taken during installation to prevent damage and obtain proper electrical contact Prior to installation pull plunger to full extension, use and apply lubricant to plunger. Keep pedal in up position. Push switch in and seat into opening pressing against pedal. Once seated secure switch by turning it to the right approximately 45 degrees. This action turns the plunger shoe into the correct position to make contacts operate. | ||||
| 2006 | Volkswagen | Golf | Europa | 2.0 |
| Notes: 4 Pin Connector | ||||
| 2006 | Volkswagen | Golf | Europa | 2.0 |
| Notes: 4-Pin Special care must be taken during installation to prevent damage and obtain proper electrical contact Prior to installation pull plunger to full extension, use and apply lubricant to plunger. Keep pedal in up position. Push switch in and seat into opening pressing against pedal. Once seated secure switch by turning it to the right approximately 45 degrees. This action turns the plunger shoe into the correct position to make contacts operate. | ||||
| 2006 | Volkswagen | Golf | GL | 2.0 |
| Notes: 4 Pin Connector | ||||
| 2006 | Volkswagen | Golf | GL | 2.0 |
| Notes: 4-Pin Special care must be taken during installation to prevent damage and obtain proper electrical contact Prior to installation pull plunger to full extension, use and apply lubricant to plunger. Keep pedal in up position. Push switch in and seat into opening pressing against pedal. Once seated secure switch by turning it to the right approximately 45 degrees. This action turns the plunger shoe into the correct position to make contacts operate. | ||||
| 2006 | Volkswagen | Golf | GLS | 2.0 |
| Notes: 4 Pin Connector | ||||
| 2006 | Volkswagen | Golf | GLS | 2.0 |
| Notes: 4-Pin Special care must be taken during installation to prevent damage and obtain proper electrical contact Prior to installation pull plunger to full extension, use and apply lubricant to plunger. Keep pedal in up position. Push switch in and seat into opening pressing against pedal. Once seated secure switch by turning it to the right approximately 45 degrees. This action turns the plunger shoe into the correct position to make contacts operate. | ||||
| 2006 | Volkswagen | Golf | GLS TDI | 1.9 |
| Notes: 4 Pin Connector | ||||
| 2006 | Volkswagen | Golf | GLS TDI | 1.9 |
| Notes: 4-Pin Special care must be taken during installation to prevent damage and obtain proper electrical contact Prior to installation pull plunger to full extension, use and apply lubricant to plunger. Keep pedal in up position. Push switch in and seat into opening pressing against pedal. Once seated secure switch by turning it to the right approximately 45 degrees. This action turns the plunger shoe into the correct position to make contacts operate. | ||||
| 2006 | Volkswagen | Golf | GTI 1.8T | 1.8 |
| Notes: 4 Pin Connector | ||||
| 2006 | Volkswagen | Golf | GTI 1.8T | 1.8 |
| Notes: 4-Pin Special care must be taken during installation to prevent damage and obtain proper electrical contact Prior to installation pull plunger to full extension, use and apply lubricant to plunger. Keep pedal in up position. Push switch in and seat into opening pressing against pedal. Once seated secure switch by turning it to the right approximately 45 degrees. This action turns the plunger shoe into the correct position to make contacts operate. | ||||
| 2007 | Volkswagen | Beetle | 2.5 | 2.5 |
| Notes: 4 Pin Connector | ||||
| 2007 | Volkswagen | Beetle | 2.5 | 2.5 |
| Notes: 4-Pin Special care must be taken during installation to prevent damage and obtain proper electrical contact Prior to installation pull plunger to full extension, use and apply lubricant to plunger. Keep pedal in up position. Push switch in and seat into opening pressing against pedal. Once seated secure switch by turning it to the right approximately 45 degrees. This action turns the plunger shoe into the correct position to make contacts operate. | ||||
| 2007 | Volkswagen | Beetle | Cabrio | 2.0 |
| Notes: 4 Pin Connector | ||||
| 2007 | Volkswagen | Beetle | Cabrio | 2.0 |
| Notes: 4-Pin Special care must be taken during installation to prevent damage and obtain proper electrical contact Prior to installation pull plunger to full extension, use and apply lubricant to plunger. Keep pedal in up position. Push switch in and seat into opening pressing against pedal. Once seated secure switch by turning it to the right approximately 45 degrees. This action turns the plunger shoe into the correct position to make contacts operate. | ||||
| 2007 | Volkswagen | Beetle | GLS | 2.0 |
| Notes: 4 Pin Connector | ||||
| 2007 | Volkswagen | Beetle | GLS | 2.0 |
| Notes: 4-Pin Special care must be taken during installation to prevent damage and obtain proper electrical contact Prior to installation pull plunger to full extension, use and apply lubricant to plunger. Keep pedal in up position. Push switch in and seat into opening pressing against pedal. Once seated secure switch by turning it to the right approximately 45 degrees. This action turns the plunger shoe into the correct position to make contacts operate. | ||||
| 2007 | Volkswagen | Beetle | Sport | 2.0 |
| Notes: 4 Pin Connector | ||||
| 2007 | Volkswagen | Beetle | Sport | 2.0 |
| Notes: 4-Pin Special care must be taken during installation to prevent damage and obtain proper electrical contact Prior to installation pull plunger to full extension, use and apply lubricant to plunger. Keep pedal in up position. Push switch in and seat into opening pressing against pedal. Once seated secure switch by turning it to the right approximately 45 degrees. This action turns the plunger shoe into the correct position to make contacts operate. | ||||
| 2007 | Volkswagen | Beetle | Sport GLX | 2.0 |
| Notes: 4 Pin Connector | ||||
| 2007 | Volkswagen | Beetle | Sport GLX | 2.0 |
| Notes: 4-Pin Special care must be taken during installation to prevent damage and obtain proper electrical contact Prior to installation pull plunger to full extension, use and apply lubricant to plunger. Keep pedal in up position. Push switch in and seat into opening pressing against pedal. Once seated secure switch by turning it to the right approximately 45 degrees. This action turns the plunger shoe into the correct position to make contacts operate. | ||||
| 2007 | Volkswagen | Touareg | TDI | 4.9 |
| Notes: 4-Pin Special care must be taken during installation to prevent damage and obtain proper electrical contact Prior to installation pull plunger to full extension, use and apply lubricant to plunger. Keep pedal in up position. Push switch in and seat into opening pressing against pedal. Once seated secure switch by turning it to the right approximately 45 degrees. This action turns the plunger shoe into the correct position to make contacts operate. | ||||
| 2007 | Volkswagen | Touareg | TDI | 5.0 |
| Notes: 4-Pin Special care must be taken during installation to prevent damage and obtain proper electrical contact Prior to installation pull plunger to full extension, use and apply lubricant to plunger. Keep pedal in up position. Push switch in and seat into opening pressing against pedal. Once seated secure switch by turning it to the right approximately 45 degrees. This action turns the plunger shoe into the correct position to make contacts operate. | ||||
| 2008 | Volkswagen | Beetle | 10 Anos | 2.0 |
| Notes: 4 Pin Connector | ||||
| 2008 | Volkswagen | Beetle | 10 Anos | 2.0 |
| Notes: 4-Pin Special care must be taken during installation to prevent damage and obtain proper electrical contact Prior to installation pull plunger to full extension, use and apply lubricant to plunger. Keep pedal in up position. Push switch in and seat into opening pressing against pedal. Once seated secure switch by turning it to the right approximately 45 degrees. This action turns the plunger shoe into the correct position to make contacts operate. | ||||
| 2008 | Volkswagen | Beetle | 10 Anos | 2.5 |
| Notes: 4 Pin Connector | ||||
| 2008 | Volkswagen | Beetle | 10 Anos | 2.5 |
| Notes: 4-Pin Special care must be taken during installation to prevent damage and obtain proper electrical contact Prior to installation pull plunger to full extension, use and apply lubricant to plunger. Keep pedal in up position. Push switch in and seat into opening pressing against pedal. Once seated secure switch by turning it to the right approximately 45 degrees. This action turns the plunger shoe into the correct position to make contacts operate. | ||||
| 2008 | Volkswagen | Beetle | 2.5 | 2.5 |
| Notes: 4 Pin Connector | ||||
| 2008 | Volkswagen | Beetle | 2.5 | 2.5 |
| Notes: 4-Pin Special care must be taken during installation to prevent damage and obtain proper electrical contact Prior to installation pull plunger to full extension, use and apply lubricant to plunger. Keep pedal in up position. Push switch in and seat into opening pressing against pedal. Once seated secure switch by turning it to the right approximately 45 degrees. This action turns the plunger shoe into the correct position to make contacts operate. | ||||
| 2008 | Volkswagen | Beetle | Cabrio | 2.0 |
| Notes: 4 Pin Connector | ||||
| 2008 | Volkswagen | Beetle | Cabrio | 2.0 |
| Notes: 4-Pin Special care must be taken during installation to prevent damage and obtain proper electrical contact Prior to installation pull plunger to full extension, use and apply lubricant to plunger. Keep pedal in up position. Push switch in and seat into opening pressing against pedal. Once seated secure switch by turning it to the right approximately 45 degrees. This action turns the plunger shoe into the correct position to make contacts operate. | ||||
| 2008 | Volkswagen | Beetle | GLS | 2.0 |
| Notes: 4 Pin Connector | ||||
| 2008 | Volkswagen | Beetle | GLS | 2.0 |
| Notes: 4-Pin Special care must be taken during installation to prevent damage and obtain proper electrical contact Prior to installation pull plunger to full extension, use and apply lubricant to plunger. Keep pedal in up position. Push switch in and seat into opening pressing against pedal. Once seated secure switch by turning it to the right approximately 45 degrees. This action turns the plunger shoe into the correct position to make contacts operate. | ||||
| 2008 | Volkswagen | Beetle | Hot Wheels | 2.0 |
| Notes: 4 Pin Connector | ||||
| 2008 | Volkswagen | Beetle | Hot Wheels | 2.0 |
| Notes: 4-Pin Special care must be taken during installation to prevent damage and obtain proper electrical contact Prior to installation pull plunger to full extension, use and apply lubricant to plunger. Keep pedal in up position. Push switch in and seat into opening pressing against pedal. Once seated secure switch by turning it to the right approximately 45 degrees. This action turns the plunger shoe into the correct position to make contacts operate. | ||||
| 2008 | Volkswagen | Beetle | Hot Wheels | 2.5 |
| Notes: 4 Pin Connector | ||||
| 2008 | Volkswagen | Beetle | Hot Wheels | 2.5 |
| Notes: 4-Pin Special care must be taken during installation to prevent damage and obtain proper electrical contact Prior to installation pull plunger to full extension, use and apply lubricant to plunger. Keep pedal in up position. Push switch in and seat into opening pressing against pedal. Once seated secure switch by turning it to the right approximately 45 degrees. This action turns the plunger shoe into the correct position to make contacts operate. | ||||
| 2008 | Volkswagen | Beetle | S | 2.5 |
| Notes: 4 Pin Connector | ||||
| 2008 | Volkswagen | Beetle | S | 2.5 |
| Notes: 4-Pin Special care must be taken during installation to prevent damage and obtain proper electrical contact Prior to installation pull plunger to full extension, use and apply lubricant to plunger. Keep pedal in up position. Push switch in and seat into opening pressing against pedal. Once seated secure switch by turning it to the right approximately 45 degrees. This action turns the plunger shoe into the correct position to make contacts operate. | ||||
| 2008 | Volkswagen | Beetle | SE | 2.5 |
| Notes: 4 Pin Connector | ||||
| 2008 | Volkswagen | Beetle | SE | 2.5 |
| Notes: 4-Pin Special care must be taken during installation to prevent damage and obtain proper electrical contact Prior to installation pull plunger to full extension, use and apply lubricant to plunger. Keep pedal in up position. Push switch in and seat into opening pressing against pedal. Once seated secure switch by turning it to the right approximately 45 degrees. This action turns the plunger shoe into the correct position to make contacts operate. | ||||
| 2008 | Volkswagen | Beetle | Sport | 2.5 |
| Notes: 4 Pin Connector | ||||
| 2008 | Volkswagen | Beetle | Sport | 2.5 |
| Notes: 4-Pin Special care must be taken during installation to prevent damage and obtain proper electrical contact Prior to installation pull plunger to full extension, use and apply lubricant to plunger. Keep pedal in up position. Push switch in and seat into opening pressing against pedal. Once seated secure switch by turning it to the right approximately 45 degrees. This action turns the plunger shoe into the correct position to make contacts operate. | ||||
| 2008 | Volkswagen | Beetle | Sport GLX | 2.5 |
| Notes: 4 Pin Connector | ||||
| 2008 | Volkswagen | Beetle | Sport GLX | 2.5 |
| Notes: 4-Pin Special care must be taken during installation to prevent damage and obtain proper electrical contact Prior to installation pull plunger to full extension, use and apply lubricant to plunger. Keep pedal in up position. Push switch in and seat into opening pressing against pedal. Once seated secure switch by turning it to the right approximately 45 degrees. This action turns the plunger shoe into the correct position to make contacts operate. | ||||
| 2008 | Volkswagen | Touareg | TDI | 5.0 |
| Notes: 4-Pin Special care must be taken during installation to prevent damage and obtain proper electrical contact Prior to installation pull plunger to full extension, use and apply lubricant to plunger. Keep pedal in up position. Push switch in and seat into opening pressing against pedal. Once seated secure switch by turning it to the right approximately 45 degrees. This action turns the plunger shoe into the correct position to make contacts operate. | ||||
| 2009 | Volkswagen | Beetle | Base | 2.5 |
| Notes: 4 Pin Connector | ||||
| 2009 | Volkswagen | Beetle | Cabrio | 2.0 |
| Notes: 4 Pin Connector | ||||
| 2009 | Volkswagen | Beetle | Comfortline | 2.5 |
| Notes: 4 Pin Connector | ||||
| 2009 | Volkswagen | Beetle | GLS | 2.0 |
| Notes: 4 Pin Connector | ||||
| 2009 | Volkswagen | Beetle | Sport | 2.5 |
| Notes: 4 Pin Connector | ||||
| 2009 | Volkswagen | Beetle | Sport GLX | 2.5 |
| Notes: 4 Pin Connector | ||||
| 2009 | Volkswagen | Beetle | Trendline | 2.5 |
| Notes: 4 Pin Connector | ||||
| 2010 | Volkswagen | Beetle | Base | 2.5 |
| Notes: 4 Pin Connector | ||||
| 2010 | Volkswagen | Beetle | Comfortline | 2.5 |
| Notes: 4 Pin Connector | ||||
| 2010 | Volkswagen | Beetle | GLS | 2.0 |
| Notes: 4 Pin Connector | ||||
| 2010 | Volkswagen | Beetle | Sport | 2.5 |
| Notes: 4 Pin Connector | ||||
| 2010 | Volkswagen | Beetle | Sport GLX | 2.5 |
| Notes: 4 Pin Connector | ||||
| 1999 Volkswagen EuroVan GLS 2.8 |
| Notes: 4 Pin Connector |
| 1999 Volkswagen EuroVan MV 2.8 |
| Notes: 4 Pin Connector |
| 1999 Volkswagen Golf GL 1.9 |
| Notes: 4-Pin Special care must be taken during installation to prevent damage and obtain proper electrical contact Prior to installation pull plunger to full extension, use and apply lubricant to plunger. Keep pedal in up position. Push switch in and seat into opening pressing against pedal. Once seated secure switch by turning it to the right approximately 45 degrees. This action turns the plunger shoe into the correct position to make contacts operate. |
| 1999 Volkswagen Golf GL 2.0 |
| Notes: 4 Pin Connector |
| 1999 Volkswagen Golf GL 2.0 |
| Notes: 4-Pin Special care must be taken during installation to prevent damage and obtain proper electrical contact Prior to installation pull plunger to full extension, use and apply lubricant to plunger. Keep pedal in up position. Push switch in and seat into opening pressing against pedal. Once seated secure switch by turning it to the right approximately 45 degrees. This action turns the plunger shoe into the correct position to make contacts operate. |
| 1999 Volkswagen Golf GLS 2.0 |
| Notes: 4 Pin Connector |
| 1999 Volkswagen Golf GLS 2.0 |
| Notes: 4-Pin Special care must be taken during installation to prevent damage and obtain proper electrical contact Prior to installation pull plunger to full extension, use and apply lubricant to plunger. Keep pedal in up position. Push switch in and seat into opening pressing against pedal. Once seated secure switch by turning it to the right approximately 45 degrees. This action turns the plunger shoe into the correct position to make contacts operate. |
| 1999 Volkswagen Golf GTI 2.0 |
| Notes: 4 Pin Connector |
| 1999 Volkswagen Golf GTI 2.0 |
| Notes: 4-Pin Special care must be taken during installation to prevent damage and obtain proper electrical contact Prior to installation pull plunger to full extension, use and apply lubricant to plunger. Keep pedal in up position. Push switch in and seat into opening pressing against pedal. Once seated secure switch by turning it to the right approximately 45 degrees. This action turns the plunger shoe into the correct position to make contacts operate. |
| 1999 Volkswagen Golf GTI 2.8 |
| Notes: 4 Pin Connector |
| 1999 Volkswagen Golf GTI 2.8 |
| Notes: 4-Pin Special care must be taken during installation to prevent damage and obtain proper electrical contact Prior to installation pull plunger to full extension, use and apply lubricant to plunger. Keep pedal in up position. Push switch in and seat into opening pressing against pedal. Once seated secure switch by turning it to the right approximately 45 degrees. This action turns the plunger shoe into the correct position to make contacts operate. |
| 1999 Volkswagen Golf GTI VR6 2.8 |
| Notes: 4-Pin Special care must be taken during installation to prevent damage and obtain proper electrical contact Prior to installation pull plunger to full extension, use and apply lubricant to plunger. Keep pedal in up position. Push switch in and seat into opening pressing against pedal. Once seated secure switch by turning it to the right approximately 45 degrees. This action turns the plunger shoe into the correct position to make contacts operate. |
| 1999 Volkswagen Golf MI 1.8 |
| Notes: 4-Pin Special care must be taken during installation to prevent damage and obtain proper electrical contact Prior to installation pull plunger to full extension, use and apply lubricant to plunger. Keep pedal in up position. Push switch in and seat into opening pressing against pedal. Once seated secure switch by turning it to the right approximately 45 degrees. This action turns the plunger shoe into the correct position to make contacts operate. |
| 1999 Volkswagen Golf TDI 1.9 |
| Notes: 4 Pin Connector |
| 1999 Volkswagen Golf TDI 1.9 |
| Notes: 4-Pin Special care must be taken during installation to prevent damage and obtain proper electrical contact Prior to installation pull plunger to full extension, use and apply lubricant to plunger. Keep pedal in up position. Push switch in and seat into opening pressing against pedal. Once seated secure switch by turning it to the right approximately 45 degrees. This action turns the plunger shoe into the correct position to make contacts operate. |
| 1999 Volkswagen Golf Wolfsburg Edition 2.0 |
| Notes: 4-Pin Special care must be taken during installation to prevent damage and obtain proper electrical contact Prior to installation pull plunger to full extension, use and apply lubricant to plunger. Keep pedal in up position. Push switch in and seat into opening pressing against pedal. Once seated secure switch by turning it to the right approximately 45 degrees. This action turns the plunger shoe into the correct position to make contacts operate. |
| 1999 Volkswagen Jetta Base 2.0 |
| Notes: 4-Pin Special care must be taken during installation to prevent damage and obtain proper electrical contact Prior to installation pull plunger to full extension, use and apply lubricant to plunger. Keep pedal in up position. Push switch in and seat into opening pressing against pedal. Once seated secure switch by turning it to the right approximately 45 degrees. This action turns the plunger shoe into the correct position to make contacts operate. |
| 1999 Volkswagen Jetta CL 1.8 |
| Notes: 4-Pin Special care must be taken during installation to prevent damage and obtain proper electrical contact Prior to installation pull plunger to full extension, use and apply lubricant to plunger. Keep pedal in up position. Push switch in and seat into opening pressing against pedal. Once seated secure switch by turning it to the right approximately 45 degrees. This action turns the plunger shoe into the correct position to make contacts operate. |
| 1999 Volkswagen Jetta CL 2.0 |
| Notes: 4-Pin Special care must be taken during installation to prevent damage and obtain proper electrical contact Prior to installation pull plunger to full extension, use and apply lubricant to plunger. Keep pedal in up position. Push switch in and seat into opening pressing against pedal. Once seated secure switch by turning it to the right approximately 45 degrees. This action turns the plunger shoe into the correct position to make contacts operate. |
| 1999 Volkswagen Jetta GL 2.0 |
| Notes: 4-Pin Special care must be taken during installation to prevent damage and obtain proper electrical contact Prior to installation pull plunger to full extension, use and apply lubricant to plunger. Keep pedal in up position. Push switch in and seat into opening pressing against pedal. Once seated secure switch by turning it to the right approximately 45 degrees. This action turns the plunger shoe into the correct position to make contacts operate. |
| 1999 Volkswagen Jetta GLS 2.0 |
| Notes: 4-Pin Special care must be taken during installation to prevent damage and obtain proper electrical contact Prior to installation pull plunger to full extension, use and apply lubricant to plunger. Keep pedal in up position. Push switch in and seat into opening pressing against pedal. Once seated secure switch by turning it to the right approximately 45 degrees. This action turns the plunger shoe into the correct position to make contacts operate. |
| 1999 Volkswagen Jetta GLS 2.8 |
| Notes: 4-Pin Special care must be taken during installation to prevent damage and obtain proper electrical contact Prior to installation pull plunger to full extension, use and apply lubricant to plunger. Keep pedal in up position. Push switch in and seat into opening pressing against pedal. Once seated secure switch by turning it to the right approximately 45 degrees. This action turns the plunger shoe into the correct position to make contacts operate. |
| 1999 Volkswagen Jetta GLS Confort 2.0 |
| Notes: 4-Pin Special care must be taken during installation to prevent damage and obtain proper electrical contact Prior to installation pull plunger to full extension, use and apply lubricant to plunger. Keep pedal in up position. Push switch in and seat into opening pressing against pedal. Once seated secure switch by turning it to the right approximately 45 degrees. This action turns the plunger shoe into the correct position to make contacts operate. |
| 1999 Volkswagen Jetta GLS VR6 1.8 |
| Notes: 4-Pin Special care must be taken during installation to prevent damage and obtain proper electrical contact Prior to installation pull plunger to full extension, use and apply lubricant to plunger. Keep pedal in up position. Push switch in and seat into opening pressing against pedal. Once seated secure switch by turning it to the right approximately 45 degrees. This action turns the plunger shoe into the correct position to make contacts operate. |
| 1999 Volkswagen Jetta GLS VR6 2.8 |
| Notes: 4-Pin Special care must be taken during installation to prevent damage and obtain proper electrical contact Prior to installation pull plunger to full extension, use and apply lubricant to plunger. Keep pedal in up position. Push switch in and seat into opening pressing against pedal. Once seated secure switch by turning it to the right approximately 45 degrees. This action turns the plunger shoe into the correct position to make contacts operate. |
| 1999 Volkswagen Jetta GLX 2.8 |
| Notes: 4-Pin Special care must be taken during installation to prevent damage and obtain proper electrical contact Prior to installation pull plunger to full extension, use and apply lubricant to plunger. Keep pedal in up position. Push switch in and seat into opening pressing against pedal. Once seated secure switch by turning it to the right approximately 45 degrees. This action turns the plunger shoe into the correct position to make contacts operate. |
| 1999 Volkswagen Jetta GLX VR6 1.8 |
| Notes: 4-Pin Special care must be taken during installation to prevent damage and obtain proper electrical contact Prior to installation pull plunger to full extension, use and apply lubricant to plunger. Keep pedal in up position. Push switch in and seat into opening pressing against pedal. Once seated secure switch by turning it to the right approximately 45 degrees. This action turns the plunger shoe into the correct position to make contacts operate. |
| 1999 Volkswagen Jetta GLX VR6 2.8 |
| Notes: 4-Pin Special care must be taken during installation to prevent damage and obtain proper electrical contact Prior to installation pull plunger to full extension, use and apply lubricant to plunger. Keep pedal in up position. Push switch in and seat into opening pressing against pedal. Once seated secure switch by turning it to the right approximately 45 degrees. This action turns the plunger shoe into the correct position to make contacts operate. |
| 1999 Volkswagen Jetta TDI 1.9 |
| Notes: 4-Pin Special care must be taken during installation to prevent damage and obtain proper electrical contact Prior to installation pull plunger to full extension, use and apply lubricant to plunger. Keep pedal in up position. Push switch in and seat into opening pressing against pedal. Once seated secure switch by turning it to the right approximately 45 degrees. This action turns the plunger shoe into the correct position to make contacts operate. |
| 1999 Volkswagen Jetta VR6 Carat 1.8 |
| Notes: 4-Pin Special care must be taken during installation to prevent damage and obtain proper electrical contact Prior to installation pull plunger to full extension, use and apply lubricant to plunger. Keep pedal in up position. Push switch in and seat into opening pressing against pedal. Once seated secure switch by turning it to the right approximately 45 degrees. This action turns the plunger shoe into the correct position to make contacts operate. |
| 1999 Volkswagen Jetta VR6 Carat 2.8 |
| Notes: 4-Pin Special care must be taken during installation to prevent damage and obtain proper electrical contact Prior to installation pull plunger to full extension, use and apply lubricant to plunger. Keep pedal in up position. Push switch in and seat into opening pressing against pedal. Once seated secure switch by turning it to the right approximately 45 degrees. This action turns the plunger shoe into the correct position to make contacts operate. |
| 1999 Volkswagen Jetta Wolfsburg Edition 2.0 |
| Notes: 4-Pin Special care must be taken during installation to prevent damage and obtain proper electrical contact Prior to installation pull plunger to full extension, use and apply lubricant to plunger. Keep pedal in up position. Push switch in and seat into opening pressing against pedal. Once seated secure switch by turning it to the right approximately 45 degrees. This action turns the plunger shoe into the correct position to make contacts operate. |
| 2000 Audi TT Base 1.8 |
| Notes: 4 Pin Connector |
| 2000 Audi TT Base 1.8 |
| Notes: 4-Pin Special care must be taken during installation to prevent damage and obtain proper electrical contact Prior to installation pull plunger to full extension, use and apply lubricant to plunger. Keep pedal in up position. Push switch in and seat into opening pressing against pedal. Once seated secure switch by turning it to the right approximately 45 degrees. This action turns the plunger shoe into the correct position to make contacts operate. |
| 2000 Audi TT Quattro Base 1.8 |
| Notes: 4 Pin Connector |
| 2000 Audi TT Quattro Base 1.8 |
| Notes: 4-Pin Special care must be taken during installation to prevent damage and obtain proper electrical contact Prior to installation pull plunger to full extension, use and apply lubricant to plunger. Keep pedal in up position. Push switch in and seat into opening pressing against pedal. Once seated secure switch by turning it to the right approximately 45 degrees. This action turns the plunger shoe into the correct position to make contacts operate. |
| 2000 Volkswagen EuroVan GLS 2.8 |
| Notes: 4 Pin Connector |
| 2000 Volkswagen EuroVan MV 2.8 |
| Notes: 4 Pin Connector |
| 2000 Volkswagen EuroVan VR6 2.8 |
| Notes: 4 Pin Connector |
| 2000 Volkswagen Golf Base 2.0 |
| Notes: 4-Pin Special care must be taken during installation to prevent damage and obtain proper electrical contact Prior to installation pull plunger to full extension, use and apply lubricant to plunger. Keep pedal in up position. Push switch in and seat into opening pressing against pedal. Once seated secure switch by turning it to the right approximately 45 degrees. This action turns the plunger shoe into the correct position to make contacts operate. |
| 2000 Volkswagen Golf Confort 2.0 |
| Notes: 4-Pin Special care must be taken during installation to prevent damage and obtain proper electrical contact Prior to installation pull plunger to full extension, use and apply lubricant to plunger. Keep pedal in up position. Push switch in and seat into opening pressing against pedal. Once seated secure switch by turning it to the right approximately 45 degrees. This action turns the plunger shoe into the correct position to make contacts operate. |
| 2000 Volkswagen Golf GL 1.9 |
| Notes: 4 Pin Connector |
| 2000 Volkswagen Golf GL 1.9 |
| Notes: 4-Pin Special care must be taken during installation to prevent damage and obtain proper electrical contact Prior to installation pull plunger to full extension, use and apply lubricant to plunger. Keep pedal in up position. Push switch in and seat into opening pressing against pedal. Once seated secure switch by turning it to the right approximately 45 degrees. This action turns the plunger shoe into the correct position to make contacts operate. |
| 2000 Volkswagen Golf GL 2.0 |
| Notes: 4 Pin Connector |
| 2000 Volkswagen Golf GL 2.0 |
| Notes: 4-Pin Special care must be taken during installation to prevent damage and obtain proper electrical contact Prior to installation pull plunger to full extension, use and apply lubricant to plunger. Keep pedal in up position. Push switch in and seat into opening pressing against pedal. Once seated secure switch by turning it to the right approximately 45 degrees. This action turns the plunger shoe into the correct position to make contacts operate. |
| 2000 Volkswagen Golf GLS 1.8 |
| Notes: 4 Pin Connector |
| 2000 Volkswagen Golf GLS 1.8 |
| Notes: 4-Pin Special care must be taken during installation to prevent damage and obtain proper electrical contact Prior to installation pull plunger to full extension, use and apply lubricant to plunger. Keep pedal in up position. Push switch in and seat into opening pressing against pedal. Once seated secure switch by turning it to the right approximately 45 degrees. This action turns the plunger shoe into the correct position to make contacts operate. |
| 2000 Volkswagen Golf GLS 1.9 |
| Notes: 4 Pin Connector |
| 2000 Volkswagen Golf GLS 1.9 |
| Notes: 4-Pin Special care must be taken during installation to prevent damage and obtain proper electrical contact Prior to installation pull plunger to full extension, use and apply lubricant to plunger. Keep pedal in up position. Push switch in and seat into opening pressing against pedal. Once seated secure switch by turning it to the right approximately 45 degrees. This action turns the plunger shoe into the correct position to make contacts operate. |
| 2000 Volkswagen Golf GLS 2.0 |
| Notes: 4 Pin Connector |
| 2000 Volkswagen Golf GLS 2.0 |
| Notes: 4-Pin Special care must be taken during installation to prevent damage and obtain proper electrical contact Prior to installation pull plunger to full extension, use and apply lubricant to plunger. Keep pedal in up position. Push switch in and seat into opening pressing against pedal. Once seated secure switch by turning it to the right approximately 45 degrees. This action turns the plunger shoe into the correct position to make contacts operate. |
| 2000 Volkswagen Golf GTI 2.0 |
| Notes: 4-Pin Special care must be taken during installation to prevent damage and obtain proper electrical contact Prior to installation pull plunger to full extension, use and apply lubricant to plunger. Keep pedal in up position. Push switch in and seat into opening pressing against pedal. Once seated secure switch by turning it to the right approximately 45 degrees. This action turns the plunger shoe into the correct position to make contacts operate. |
| 2000 Volkswagen Golf GTI GLS 1.8 |
| Notes: 4 Pin Connector |
| 2000 Volkswagen Golf GTI GLS 1.8 |
| Notes: 4-Pin Special care must be taken during installation to prevent damage and obtain proper electrical contact Prior to installation pull plunger to full extension, use and apply lubricant to plunger. Keep pedal in up position. Push switch in and seat into opening pressing against pedal. Once seated secure switch by turning it to the right approximately 45 degrees. This action turns the plunger shoe into the correct position to make contacts operate. |
| 2000 Volkswagen Golf GTI GLS 2.0 |
| Notes: 4 Pin Connector |
| 2000 Volkswagen Golf GTI GLS 2.0 |
| Notes: 4-Pin Special care must be taken during installation to prevent damage and obtain proper electrical contact Prior to installation pull plunger to full extension, use and apply lubricant to plunger. Keep pedal in up position. Push switch in and seat into opening pressing against pedal. Once seated secure switch by turning it to the right approximately 45 degrees. This action turns the plunger shoe into the correct position to make contacts operate. |
| 2000 Volkswagen Golf GTI GLX 2.8 |
| Notes: 4 Pin Connector |
| 2000 Volkswagen Golf GTI GLX 2.8 |
| Notes: 4-Pin Special care must be taken during installation to prevent damage and obtain proper electrical contact Prior to installation pull plunger to full extension, use and apply lubricant to plunger. Keep pedal in up position. Push switch in and seat into opening pressing against pedal. Once seated secure switch by turning it to the right approximately 45 degrees. This action turns the plunger shoe into the correct position to make contacts operate. |
| 2000 Volkswagen Golf Lujo 2.0 |
| Notes: 4-Pin Special care must be taken during installation to prevent damage and obtain proper electrical contact Prior to installation pull plunger to full extension, use and apply lubricant to plunger. Keep pedal in up position. Push switch in and seat into opening pressing against pedal. Once seated secure switch by turning it to the right approximately 45 degrees. This action turns the plunger shoe into the correct position to make contacts operate. |
| 2000 Volkswagen Golf Verano 2.0 |
| Notes: 4-Pin Special care must be taken during installation to prevent damage and obtain proper electrical contact Prior to installation pull plunger to full extension, use and apply lubricant to plunger. Keep pedal in up position. Push switch in and seat into opening pressing against pedal. Once seated secure switch by turning it to the right approximately 45 degrees. This action turns the plunger shoe into the correct position to make contacts operate. |
| 2000 Volkswagen Jetta GL 2.0 |
| Notes: 4-Pin Special care must be taken during installation to prevent damage and obtain proper electrical contact Prior to installation pull plunger to full extension, use and apply lubricant to plunger. Keep pedal in up position. Push switch in and seat into opening pressing against pedal. Once seated secure switch by turning it to the right approximately 45 degrees. This action turns the plunger shoe into the correct position to make contacts operate. |
| 2000 Volkswagen Jetta GL Confort 2.0 |
| Notes: 4-Pin Special care must be taken during installation to prevent damage and obtain proper electrical contact Prior to installation pull plunger to full extension, use and apply lubricant to plunger. Keep pedal in up position. Push switch in and seat into opening pressing against pedal. Once seated secure switch by turning it to the right approximately 45 degrees. This action turns the plunger shoe into the correct position to make contacts operate. |
| 2000 Volkswagen Jetta GLS 1.8 |
| Notes: 4-Pin Special care must be taken during installation to prevent damage and obtain proper electrical contact Prior to installation pull plunger to full extension, use and apply lubricant to plunger. Keep pedal in up position. Push switch in and seat into opening pressing against pedal. Once seated secure switch by turning it to the right approximately 45 degrees. This action turns the plunger shoe into the correct position to make contacts operate. |
| 2000 Volkswagen Jetta GLS 2.0 |
| Notes: 4-Pin Special care must be taken during installation to prevent damage and obtain proper electrical contact Prior to installation pull plunger to full extension, use and apply lubricant to plunger. Keep pedal in up position. Push switch in and seat into opening pressing against pedal. Once seated secure switch by turning it to the right approximately 45 degrees. This action turns the plunger shoe into the correct position to make contacts operate. |
| 2000 Volkswagen Jetta GLS 2.8 |
| Notes: 4-Pin Special care must be taken during installation to prevent damage and obtain proper electrical contact Prior to installation pull plunger to full extension, use and apply lubricant to plunger. Keep pedal in up position. Push switch in and seat into opening pressing against pedal. Once seated secure switch by turning it to the right approximately 45 degrees. This action turns the plunger shoe into the correct position to make contacts operate. |
| 2000 Volkswagen Jetta GLS Turbo 1.8 |
| Notes: 4-Pin Special care must be taken during installation to prevent damage and obtain proper electrical contact Prior to installation pull plunger to full extension, use and apply lubricant to plunger. Keep pedal in up position. Push switch in and seat into opening pressing against pedal. Once seated secure switch by turning it to the right approximately 45 degrees. This action turns the plunger shoe into the correct position to make contacts operate. |
| 2000 Volkswagen Jetta GLS VR6 2.8 |
| Notes: 4-Pin Special care must be taken during installation to prevent damage and obtain proper electrical contact Prior to installation pull plunger to full extension, use and apply lubricant to plunger. Keep pedal in up position. Push switch in and seat into opening pressing against pedal. Once seated secure switch by turning it to the right approximately 45 degrees. This action turns the plunger shoe into the correct position to make contacts operate. |
| 2000 Volkswagen Jetta GLX 2.8 |
| Notes: 4-Pin Special care must be taken during installation to prevent damage and obtain proper electrical contact Prior to installation pull plunger to full extension, use and apply lubricant to plunger. Keep pedal in up position. Push switch in and seat into opening pressing against pedal. Once seated secure switch by turning it to the right approximately 45 degrees. This action turns the plunger shoe into the correct position to make contacts operate. |
| 2000 Volkswagen Jetta GLX VR6 2.8 |
| Notes: 4-Pin Special care must be taken during installation to prevent damage and obtain proper electrical contact Prior to installation pull plunger to full extension, use and apply lubricant to plunger. Keep pedal in up position. Push switch in and seat into opening pressing against pedal. Once seated secure switch by turning it to the right approximately 45 degrees. This action turns the plunger shoe into the correct position to make contacts operate. |
| 2000 Volkswagen Jetta TDI 1.9 |
| Notes: 4-Pin Special care must be taken during installation to prevent damage and obtain proper electrical contact Prior to installation pull plunger to full extension, use and apply lubricant to plunger. Keep pedal in up position. Push switch in and seat into opening pressing against pedal. Once seated secure switch by turning it to the right approximately 45 degrees. This action turns the plunger shoe into the correct position to make contacts operate. |
| 2001 Audi TT Base 1.8 |
| Notes: 4 Pin Connector |
| 2001 Audi TT Base 1.8 |
| Notes: 4-Pin Special care must be taken during installation to prevent damage and obtain proper electrical contact Prior to installation pull plunger to full extension, use and apply lubricant to plunger. Keep pedal in up position. Push switch in and seat into opening pressing against pedal. Once seated secure switch by turning it to the right approximately 45 degrees. This action turns the plunger shoe into the correct position to make contacts operate. |
| 2001 Audi TT Quattro Base 1.8 |
| Notes: 4 Pin Connector |
| 2001 Audi TT Quattro Base 1.8 |
| Notes: 4-Pin Special care must be taken during installation to prevent damage and obtain proper electrical contact Prior to installation pull plunger to full extension, use and apply lubricant to plunger. Keep pedal in up position. Push switch in and seat into opening pressing against pedal. Once seated secure switch by turning it to the right approximately 45 degrees. This action turns the plunger shoe into the correct position to make contacts operate. |
| 2001 Volkswagen Beetle GL 1.8 |
| Notes: 4 Pin Connector Chassis Range: From # 1C-1-430001 |
| 2001 Volkswagen Beetle GL 1.8 |
| Notes: 4-Pin Special care must be taken during installation to prevent damage and obtain proper electrical contact Prior to installation pull plunger to full extension, use and apply lubricant to plunger. Keep pedal in up position. Push switch in and seat into opening pressing against pedal. Once seated secure switch by turning it to the right approximately 45 degrees. This action turns the plunger shoe into the correct position to make contacts operate. |
| 2001 Volkswagen Beetle GL 1.9 |
| Notes: 4 Pin Connector Chassis Range: From # 1C-1-430001 |
| 2001 Volkswagen Beetle GL 1.9 |
| Notes: 4-Pin Special care must be taken during installation to prevent damage and obtain proper electrical contact Prior to installation pull plunger to full extension, use and apply lubricant to plunger. Keep pedal in up position. Push switch in and seat into opening pressing against pedal. Once seated secure switch by turning it to the right approximately 45 degrees. This action turns the plunger shoe into the correct position to make contacts operate. |
| 2001 Volkswagen Beetle GL 2.0 |
| Notes: 4 Pin Connector Chassis Range: From # 1C-1-430001 |
| 2001 Volkswagen Beetle GL 2.0 |
| Notes: 4-Pin Special care must be taken during installation to prevent damage and obtain proper electrical contact Prior to installation pull plunger to full extension, use and apply lubricant to plunger. Keep pedal in up position. Push switch in and seat into opening pressing against pedal. Once seated secure switch by turning it to the right approximately 45 degrees. This action turns the plunger shoe into the correct position to make contacts operate. |
| 2001 Volkswagen Beetle GLS 1.8 |
| Notes: 4 Pin Connector Chassis Range: From # 1C-1-430001 |
| 2001 Volkswagen Beetle GLS 1.8 |
| Notes: 4-Pin Special care must be taken during installation to prevent damage and obtain proper electrical contact Prior to installation pull plunger to full extension, use and apply lubricant to plunger. Keep pedal in up position. Push switch in and seat into opening pressing against pedal. Once seated secure switch by turning it to the right approximately 45 degrees. This action turns the plunger shoe into the correct position to make contacts operate. |
| 2001 Volkswagen Beetle GLS 1.9 |
| Notes: 4 Pin Connector Chassis Range: From # 1C-1-430001 |
| 2001 Volkswagen Beetle GLS 1.9 |
| Notes: 4-Pin Special care must be taken during installation to prevent damage and obtain proper electrical contact Prior to installation pull plunger to full extension, use and apply lubricant to plunger. Keep pedal in up position. Push switch in and seat into opening pressing against pedal. Once seated secure switch by turning it to the right approximately 45 degrees. This action turns the plunger shoe into the correct position to make contacts operate. |
| 2001 Volkswagen Beetle GLS 2.0 |
| Notes: 4 Pin Connector Chassis Range: From # 1C-1-430001 |
| 2001 Volkswagen Beetle GLS 2.0 |
| Notes: 4-Pin Special care must be taken during installation to prevent damage and obtain proper electrical contact Prior to installation pull plunger to full extension, use and apply lubricant to plunger. Keep pedal in up position. Push switch in and seat into opening pressing against pedal. Once seated secure switch by turning it to the right approximately 45 degrees. This action turns the plunger shoe into the correct position to make contacts operate. |
| 2001 Volkswagen Beetle GLS Turbo 1.8 |
| Notes: 4 Pin Connector Chassis Range: From # 1C-1-430001 |
| 2001 Volkswagen Beetle GLS Turbo 1.8 |
| Notes: 4-Pin Special care must be taken during installation to prevent damage and obtain proper electrical contact Prior to installation pull plunger to full extension, use and apply lubricant to plunger. Keep pedal in up position. Push switch in and seat into opening pressing against pedal. Once seated secure switch by turning it to the right approximately 45 degrees. This action turns the plunger shoe into the correct position to make contacts operate. |
| 2001 Volkswagen Beetle GLX 1.8 |
| Notes: 4 Pin Connector Chassis Range: From # 1C-1-430001 |
| 2001 Volkswagen Beetle GLX 1.8 |
| Notes: 4-Pin Special care must be taken during installation to prevent damage and obtain proper electrical contact Prior to installation pull plunger to full extension, use and apply lubricant to plunger. Keep pedal in up position. Push switch in and seat into opening pressing against pedal. Once seated secure switch by turning it to the right approximately 45 degrees. This action turns the plunger shoe into the correct position to make contacts operate. |
| 2001 Volkswagen Beetle GLX Sport Turbo 1.8 |
| Notes: 4 Pin Connector Chassis Range: From # 1C-1-430001 |
| 2001 Volkswagen Beetle GLX Sport Turbo 1.8 |
| Notes: 4-Pin Special care must be taken during installation to prevent damage and obtain proper electrical contact Prior to installation pull plunger to full extension, use and apply lubricant to plunger. Keep pedal in up position. Push switch in and seat into opening pressing against pedal. Once seated secure switch by turning it to the right approximately 45 degrees. This action turns the plunger shoe into the correct position to make contacts operate. |
| 2001 Volkswagen Beetle GLX Turbo 1.8 |
| Notes: 4 Pin Connector Chassis Range: From # 1C-1-430001 |
| 2001 Volkswagen Beetle GLX Turbo 1.8 |
| Notes: 4-Pin Special care must be taken during installation to prevent damage and obtain proper electrical contact Prior to installation pull plunger to full extension, use and apply lubricant to plunger. Keep pedal in up position. Push switch in and seat into opening pressing against pedal. Once seated secure switch by turning it to the right approximately 45 degrees. This action turns the plunger shoe into the correct position to make contacts operate. |
| 2001 Volkswagen Beetle Sport 1.8 |
| Notes: 4 Pin Connector Chassis Range: From # 1C-1-430001 |
| 2001 Volkswagen Beetle Sport 1.8 |
| Notes: 4-Pin Special care must be taken during installation to prevent damage and obtain proper electrical contact Prior to installation pull plunger to full extension, use and apply lubricant to plunger. Keep pedal in up position. Push switch in and seat into opening pressing against pedal. Once seated secure switch by turning it to the right approximately 45 degrees. This action turns the plunger shoe into the correct position to make contacts operate. |
| 2001 Volkswagen Beetle Sport 1.9 |
| Notes: 4 Pin Connector Chassis Range: From # 1C-1-430001 |
| 2001 Volkswagen Beetle Sport 1.9 |
| Notes: 4-Pin Special care must be taken during installation to prevent damage and obtain proper electrical contact Prior to installation pull plunger to full extension, use and apply lubricant to plunger. Keep pedal in up position. Push switch in and seat into opening pressing against pedal. Once seated secure switch by turning it to the right approximately 45 degrees. This action turns the plunger shoe into the correct position to make contacts operate. |
| 2001 Volkswagen Beetle Sport 2.0 |
| Notes: 4 Pin Connector Chassis Range: From # 1C-1-430001 |
| 2001 Volkswagen Beetle Sport 2.0 |
| Notes: 4-Pin Special care must be taken during installation to prevent damage and obtain proper electrical contact Prior to installation pull plunger to full extension, use and apply lubricant to plunger. Keep pedal in up position. Push switch in and seat into opening pressing against pedal. Once seated secure switch by turning it to the right approximately 45 degrees. This action turns the plunger shoe into the correct position to make contacts operate. |
| 2001 Volkswagen EuroVan Base 2.5 |
| Notes: 4 Pin Connector |
| 2001 Volkswagen EuroVan GLS 2.8 |
| Notes: 4 Pin Connector |
| 2001 Volkswagen EuroVan MV 2.8 |
| Notes: 4 Pin Connector |
| 2001 Volkswagen Golf Base 2.0 |
| Notes: 4-Pin Special care must be taken during installation to prevent damage and obtain proper electrical contact Prior to installation pull plunger to full extension, use and apply lubricant to plunger. Keep pedal in up position. Push switch in and seat into opening pressing against pedal. Once seated secure switch by turning it to the right approximately 45 degrees. This action turns the plunger shoe into the correct position to make contacts operate. |
| 2001 Volkswagen Golf Confort 2.0 |
| Notes: 4-Pin Special care must be taken during installation to prevent damage and obtain proper electrical contact Prior to installation pull plunger to full extension, use and apply lubricant to plunger. Keep pedal in up position. Push switch in and seat into opening pressing against pedal. Once seated secure switch by turning it to the right approximately 45 degrees. This action turns the plunger shoe into the correct position to make contacts operate. |
| 2001 Volkswagen Golf GL 1.9 |
| Notes: 4 Pin Connector |
| 2001 Volkswagen Golf GL 1.9 |
| Notes: 4-Pin Special care must be taken during installation to prevent damage and obtain proper electrical contact Prior to installation pull plunger to full extension, use and apply lubricant to plunger. Keep pedal in up position. Push switch in and seat into opening pressing against pedal. Once seated secure switch by turning it to the right approximately 45 degrees. This action turns the plunger shoe into the correct position to make contacts operate. |
| 2001 Volkswagen Golf GL 2.0 |
| Notes: 4 Pin Connector |
| 2001 Volkswagen Golf GL 2.0 |
| Notes: 4-Pin Special care must be taken during installation to prevent damage and obtain proper electrical contact Prior to installation pull plunger to full extension, use and apply lubricant to plunger. Keep pedal in up position. Push switch in and seat into opening pressing against pedal. Once seated secure switch by turning it to the right approximately 45 degrees. This action turns the plunger shoe into the correct position to make contacts operate. |
| 2001 Volkswagen Golf GLS 1.8 |
| Notes: 4 Pin Connector |
| 2001 Volkswagen Golf GLS 1.8 |
| Notes: 4-Pin Special care must be taken during installation to prevent damage and obtain proper electrical contact Prior to installation pull plunger to full extension, use and apply lubricant to plunger. Keep pedal in up position. Push switch in and seat into opening pressing against pedal. Once seated secure switch by turning it to the right approximately 45 degrees. This action turns the plunger shoe into the correct position to make contacts operate. |
| 2001 Volkswagen Golf GLS 1.9 |
| Notes: 4 Pin Connector |
| 2001 Volkswagen Golf GLS 1.9 |
| Notes: 4-Pin Special care must be taken during installation to prevent damage and obtain proper electrical contact Prior to installation pull plunger to full extension, use and apply lubricant to plunger. Keep pedal in up position. Push switch in and seat into opening pressing against pedal. Once seated secure switch by turning it to the right approximately 45 degrees. This action turns the plunger shoe into the correct position to make contacts operate. |
| 2001 Volkswagen Golf GLS 2.0 |
| Notes: 4 Pin Connector |
| 2001 Volkswagen Golf GLS 2.0 |
| Notes: 4-Pin Special care must be taken during installation to prevent damage and obtain proper electrical contact Prior to installation pull plunger to full extension, use and apply lubricant to plunger. Keep pedal in up position. Push switch in and seat into opening pressing against pedal. Once seated secure switch by turning it to the right approximately 45 degrees. This action turns the plunger shoe into the correct position to make contacts operate. |
| 2001 Volkswagen Golf GTI 2.0 |
| Notes: 4-Pin Special care must be taken during installation to prevent damage and obtain proper electrical contact Prior to installation pull plunger to full extension, use and apply lubricant to plunger. Keep pedal in up position. Push switch in and seat into opening pressing against pedal. Once seated secure switch by turning it to the right approximately 45 degrees. This action turns the plunger shoe into the correct position to make contacts operate. |
| 2001 Volkswagen Golf GTI GLS 1.8 |
| Notes: 4 Pin Connector |
| 2001 Volkswagen Golf GTI GLS 1.8 |
| Notes: 4-Pin Special care must be taken during installation to prevent damage and obtain proper electrical contact Prior to installation pull plunger to full extension, use and apply lubricant to plunger. Keep pedal in up position. Push switch in and seat into opening pressing against pedal. Once seated secure switch by turning it to the right approximately 45 degrees. This action turns the plunger shoe into the correct position to make contacts operate. |
| 2001 Volkswagen Golf GTI GLX 2.8 |
| Notes: 4 Pin Connector |
| 2001 Volkswagen Golf GTI GLX 2.8 |
| Notes: 4-Pin Special care must be taken during installation to prevent damage and obtain proper electrical contact Prior to installation pull plunger to full extension, use and apply lubricant to plunger. Keep pedal in up position. Push switch in and seat into opening pressing against pedal. Once seated secure switch by turning it to the right approximately 45 degrees. This action turns the plunger shoe into the correct position to make contacts operate. |
| 2001 Volkswagen Golf GTI Turbo 1.8 |
| Notes: 4-Pin Special care must be taken during installation to prevent damage and obtain proper electrical contact Prior to installation pull plunger to full extension, use and apply lubricant to plunger. Keep pedal in up position. Push switch in and seat into opening pressing against pedal. Once seated secure switch by turning it to the right approximately 45 degrees. This action turns the plunger shoe into the correct position to make contacts operate. |
| 2001 Volkswagen Golf Lujo 2.0 |
| Notes: 4-Pin Special care must be taken during installation to prevent damage and obtain proper electrical contact Prior to installation pull plunger to full extension, use and apply lubricant to plunger. Keep pedal in up position. Push switch in and seat into opening pressing against pedal. Once seated secure switch by turning it to the right approximately 45 degrees. This action turns the plunger shoe into the correct position to make contacts operate. |
| 2001 Volkswagen Golf Verano 2.0 |
| Notes: 4-Pin Special care must be taken during installation to prevent damage and obtain proper electrical contact Prior to installation pull plunger to full extension, use and apply lubricant to plunger. Keep pedal in up position. Push switch in and seat into opening pressing against pedal. Once seated secure switch by turning it to the right approximately 45 degrees. This action turns the plunger shoe into the correct position to make contacts operate. |
| 2001 Volkswagen Jetta GL 2.0 |
| Notes: 4 Pin Connector Chassis Range: From # 9M-1-075841 |
| 2001 Volkswagen Jetta GL 2.0 |
| Notes: 4-Pin Special care must be taken during installation to prevent damage and obtain proper electrical contact Prior to installation pull plunger to full extension, use and apply lubricant to plunger. Keep pedal in up position. Push switch in and seat into opening pressing against pedal. Once seated secure switch by turning it to the right approximately 45 degrees. This action turns the plunger shoe into the correct position to make contacts operate. |
| 2001 Volkswagen Jetta GL Confort 2.0 |
| Notes: 4-Pin Special care must be taken during installation to prevent damage and obtain proper electrical contact Prior to installation pull plunger to full extension, use and apply lubricant to plunger. Keep pedal in up position. Push switch in and seat into opening pressing against pedal. Once seated secure switch by turning it to the right approximately 45 degrees. This action turns the plunger shoe into the correct position to make contacts operate. |
| 2001 Volkswagen Jetta GL Variant 2.0 |
| Notes: 4-Pin Special care must be taken during installation to prevent damage and obtain proper electrical contact Prior to installation pull plunger to full extension, use and apply lubricant to plunger. Keep pedal in up position. Push switch in and seat into opening pressing against pedal. Once seated secure switch by turning it to the right approximately 45 degrees. This action turns the plunger shoe into the correct position to make contacts operate. |
| 2001 Volkswagen Jetta GLS 1.8 |
| Notes: 4 Pin Connector Chassis Range: From # 9M-1-075841 |
| 2001 Volkswagen Jetta GLS 1.8 |
| Notes: 4-Pin Special care must be taken during installation to prevent damage and obtain proper electrical contact Prior to installation pull plunger to full extension, use and apply lubricant to plunger. Keep pedal in up position. Push switch in and seat into opening pressing against pedal. Once seated secure switch by turning it to the right approximately 45 degrees. This action turns the plunger shoe into the correct position to make contacts operate. |
| 2001 Volkswagen Jetta GLS 2.0 |
| Notes: 4 Pin Connector Chassis Range: From # 9M-1-075841 |
| 2001 Volkswagen Jetta GLS 2.0 |
| Notes: 4-Pin Special care must be taken during installation to prevent damage and obtain proper electrical contact Prior to installation pull plunger to full extension, use and apply lubricant to plunger. Keep pedal in up position. Push switch in and seat into opening pressing against pedal. Once seated secure switch by turning it to the right approximately 45 degrees. This action turns the plunger shoe into the correct position to make contacts operate. |
| 2001 Volkswagen Jetta GLS 2.8 |
| Notes: 4 Pin Connector |
| 2001 Volkswagen Jetta GLS 2.8 |
| Notes: 4 Pin Connector Chassis Range: From # 9M-1-075841 |
| 2001 Volkswagen Jetta GLS 2.8 |
| Notes: 4-Pin Special care must be taken during installation to prevent damage and obtain proper electrical contact Prior to installation pull plunger to full extension, use and apply lubricant to plunger. Keep pedal in up position. Push switch in and seat into opening pressing against pedal. Once seated secure switch by turning it to the right approximately 45 degrees. This action turns the plunger shoe into the correct position to make contacts operate. |
| 2001 Volkswagen Jetta GLS Turbo 1.8 |
| Notes: 4-Pin Special care must be taken during installation to prevent damage and obtain proper electrical contact Prior to installation pull plunger to full extension, use and apply lubricant to plunger. Keep pedal in up position. Push switch in and seat into opening pressing against pedal. Once seated secure switch by turning it to the right approximately 45 degrees. This action turns the plunger shoe into the correct position to make contacts operate. |
| 2001 Volkswagen Jetta GLS Variant 2.0 |
| Notes: 4-Pin Special care must be taken during installation to prevent damage and obtain proper electrical contact Prior to installation pull plunger to full extension, use and apply lubricant to plunger. Keep pedal in up position. Push switch in and seat into opening pressing against pedal. Once seated secure switch by turning it to the right approximately 45 degrees. This action turns the plunger shoe into the correct position to make contacts operate. |
| 2001 Volkswagen Jetta GLS Wolfsburg 2.0 |
| Notes: 4-Pin Special care must be taken during installation to prevent damage and obtain proper electrical contact Prior to installation pull plunger to full extension, use and apply lubricant to plunger. Keep pedal in up position. Push switch in and seat into opening pressing against pedal. Once seated secure switch by turning it to the right approximately 45 degrees. This action turns the plunger shoe into the correct position to make contacts operate. |
| 2001 Volkswagen Jetta GLX 2.8 |
| Notes: 4 Pin Connector |
| 2001 Volkswagen Jetta GLX 2.8 |
| Notes: 4-Pin Special care must be taken during installation to prevent damage and obtain proper electrical contact Prior to installation pull plunger to full extension, use and apply lubricant to plunger. Keep pedal in up position. Push switch in and seat into opening pressing against pedal. Once seated secure switch by turning it to the right approximately 45 degrees. This action turns the plunger shoe into the correct position to make contacts operate. |
| 2001 Volkswagen Jetta GLX VR6 2.8 |
| Notes: 4-Pin Special care must be taken during installation to prevent damage and obtain proper electrical contact Prior to installation pull plunger to full extension, use and apply lubricant to plunger. Keep pedal in up position. Push switch in and seat into opening pressing against pedal. Once seated secure switch by turning it to the right approximately 45 degrees. This action turns the plunger shoe into the correct position to make contacts operate. |
| 2001 Volkswagen Jetta TDI 1.9 |
| Notes: 4 Pin Connector Chassis Range: From # 9M-1-075841 |
| 2001 Volkswagen Jetta TDI 1.9 |
| Notes: 4-Pin Special care must be taken during installation to prevent damage and obtain proper electrical contact Prior to installation pull plunger to full extension, use and apply lubricant to plunger. Keep pedal in up position. Push switch in and seat into opening pressing against pedal. Once seated secure switch by turning it to the right approximately 45 degrees. This action turns the plunger shoe into the correct position to make contacts operate. |
| 2001 Volkswagen Jetta Wolfsburg Edition 1.8 |
| Notes: 4 Pin Connector Chassis Range: From # 9M-1-075841 |
| 2001 Volkswagen Jetta Wolfsburg Edition 1.8 |
| Notes: 4-Pin Special care must be taken during installation to prevent damage and obtain proper electrical contact Prior to installation pull plunger to full extension, use and apply lubricant to plunger. Keep pedal in up position. Push switch in and seat into opening pressing against pedal. Once seated secure switch by turning it to the right approximately 45 degrees. This action turns the plunger shoe into the correct position to make contacts operate. |
| 2002 Audi TT Base 1.8 |
| Notes: 4 Pin Connector |
| 2002 Audi TT Base 1.8 |
| Notes: 4-Pin Special care must be taken during installation to prevent damage and obtain proper electrical contact Prior to installation pull plunger to full extension, use and apply lubricant to plunger. Keep pedal in up position. Push switch in and seat into opening pressing against pedal. Once seated secure switch by turning it to the right approximately 45 degrees. This action turns the plunger shoe into the correct position to make contacts operate. |
| 2002 Audi TT Quattro ALMS Edition 1.8 |
| Notes: 4 Pin Connector |
| 2002 Audi TT Quattro ALMS Edition 1.8 |
| Notes: 4-Pin Special care must be taken during installation to prevent damage and obtain proper electrical contact Prior to installation pull plunger to full extension, use and apply lubricant to plunger. Keep pedal in up position. Push switch in and seat into opening pressing against pedal. Once seated secure switch by turning it to the right approximately 45 degrees. This action turns the plunger shoe into the correct position to make contacts operate. |
| 2002 Audi TT Quattro Base 1.8 |
| Notes: 4 Pin Connector |
| 2002 Audi TT Quattro Base 1.8 |
| Notes: 4-Pin Special care must be taken during installation to prevent damage and obtain proper electrical contact Prior to installation pull plunger to full extension, use and apply lubricant to plunger. Keep pedal in up position. Push switch in and seat into opening pressing against pedal. Once seated secure switch by turning it to the right approximately 45 degrees. This action turns the plunger shoe into the correct position to make contacts operate. |
| 2002 Volkswagen Beetle GL 1.8 |
| Notes: 4 Pin Connector |
| 2002 Volkswagen Beetle GL 1.8 |
| Notes: 4-Pin Special care must be taken during installation to prevent damage and obtain proper electrical contact Prior to installation pull plunger to full extension, use and apply lubricant to plunger. Keep pedal in up position. Push switch in and seat into opening pressing against pedal. Once seated secure switch by turning it to the right approximately 45 degrees. This action turns the plunger shoe into the correct position to make contacts operate. |
| 2002 Volkswagen Beetle GL 1.9 |
| Notes: 4 Pin Connector |
| 2002 Volkswagen Beetle GL 1.9 |
| Notes: 4-Pin Special care must be taken during installation to prevent damage and obtain proper electrical contact Prior to installation pull plunger to full extension, use and apply lubricant to plunger. Keep pedal in up position. Push switch in and seat into opening pressing against pedal. Once seated secure switch by turning it to the right approximately 45 degrees. This action turns the plunger shoe into the correct position to make contacts operate. |
| 2002 Volkswagen Beetle GL 2.0 |
| Notes: 4 Pin Connector |
| 2002 Volkswagen Beetle GL 2.0 |
| Notes: 4-Pin Special care must be taken during installation to prevent damage and obtain proper electrical contact Prior to installation pull plunger to full extension, use and apply lubricant to plunger. Keep pedal in up position. Push switch in and seat into opening pressing against pedal. Once seated secure switch by turning it to the right approximately 45 degrees. This action turns the plunger shoe into the correct position to make contacts operate. |
| 2002 Volkswagen Beetle GLS 1.8 |
| Notes: 4 Pin Connector |
| 2002 Volkswagen Beetle GLS 1.8 |
| Notes: 4-Pin Special care must be taken during installation to prevent damage and obtain proper electrical contact Prior to installation pull plunger to full extension, use and apply lubricant to plunger. Keep pedal in up position. Push switch in and seat into opening pressing against pedal. Once seated secure switch by turning it to the right approximately 45 degrees. This action turns the plunger shoe into the correct position to make contacts operate. |
| 2002 Volkswagen Beetle GLS 1.9 |
| Notes: 4 Pin Connector |
| 2002 Volkswagen Beetle GLS 1.9 |
| Notes: 4-Pin Special care must be taken during installation to prevent damage and obtain proper electrical contact Prior to installation pull plunger to full extension, use and apply lubricant to plunger. Keep pedal in up position. Push switch in and seat into opening pressing against pedal. Once seated secure switch by turning it to the right approximately 45 degrees. This action turns the plunger shoe into the correct position to make contacts operate. |
| 2002 Volkswagen Beetle GLS 2.0 |
| Notes: 4 Pin Connector |
| 2002 Volkswagen Beetle GLS 2.0 |
| Notes: 4-Pin Special care must be taken during installation to prevent damage and obtain proper electrical contact Prior to installation pull plunger to full extension, use and apply lubricant to plunger. Keep pedal in up position. Push switch in and seat into opening pressing against pedal. Once seated secure switch by turning it to the right approximately 45 degrees. This action turns the plunger shoe into the correct position to make contacts operate. |
| 2002 Volkswagen Beetle GLS Sport Turbo 1.8 |
| Notes: 4 Pin Connector |
| 2002 Volkswagen Beetle GLS Sport Turbo 1.8 |
| Notes: 4-Pin Special care must be taken during installation to prevent damage and obtain proper electrical contact Prior to installation pull plunger to full extension, use and apply lubricant to plunger. Keep pedal in up position. Push switch in and seat into opening pressing against pedal. Once seated secure switch by turning it to the right approximately 45 degrees. This action turns the plunger shoe into the correct position to make contacts operate. |
| 2002 Volkswagen Beetle GLX 1.8 |
| Notes: 4 Pin Connector |
| 2002 Volkswagen Beetle GLX 1.8 |
| Notes: 4-Pin Special care must be taken during installation to prevent damage and obtain proper electrical contact Prior to installation pull plunger to full extension, use and apply lubricant to plunger. Keep pedal in up position. Push switch in and seat into opening pressing against pedal. Once seated secure switch by turning it to the right approximately 45 degrees. This action turns the plunger shoe into the correct position to make contacts operate. |
| 2002 Volkswagen Beetle GLX Sport Turbo 1.8 |
| Notes: 4 Pin Connector |
| 2002 Volkswagen Beetle GLX Sport Turbo 1.8 |
| Notes: 4-Pin Special care must be taken during installation to prevent damage and obtain proper electrical contact Prior to installation pull plunger to full extension, use and apply lubricant to plunger. Keep pedal in up position. Push switch in and seat into opening pressing against pedal. Once seated secure switch by turning it to the right approximately 45 degrees. This action turns the plunger shoe into the correct position to make contacts operate. |
| 2002 Volkswagen Beetle Sport 1.8 |
| Notes: 4 Pin Connector |
| 2002 Volkswagen Beetle Sport 1.8 |
| Notes: 4-Pin Special care must be taken during installation to prevent damage and obtain proper electrical contact Prior to installation pull plunger to full extension, use and apply lubricant to plunger. Keep pedal in up position. Push switch in and seat into opening pressing against pedal. Once seated secure switch by turning it to the right approximately 45 degrees. This action turns the plunger shoe into the correct position to make contacts operate. |
| 2002 Volkswagen Beetle Sport 1.9 |
| Notes: 4 Pin Connector |
| 2002 Volkswagen Beetle Sport 1.9 |
| Notes: 4-Pin Special care must be taken during installation to prevent damage and obtain proper electrical contact Prior to installation pull plunger to full extension, use and apply lubricant to plunger. Keep pedal in up position. Push switch in and seat into opening pressing against pedal. Once seated secure switch by turning it to the right approximately 45 degrees. This action turns the plunger shoe into the correct position to make contacts operate. |
| 2002 Volkswagen Beetle Sport 2.0 |
| Notes: 4 Pin Connector |
| 2002 Volkswagen Beetle Sport 2.0 |
| Notes: 4-Pin Special care must be taken during installation to prevent damage and obtain proper electrical contact Prior to installation pull plunger to full extension, use and apply lubricant to plunger. Keep pedal in up position. Push switch in and seat into opening pressing against pedal. Once seated secure switch by turning it to the right approximately 45 degrees. This action turns the plunger shoe into the correct position to make contacts operate. |
| 2002 Volkswagen Beetle Turbo S 1.8 |
| Notes: 4 Pin Connector |
| 2002 Volkswagen Beetle Turbo S 1.8 |
| Notes: 4-Pin Special care must be taken during installation to prevent damage and obtain proper electrical contact Prior to installation pull plunger to full extension, use and apply lubricant to plunger. Keep pedal in up position. Push switch in and seat into opening pressing against pedal. Once seated secure switch by turning it to the right approximately 45 degrees. This action turns the plunger shoe into the correct position to make contacts operate. |
| 2002 Volkswagen EuroVan Base 2.5 |
| Notes: 4 Pin Connector |
| 2002 Volkswagen EuroVan GLS 2.8 |
| Notes: 4 Pin Connector |
| 2002 Volkswagen EuroVan MV 2.8 |
| Notes: 4 Pin Connector |
| 2002 Volkswagen Golf Base 2.0 |
| Notes: 4-Pin Special care must be taken during installation to prevent damage and obtain proper electrical contact Prior to installation pull plunger to full extension, use and apply lubricant to plunger. Keep pedal in up position. Push switch in and seat into opening pressing against pedal. Once seated secure switch by turning it to the right approximately 45 degrees. This action turns the plunger shoe into the correct position to make contacts operate. |
| 2002 Volkswagen Golf Confort 2.0 |
| Notes: 4-Pin Special care must be taken during installation to prevent damage and obtain proper electrical contact Prior to installation pull plunger to full extension, use and apply lubricant to plunger. Keep pedal in up position. Push switch in and seat into opening pressing against pedal. Once seated secure switch by turning it to the right approximately 45 degrees. This action turns the plunger shoe into the correct position to make contacts operate. |
| 2002 Volkswagen Golf GL 1.9 |
| Notes: 4 Pin Connector |
| 2002 Volkswagen Golf GL 1.9 |
| Notes: 4-Pin Special care must be taken during installation to prevent damage and obtain proper electrical contact Prior to installation pull plunger to full extension, use and apply lubricant to plunger. Keep pedal in up position. Push switch in and seat into opening pressing against pedal. Once seated secure switch by turning it to the right approximately 45 degrees. This action turns the plunger shoe into the correct position to make contacts operate. |
| 2002 Volkswagen Golf GL 2.0 |
| Notes: 4 Pin Connector |
| 2002 Volkswagen Golf GL 2.0 |
| Notes: 4-Pin Special care must be taken during installation to prevent damage and obtain proper electrical contact Prior to installation pull plunger to full extension, use and apply lubricant to plunger. Keep pedal in up position. Push switch in and seat into opening pressing against pedal. Once seated secure switch by turning it to the right approximately 45 degrees. This action turns the plunger shoe into the correct position to make contacts operate. |
| 2002 Volkswagen Golf GLS 1.9 |
| Notes: 4 Pin Connector |
| 2002 Volkswagen Golf GLS 1.9 |
| Notes: 4-Pin Special care must be taken during installation to prevent damage and obtain proper electrical contact Prior to installation pull plunger to full extension, use and apply lubricant to plunger. Keep pedal in up position. Push switch in and seat into opening pressing against pedal. Once seated secure switch by turning it to the right approximately 45 degrees. This action turns the plunger shoe into the correct position to make contacts operate. |
| 2002 Volkswagen Golf GLS 2.0 |
| Notes: 4 Pin Connector |
| 2002 Volkswagen Golf GLS 2.0 |
| Notes: 4-Pin Special care must be taken during installation to prevent damage and obtain proper electrical contact Prior to installation pull plunger to full extension, use and apply lubricant to plunger. Keep pedal in up position. Push switch in and seat into opening pressing against pedal. Once seated secure switch by turning it to the right approximately 45 degrees. This action turns the plunger shoe into the correct position to make contacts operate. |
| 2002 Volkswagen Golf GTI 2.0 |
| Notes: 4-Pin Special care must be taken during installation to prevent damage and obtain proper electrical contact Prior to installation pull plunger to full extension, use and apply lubricant to plunger. Keep pedal in up position. Push switch in and seat into opening pressing against pedal. Once seated secure switch by turning it to the right approximately 45 degrees. This action turns the plunger shoe into the correct position to make contacts operate. |
| 2002 Volkswagen Golf GTI 1.8T 1.8 |
| Notes: 4 Pin Connector |
| 2002 Volkswagen Golf GTI 1.8T 1.8 |
| Notes: 4-Pin Special care must be taken during installation to prevent damage and obtain proper electrical contact Prior to installation pull plunger to full extension, use and apply lubricant to plunger. Keep pedal in up position. Push switch in and seat into opening pressing against pedal. Once seated secure switch by turning it to the right approximately 45 degrees. This action turns the plunger shoe into the correct position to make contacts operate. |
| 2002 Volkswagen Golf GTI 337 1.8 |
| Notes: 4 Pin Connector |
| 2002 Volkswagen Golf GTI 337 1.8 |
| Notes: 4-Pin Special care must be taken during installation to prevent damage and obtain proper electrical contact Prior to installation pull plunger to full extension, use and apply lubricant to plunger. Keep pedal in up position. Push switch in and seat into opening pressing against pedal. Once seated secure switch by turning it to the right approximately 45 degrees. This action turns the plunger shoe into the correct position to make contacts operate. |
| 2002 Volkswagen Golf GTI Turbo 1.8 |
| Notes: 4-Pin Special care must be taken during installation to prevent damage and obtain proper electrical contact Prior to installation pull plunger to full extension, use and apply lubricant to plunger. Keep pedal in up position. Push switch in and seat into opening pressing against pedal. Once seated secure switch by turning it to the right approximately 45 degrees. This action turns the plunger shoe into the correct position to make contacts operate. |
| 2002 Volkswagen Golf GTI VR6 2.8 |
| Notes: 4 Pin Connector |
| 2002 Volkswagen Golf GTI VR6 2.8 |
| Notes: 4-Pin Special care must be taken during installation to prevent damage and obtain proper electrical contact Prior to installation pull plunger to full extension, use and apply lubricant to plunger. Keep pedal in up position. Push switch in and seat into opening pressing against pedal. Once seated secure switch by turning it to the right approximately 45 degrees. This action turns the plunger shoe into the correct position to make contacts operate. |
| 2002 Volkswagen Golf Lujo 2.0 |
| Notes: 4-Pin Special care must be taken during installation to prevent damage and obtain proper electrical contact Prior to installation pull plunger to full extension, use and apply lubricant to plunger. Keep pedal in up position. Push switch in and seat into opening pressing against pedal. Once seated secure switch by turning it to the right approximately 45 degrees. This action turns the plunger shoe into the correct position to make contacts operate. |
| 2002 Volkswagen Golf Verano 2.0 |
| Notes: 4-Pin Special care must be taken during installation to prevent damage and obtain proper electrical contact Prior to installation pull plunger to full extension, use and apply lubricant to plunger. Keep pedal in up position. Push switch in and seat into opening pressing against pedal. Once seated secure switch by turning it to the right approximately 45 degrees. This action turns the plunger shoe into the correct position to make contacts operate. |
| 2002 Volkswagen Jetta Confortline 2.0 |
| Notes: 4-Pin Special care must be taken during installation to prevent damage and obtain proper electrical contact Prior to installation pull plunger to full extension, use and apply lubricant to plunger. Keep pedal in up position. Push switch in and seat into opening pressing against pedal. Once seated secure switch by turning it to the right approximately 45 degrees. This action turns the plunger shoe into the correct position to make contacts operate. |
| 2002 Volkswagen Jetta Europa 2.0 |
| Notes: 4-Pin Special care must be taken during installation to prevent damage and obtain proper electrical contact Prior to installation pull plunger to full extension, use and apply lubricant to plunger. Keep pedal in up position. Push switch in and seat into opening pressing against pedal. Once seated secure switch by turning it to the right approximately 45 degrees. This action turns the plunger shoe into the correct position to make contacts operate. |
| 2002 Volkswagen Jetta GL 2.0 |
| Notes: 4 Pin Connector |
| 2002 Volkswagen Jetta GL 2.0 |
| Notes: 4-Pin Special care must be taken during installation to prevent damage and obtain proper electrical contact Prior to installation pull plunger to full extension, use and apply lubricant to plunger. Keep pedal in up position. Push switch in and seat into opening pressing against pedal. Once seated secure switch by turning it to the right approximately 45 degrees. This action turns the plunger shoe into the correct position to make contacts operate. |
| 2002 Volkswagen Jetta GL Confort 2.0 |
| Notes: 4-Pin Special care must be taken during installation to prevent damage and obtain proper electrical contact Prior to installation pull plunger to full extension, use and apply lubricant to plunger. Keep pedal in up position. Push switch in and seat into opening pressing against pedal. Once seated secure switch by turning it to the right approximately 45 degrees. This action turns the plunger shoe into the correct position to make contacts operate. |
| 2002 Volkswagen Jetta GLI 2.8 |
| Notes: 4 Pin Connector |
| 2002 Volkswagen Jetta GLI 2.8 |
| Notes: 4-Pin Special care must be taken during installation to prevent damage and obtain proper electrical contact Prior to installation pull plunger to full extension, use and apply lubricant to plunger. Keep pedal in up position. Push switch in and seat into opening pressing against pedal. Once seated secure switch by turning it to the right approximately 45 degrees. This action turns the plunger shoe into the correct position to make contacts operate. |
| 2002 Volkswagen Jetta GLS 1.8 |
| Notes: 4 Pin Connector |
| 2002 Volkswagen Jetta GLS 1.8 |
| Notes: 4-Pin Special care must be taken during installation to prevent damage and obtain proper electrical contact Prior to installation pull plunger to full extension, use and apply lubricant to plunger. Keep pedal in up position. Push switch in and seat into opening pressing against pedal. Once seated secure switch by turning it to the right approximately 45 degrees. This action turns the plunger shoe into the correct position to make contacts operate. |
| 2002 Volkswagen Jetta GLS 2.0 |
| Notes: 4 Pin Connector |
| 2002 Volkswagen Jetta GLS 2.0 |
| Notes: 4-Pin Special care must be taken during installation to prevent damage and obtain proper electrical contact Prior to installation pull plunger to full extension, use and apply lubricant to plunger. Keep pedal in up position. Push switch in and seat into opening pressing against pedal. Once seated secure switch by turning it to the right approximately 45 degrees. This action turns the plunger shoe into the correct position to make contacts operate. |
| 2002 Volkswagen Jetta GLS 2.8 |
| Notes: 4 Pin Connector |
| 2002 Volkswagen Jetta GLS 2.8 |
| Notes: 4-Pin Special care must be taken during installation to prevent damage and obtain proper electrical contact Prior to installation pull plunger to full extension, use and apply lubricant to plunger. Keep pedal in up position. Push switch in and seat into opening pressing against pedal. Once seated secure switch by turning it to the right approximately 45 degrees. This action turns the plunger shoe into the correct position to make contacts operate. |
| 2002 Volkswagen Jetta GLX 2.8 |
| Notes: 4 Pin Connector |
| 2002 Volkswagen Jetta GLX 2.8 |
| Notes: 4-Pin Special care must be taken during installation to prevent damage and obtain proper electrical contact Prior to installation pull plunger to full extension, use and apply lubricant to plunger. Keep pedal in up position. Push switch in and seat into opening pressing against pedal. Once seated secure switch by turning it to the right approximately 45 degrees. This action turns the plunger shoe into the correct position to make contacts operate. |
| 2002 Volkswagen Jetta GLX VR6 2.8 |
| Notes: 4-Pin Special care must be taken during installation to prevent damage and obtain proper electrical contact Prior to installation pull plunger to full extension, use and apply lubricant to plunger. Keep pedal in up position. Push switch in and seat into opening pressing against pedal. Once seated secure switch by turning it to the right approximately 45 degrees. This action turns the plunger shoe into the correct position to make contacts operate. |
| 2002 Volkswagen Jetta Highline 2.8 |
| Notes: 4-Pin Special care must be taken during installation to prevent damage and obtain proper electrical contact Prior to installation pull plunger to full extension, use and apply lubricant to plunger. Keep pedal in up position. Push switch in and seat into opening pressing against pedal. Once seated secure switch by turning it to the right approximately 45 degrees. This action turns the plunger shoe into the correct position to make contacts operate. |
| 2002 Volkswagen Jetta Sportline 1.8 |
| Notes: 4-Pin Special care must be taken during installation to prevent damage and obtain proper electrical contact Prior to installation pull plunger to full extension, use and apply lubricant to plunger. Keep pedal in up position. Push switch in and seat into opening pressing against pedal. Once seated secure switch by turning it to the right approximately 45 degrees. This action turns the plunger shoe into the correct position to make contacts operate. |
| 2002 Volkswagen Jetta TDI 1.9 |
| Notes: 4 Pin Connector |
| 2002 Volkswagen Jetta TDI 1.9 |
| Notes: 4-Pin Special care must be taken during installation to prevent damage and obtain proper electrical contact Prior to installation pull plunger to full extension, use and apply lubricant to plunger. Keep pedal in up position. Push switch in and seat into opening pressing against pedal. Once seated secure switch by turning it to the right approximately 45 degrees. This action turns the plunger shoe into the correct position to make contacts operate. |
| 2002 Volkswagen Jetta Trendline 2.0 |
| Notes: 4-Pin Special care must be taken during installation to prevent damage and obtain proper electrical contact Prior to installation pull plunger to full extension, use and apply lubricant to plunger. Keep pedal in up position. Push switch in and seat into opening pressing against pedal. Once seated secure switch by turning it to the right approximately 45 degrees. This action turns the plunger shoe into the correct position to make contacts operate. |
| 2002 Volkswagen Jetta Variant Comfortline 2.0 |
| Notes: 4-Pin Special care must be taken during installation to prevent damage and obtain proper electrical contact Prior to installation pull plunger to full extension, use and apply lubricant to plunger. Keep pedal in up position. Push switch in and seat into opening pressing against pedal. Once seated secure switch by turning it to the right approximately 45 degrees. This action turns the plunger shoe into the correct position to make contacts operate. |
| 2002 Volkswagen Jetta Variant Trendline 2.0 |
| Notes: 4-Pin Special care must be taken during installation to prevent damage and obtain proper electrical contact Prior to installation pull plunger to full extension, use and apply lubricant to plunger. Keep pedal in up position. Push switch in and seat into opening pressing against pedal. Once seated secure switch by turning it to the right approximately 45 degrees. This action turns the plunger shoe into the correct position to make contacts operate. |
| 2003 Audi TT Base 1.8 |
| Notes: 4 Pin Connector |
| 2003 Audi TT Base 1.8 |
| Notes: 4-Pin Special care must be taken during installation to prevent damage and obtain proper electrical contact Prior to installation pull plunger to full extension, use and apply lubricant to plunger. Keep pedal in up position. Push switch in and seat into opening pressing against pedal. Once seated secure switch by turning it to the right approximately 45 degrees. This action turns the plunger shoe into the correct position to make contacts operate. |
| 2003 Audi TT Quattro Base 1.8 |
| Notes: 4 Pin Connector |
| 2003 Audi TT Quattro Base 1.8 |
| Notes: 4-Pin Special care must be taken during installation to prevent damage and obtain proper electrical contact Prior to installation pull plunger to full extension, use and apply lubricant to plunger. Keep pedal in up position. Push switch in and seat into opening pressing against pedal. Once seated secure switch by turning it to the right approximately 45 degrees. This action turns the plunger shoe into the correct position to make contacts operate. |
| 2003 Audi TT Quattro S Line 1.8 |
| Notes: 4 Pin Connector |
| 2003 Audi TT Quattro S Line 1.8 |
| Notes: 4-Pin Special care must be taken during installation to prevent damage and obtain proper electrical contact Prior to installation pull plunger to full extension, use and apply lubricant to plunger. Keep pedal in up position. Push switch in and seat into opening pressing against pedal. Once seated secure switch by turning it to the right approximately 45 degrees. This action turns the plunger shoe into the correct position to make contacts operate. |
| 2003 Volkswagen Beetle Cabrio 2.0 |
| Notes: 4 Pin Connector |
| 2003 Volkswagen Beetle Cabrio 2.0 |
| Notes: 4-Pin Special care must be taken during installation to prevent damage and obtain proper electrical contact Prior to installation pull plunger to full extension, use and apply lubricant to plunger. Keep pedal in up position. Push switch in and seat into opening pressing against pedal. Once seated secure switch by turning it to the right approximately 45 degrees. This action turns the plunger shoe into the correct position to make contacts operate. |
| 2003 Volkswagen Beetle GL 1.8 |
| Notes: 4 Pin Connector |
| 2003 Volkswagen Beetle GL 1.8 |
| Notes: 4-Pin Special care must be taken during installation to prevent damage and obtain proper electrical contact Prior to installation pull plunger to full extension, use and apply lubricant to plunger. Keep pedal in up position. Push switch in and seat into opening pressing against pedal. Once seated secure switch by turning it to the right approximately 45 degrees. This action turns the plunger shoe into the correct position to make contacts operate. |
| 2003 Volkswagen Beetle GL 1.9 |
| Notes: 4 Pin Connector |
| 2003 Volkswagen Beetle GL 1.9 |
| Notes: 4-Pin Special care must be taken during installation to prevent damage and obtain proper electrical contact Prior to installation pull plunger to full extension, use and apply lubricant to plunger. Keep pedal in up position. Push switch in and seat into opening pressing against pedal. Once seated secure switch by turning it to the right approximately 45 degrees. This action turns the plunger shoe into the correct position to make contacts operate. |
| 2003 Volkswagen Beetle GL 2.0 |
| Notes: 4 Pin Connector |
| 2003 Volkswagen Beetle GL 2.0 |
| Notes: 4-Pin Special care must be taken during installation to prevent damage and obtain proper electrical contact Prior to installation pull plunger to full extension, use and apply lubricant to plunger. Keep pedal in up position. Push switch in and seat into opening pressing against pedal. Once seated secure switch by turning it to the right approximately 45 degrees. This action turns the plunger shoe into the correct position to make contacts operate. |
| 2003 Volkswagen Beetle GLS 1.8 |
| Notes: 4 Pin Connector |
| 2003 Volkswagen Beetle GLS 1.8 |
| Notes: 4-Pin Special care must be taken during installation to prevent damage and obtain proper electrical contact Prior to installation pull plunger to full extension, use and apply lubricant to plunger. Keep pedal in up position. Push switch in and seat into opening pressing against pedal. Once seated secure switch by turning it to the right approximately 45 degrees. This action turns the plunger shoe into the correct position to make contacts operate. |
| 2003 Volkswagen Beetle GLS 1.9 |
| Notes: 4 Pin Connector |
| 2003 Volkswagen Beetle GLS 1.9 |
| Notes: 4-Pin Special care must be taken during installation to prevent damage and obtain proper electrical contact Prior to installation pull plunger to full extension, use and apply lubricant to plunger. Keep pedal in up position. Push switch in and seat into opening pressing against pedal. Once seated secure switch by turning it to the right approximately 45 degrees. This action turns the plunger shoe into the correct position to make contacts operate. |
| 2003 Volkswagen Beetle GLS 2.0 |
| Notes: 4 Pin Connector |
| 2003 Volkswagen Beetle GLS 2.0 |
| Notes: 4-Pin Special care must be taken during installation to prevent damage and obtain proper electrical contact Prior to installation pull plunger to full extension, use and apply lubricant to plunger. Keep pedal in up position. Push switch in and seat into opening pressing against pedal. Once seated secure switch by turning it to the right approximately 45 degrees. This action turns the plunger shoe into the correct position to make contacts operate. |
| 2003 Volkswagen Beetle GLS Edicion especial 2.0 |
| Notes: 4 Pin Connector |
| 2003 Volkswagen Beetle GLS Edicion especial 2.0 |
| Notes: 4-Pin Special care must be taken during installation to prevent damage and obtain proper electrical contact Prior to installation pull plunger to full extension, use and apply lubricant to plunger. Keep pedal in up position. Push switch in and seat into opening pressing against pedal. Once seated secure switch by turning it to the right approximately 45 degrees. This action turns the plunger shoe into the correct position to make contacts operate. |
| 2003 Volkswagen Beetle GLS Sport 2.0 |
| Notes: 4 Pin Connector |
| 2003 Volkswagen Beetle GLS Sport 2.0 |
| Notes: 4-Pin Special care must be taken during installation to prevent damage and obtain proper electrical contact Prior to installation pull plunger to full extension, use and apply lubricant to plunger. Keep pedal in up position. Push switch in and seat into opening pressing against pedal. Once seated secure switch by turning it to the right approximately 45 degrees. This action turns the plunger shoe into the correct position to make contacts operate. |
| 2003 Volkswagen Beetle GLS Sport Turbo 1.8 |
| Notes: 4 Pin Connector |
| 2003 Volkswagen Beetle GLS Sport Turbo 1.8 |
| Notes: 4-Pin Special care must be taken during installation to prevent damage and obtain proper electrical contact Prior to installation pull plunger to full extension, use and apply lubricant to plunger. Keep pedal in up position. Push switch in and seat into opening pressing against pedal. Once seated secure switch by turning it to the right approximately 45 degrees. This action turns the plunger shoe into the correct position to make contacts operate. |
| 2003 Volkswagen Beetle GLX 1.8 |
| Notes: 4 Pin Connector |
| 2003 Volkswagen Beetle GLX 1.8 |
| Notes: 4-Pin Special care must be taken during installation to prevent damage and obtain proper electrical contact Prior to installation pull plunger to full extension, use and apply lubricant to plunger. Keep pedal in up position. Push switch in and seat into opening pressing against pedal. Once seated secure switch by turning it to the right approximately 45 degrees. This action turns the plunger shoe into the correct position to make contacts operate. |
| 2003 Volkswagen Beetle GLX Sport Turbo 1.8 |
| Notes: 4 Pin Connector |
| 2003 Volkswagen Beetle GLX Sport Turbo 1.8 |
| Notes: 4-Pin Special care must be taken during installation to prevent damage and obtain proper electrical contact Prior to installation pull plunger to full extension, use and apply lubricant to plunger. Keep pedal in up position. Push switch in and seat into opening pressing against pedal. Once seated secure switch by turning it to the right approximately 45 degrees. This action turns the plunger shoe into the correct position to make contacts operate. |
| 2003 Volkswagen Beetle Turbo S 1.8 |
| Notes: 4 Pin Connector |
| 2003 Volkswagen Beetle Turbo S 1.8 |
| Notes: 4-Pin Special care must be taken during installation to prevent damage and obtain proper electrical contact Prior to installation pull plunger to full extension, use and apply lubricant to plunger. Keep pedal in up position. Push switch in and seat into opening pressing against pedal. Once seated secure switch by turning it to the right approximately 45 degrees. This action turns the plunger shoe into the correct position to make contacts operate. |
| 2003 Volkswagen EuroVan Base 2.5 |
| Notes: 4 Pin Connector |
| 2003 Volkswagen EuroVan GLS 2.8 |
| Notes: 4 Pin Connector |
| 2003 Volkswagen EuroVan MV 2.8 |
| Notes: 4 Pin Connector |
| 2003 Volkswagen Golf Comfortline 2.0 |
| Notes: 4 Pin Connector |
| 2003 Volkswagen Golf Comfortline 2.0 |
| Notes: 4-Pin Special care must be taken during installation to prevent damage and obtain proper electrical contact Prior to installation pull plunger to full extension, use and apply lubricant to plunger. Keep pedal in up position. Push switch in and seat into opening pressing against pedal. Once seated secure switch by turning it to the right approximately 45 degrees. This action turns the plunger shoe into the correct position to make contacts operate. |
| 2003 Volkswagen Golf Europa 2.0 |
| Notes: 4 Pin Connector |
| 2003 Volkswagen Golf Europa 2.0 |
| Notes: 4-Pin Special care must be taken during installation to prevent damage and obtain proper electrical contact Prior to installation pull plunger to full extension, use and apply lubricant to plunger. Keep pedal in up position. Push switch in and seat into opening pressing against pedal. Once seated secure switch by turning it to the right approximately 45 degrees. This action turns the plunger shoe into the correct position to make contacts operate. |
| 2003 Volkswagen Golf GL 1.9 |
| Notes: 4 Pin Connector |
| 2003 Volkswagen Golf GL 1.9 |
| Notes: 4-Pin Special care must be taken during installation to prevent damage and obtain proper electrical contact Prior to installation pull plunger to full extension, use and apply lubricant to plunger. Keep pedal in up position. Push switch in and seat into opening pressing against pedal. Once seated secure switch by turning it to the right approximately 45 degrees. This action turns the plunger shoe into the correct position to make contacts operate. |
| 2003 Volkswagen Golf GL 2.0 |
| Notes: 4 Pin Connector |
| 2003 Volkswagen Golf GL 2.0 |
| Notes: 4-Pin Special care must be taken during installation to prevent damage and obtain proper electrical contact Prior to installation pull plunger to full extension, use and apply lubricant to plunger. Keep pedal in up position. Push switch in and seat into opening pressing against pedal. Once seated secure switch by turning it to the right approximately 45 degrees. This action turns the plunger shoe into the correct position to make contacts operate. |
| 2003 Volkswagen Golf GLS 1.9 |
| Notes: 4 Pin Connector |
| 2003 Volkswagen Golf GLS 1.9 |
| Notes: 4-Pin Special care must be taken during installation to prevent damage and obtain proper electrical contact Prior to installation pull plunger to full extension, use and apply lubricant to plunger. Keep pedal in up position. Push switch in and seat into opening pressing against pedal. Once seated secure switch by turning it to the right approximately 45 degrees. This action turns the plunger shoe into the correct position to make contacts operate. |
| 2003 Volkswagen Golf GLS 2.0 |
| Notes: 4 Pin Connector |
| 2003 Volkswagen Golf GLS 2.0 |
| Notes: 4-Pin Special care must be taken during installation to prevent damage and obtain proper electrical contact Prior to installation pull plunger to full extension, use and apply lubricant to plunger. Keep pedal in up position. Push switch in and seat into opening pressing against pedal. Once seated secure switch by turning it to the right approximately 45 degrees. This action turns the plunger shoe into the correct position to make contacts operate. |
| 2003 Volkswagen Golf GTI 2.0 |
| Notes: 4 Pin Connector |
| 2003 Volkswagen Golf GTI 2.0 |
| Notes: 4-Pin Special care must be taken during installation to prevent damage and obtain proper electrical contact Prior to installation pull plunger to full extension, use and apply lubricant to plunger. Keep pedal in up position. Push switch in and seat into opening pressing against pedal. Once seated secure switch by turning it to the right approximately 45 degrees. This action turns the plunger shoe into the correct position to make contacts operate. |
| 2003 Volkswagen Golf GTI 1.8T 1.8 |
| Notes: 4 Pin Connector |
| 2003 Volkswagen Golf GTI 1.8T 1.8 |
| Notes: 4-Pin Special care must be taken during installation to prevent damage and obtain proper electrical contact Prior to installation pull plunger to full extension, use and apply lubricant to plunger. Keep pedal in up position. Push switch in and seat into opening pressing against pedal. Once seated secure switch by turning it to the right approximately 45 degrees. This action turns the plunger shoe into the correct position to make contacts operate. |
| 2003 Volkswagen Golf GTI 20th Anniversary 1.8 |
| Notes: 4 Pin Connector |
| 2003 Volkswagen Golf GTI 20th Anniversary 1.8 |
| Notes: 4-Pin Special care must be taken during installation to prevent damage and obtain proper electrical contact Prior to installation pull plunger to full extension, use and apply lubricant to plunger. Keep pedal in up position. Push switch in and seat into opening pressing against pedal. Once seated secure switch by turning it to the right approximately 45 degrees. This action turns the plunger shoe into the correct position to make contacts operate. |
| 2003 Volkswagen Golf GTI Turbo 1.8 |
| Notes: 4 Pin Connector |
| 2003 Volkswagen Golf GTI Turbo 1.8 |
| Notes: 4-Pin Special care must be taken during installation to prevent damage and obtain proper electrical contact Prior to installation pull plunger to full extension, use and apply lubricant to plunger. Keep pedal in up position. Push switch in and seat into opening pressing against pedal. Once seated secure switch by turning it to the right approximately 45 degrees. This action turns the plunger shoe into the correct position to make contacts operate. |
| 2003 Volkswagen Golf GTI VR6 2.8 |
| Notes: 4 Pin Connector |
| 2003 Volkswagen Golf GTI VR6 2.8 |
| Notes: 4-Pin Special care must be taken during installation to prevent damage and obtain proper electrical contact Prior to installation pull plunger to full extension, use and apply lubricant to plunger. Keep pedal in up position. Push switch in and seat into opening pressing against pedal. Once seated secure switch by turning it to the right approximately 45 degrees. This action turns the plunger shoe into the correct position to make contacts operate. |
| 2003 Volkswagen Golf Trendline 2.0 |
| Notes: 4 Pin Connector |
| 2003 Volkswagen Golf Trendline 2.0 |
| Notes: 4-Pin Special care must be taken during installation to prevent damage and obtain proper electrical contact Prior to installation pull plunger to full extension, use and apply lubricant to plunger. Keep pedal in up position. Push switch in and seat into opening pressing against pedal. Once seated secure switch by turning it to the right approximately 45 degrees. This action turns the plunger shoe into the correct position to make contacts operate. |
| 2003 Volkswagen Jetta Confortline 2.0 |
| Notes: 4-Pin Special care must be taken during installation to prevent damage and obtain proper electrical contact Prior to installation pull plunger to full extension, use and apply lubricant to plunger. Keep pedal in up position. Push switch in and seat into opening pressing against pedal. Once seated secure switch by turning it to the right approximately 45 degrees. This action turns the plunger shoe into the correct position to make contacts operate. |
| 2003 Volkswagen Jetta Edicion Limitada 2.0 |
| Notes: 4-Pin Special care must be taken during installation to prevent damage and obtain proper electrical contact Prior to installation pull plunger to full extension, use and apply lubricant to plunger. Keep pedal in up position. Push switch in and seat into opening pressing against pedal. Once seated secure switch by turning it to the right approximately 45 degrees. This action turns the plunger shoe into the correct position to make contacts operate. |
| 2003 Volkswagen Jetta Europa 2.0 |
| Notes: 4-Pin Special care must be taken during installation to prevent damage and obtain proper electrical contact Prior to installation pull plunger to full extension, use and apply lubricant to plunger. Keep pedal in up position. Push switch in and seat into opening pressing against pedal. Once seated secure switch by turning it to the right approximately 45 degrees. This action turns the plunger shoe into the correct position to make contacts operate. |
| 2003 Volkswagen Jetta Europa Wolfsburg 2.0 |
| Notes: 4-Pin Special care must be taken during installation to prevent damage and obtain proper electrical contact Prior to installation pull plunger to full extension, use and apply lubricant to plunger. Keep pedal in up position. Push switch in and seat into opening pressing against pedal. Once seated secure switch by turning it to the right approximately 45 degrees. This action turns the plunger shoe into the correct position to make contacts operate. |
| 2003 Volkswagen Jetta GL 1.8 |
| Notes: 4 Pin Connector |
| 2003 Volkswagen Jetta GL 1.8 |
| Notes: 4-Pin Special care must be taken during installation to prevent damage and obtain proper electrical contact Prior to installation pull plunger to full extension, use and apply lubricant to plunger. Keep pedal in up position. Push switch in and seat into opening pressing against pedal. Once seated secure switch by turning it to the right approximately 45 degrees. This action turns the plunger shoe into the correct position to make contacts operate. |
| 2003 Volkswagen Jetta GL 2.0 |
| Notes: 4 Pin Connector |
| 2003 Volkswagen Jetta GL 2.0 |
| Notes: 4-Pin Special care must be taken during installation to prevent damage and obtain proper electrical contact Prior to installation pull plunger to full extension, use and apply lubricant to plunger. Keep pedal in up position. Push switch in and seat into opening pressing against pedal. Once seated secure switch by turning it to the right approximately 45 degrees. This action turns the plunger shoe into the correct position to make contacts operate. |
| 2003 Volkswagen Jetta GLI 2.8 |
| Notes: 4 Pin Connector |
| 2003 Volkswagen Jetta GLI 2.8 |
| Notes: 4-Pin Special care must be taken during installation to prevent damage and obtain proper electrical contact Prior to installation pull plunger to full extension, use and apply lubricant to plunger. Keep pedal in up position. Push switch in and seat into opening pressing against pedal. Once seated secure switch by turning it to the right approximately 45 degrees. This action turns the plunger shoe into the correct position to make contacts operate. |
| 2003 Volkswagen Jetta GLS 1.8 |
| Notes: 4 Pin Connector |
| 2003 Volkswagen Jetta GLS 1.8 |
| Notes: 4-Pin Special care must be taken during installation to prevent damage and obtain proper electrical contact Prior to installation pull plunger to full extension, use and apply lubricant to plunger. Keep pedal in up position. Push switch in and seat into opening pressing against pedal. Once seated secure switch by turning it to the right approximately 45 degrees. This action turns the plunger shoe into the correct position to make contacts operate. |
| 2003 Volkswagen Jetta GLS 2.0 |
| Notes: 4 Pin Connector |
| 2003 Volkswagen Jetta GLS 2.0 |
| Notes: 4-Pin Special care must be taken during installation to prevent damage and obtain proper electrical contact Prior to installation pull plunger to full extension, use and apply lubricant to plunger. Keep pedal in up position. Push switch in and seat into opening pressing against pedal. Once seated secure switch by turning it to the right approximately 45 degrees. This action turns the plunger shoe into the correct position to make contacts operate. |
| 2003 Volkswagen Jetta GLX 2.8 |
| Notes: 4 Pin Connector |
| 2003 Volkswagen Jetta GLX 2.8 |
| Notes: 4-Pin Special care must be taken during installation to prevent damage and obtain proper electrical contact Prior to installation pull plunger to full extension, use and apply lubricant to plunger. Keep pedal in up position. Push switch in and seat into opening pressing against pedal. Once seated secure switch by turning it to the right approximately 45 degrees. This action turns the plunger shoe into the correct position to make contacts operate. |
| 2003 Volkswagen Jetta Highline 2.0 |
| Notes: 4-Pin Special care must be taken during installation to prevent damage and obtain proper electrical contact Prior to installation pull plunger to full extension, use and apply lubricant to plunger. Keep pedal in up position. Push switch in and seat into opening pressing against pedal. Once seated secure switch by turning it to the right approximately 45 degrees. This action turns the plunger shoe into the correct position to make contacts operate. |
| 2003 Volkswagen Jetta Jazz 2.0 |
| Notes: 4-Pin Special care must be taken during installation to prevent damage and obtain proper electrical contact Prior to installation pull plunger to full extension, use and apply lubricant to plunger. Keep pedal in up position. Push switch in and seat into opening pressing against pedal. Once seated secure switch by turning it to the right approximately 45 degrees. This action turns the plunger shoe into the correct position to make contacts operate. |
| 2003 Volkswagen Jetta Sportline 1.8 |
| Notes: 4-Pin Special care must be taken during installation to prevent damage and obtain proper electrical contact Prior to installation pull plunger to full extension, use and apply lubricant to plunger. Keep pedal in up position. Push switch in and seat into opening pressing against pedal. Once seated secure switch by turning it to the right approximately 45 degrees. This action turns the plunger shoe into the correct position to make contacts operate. |
| 2003 Volkswagen Jetta TDI 1.9 |
| Notes: 4 Pin Connector |
| 2003 Volkswagen Jetta TDI 1.9 |
| Notes: 4-Pin Special care must be taken during installation to prevent damage and obtain proper electrical contact Prior to installation pull plunger to full extension, use and apply lubricant to plunger. Keep pedal in up position. Push switch in and seat into opening pressing against pedal. Once seated secure switch by turning it to the right approximately 45 degrees. This action turns the plunger shoe into the correct position to make contacts operate. |
| 2003 Volkswagen Jetta Trendline 2.0 |
| Notes: 4-Pin Special care must be taken during installation to prevent damage and obtain proper electrical contact Prior to installation pull plunger to full extension, use and apply lubricant to plunger. Keep pedal in up position. Push switch in and seat into opening pressing against pedal. Once seated secure switch by turning it to the right approximately 45 degrees. This action turns the plunger shoe into the correct position to make contacts operate. |
| 2003 Volkswagen Jetta Trendline Wolfsburg 2.0 |
| Notes: 4-Pin Special care must be taken during installation to prevent damage and obtain proper electrical contact Prior to installation pull plunger to full extension, use and apply lubricant to plunger. Keep pedal in up position. Push switch in and seat into opening pressing against pedal. Once seated secure switch by turning it to the right approximately 45 degrees. This action turns the plunger shoe into the correct position to make contacts operate. |
| 2003 Volkswagen Jetta Variant Comfortline 2.0 |
| Notes: 4-Pin Special care must be taken during installation to prevent damage and obtain proper electrical contact Prior to installation pull plunger to full extension, use and apply lubricant to plunger. Keep pedal in up position. Push switch in and seat into opening pressing against pedal. Once seated secure switch by turning it to the right approximately 45 degrees. This action turns the plunger shoe into the correct position to make contacts operate. |
| 2003 Volkswagen Jetta Variant Trendline 2.0 |
| Notes: 4-Pin Special care must be taken during installation to prevent damage and obtain proper electrical contact Prior to installation pull plunger to full extension, use and apply lubricant to plunger. Keep pedal in up position. Push switch in and seat into opening pressing against pedal. Once seated secure switch by turning it to the right approximately 45 degrees. This action turns the plunger shoe into the correct position to make contacts operate. |
| 2003 Volkswagen Jetta Wolfsburg Edition 1.8 |
| Notes: 4 Pin Connector |
| 2003 Volkswagen Jetta Wolfsburg Edition 1.8 |
| Notes: 4-Pin Special care must be taken during installation to prevent damage and obtain proper electrical contact Prior to installation pull plunger to full extension, use and apply lubricant to plunger. Keep pedal in up position. Push switch in and seat into opening pressing against pedal. Once seated secure switch by turning it to the right approximately 45 degrees. This action turns the plunger shoe into the correct position to make contacts operate. |
| 2004 Audi TT Base 1.8 |
| Notes: 4 Pin Connector |
| 2004 Audi TT Base 1.8 |
| Notes: 4-Pin Special care must be taken during installation to prevent damage and obtain proper electrical contact Prior to installation pull plunger to full extension, use and apply lubricant to plunger. Keep pedal in up position. Push switch in and seat into opening pressing against pedal. Once seated secure switch by turning it to the right approximately 45 degrees. This action turns the plunger shoe into the correct position to make contacts operate. |
| 2004 Audi TT Quattro Base 1.8 |
| Notes: 4 Pin Connector |
| 2004 Audi TT Quattro Base 1.8 |
| Notes: 4-Pin Special care must be taken during installation to prevent damage and obtain proper electrical contact Prior to installation pull plunger to full extension, use and apply lubricant to plunger. Keep pedal in up position. Push switch in and seat into opening pressing against pedal. Once seated secure switch by turning it to the right approximately 45 degrees. This action turns the plunger shoe into the correct position to make contacts operate. |
| 2004 Audi TT Quattro Base 3.2 |
| Notes: 4 Pin Connector |
| 2004 Audi TT Quattro Base 3.2 |
| Notes: 4-Pin Special care must be taken during installation to prevent damage and obtain proper electrical contact Prior to installation pull plunger to full extension, use and apply lubricant to plunger. Keep pedal in up position. Push switch in and seat into opening pressing against pedal. Once seated secure switch by turning it to the right approximately 45 degrees. This action turns the plunger shoe into the correct position to make contacts operate. |
| 2004 Audi TT Quattro S Line 1.8 |
| Notes: 4 Pin Connector |
| 2004 Audi TT Quattro S Line 1.8 |
| Notes: 4-Pin Special care must be taken during installation to prevent damage and obtain proper electrical contact Prior to installation pull plunger to full extension, use and apply lubricant to plunger. Keep pedal in up position. Push switch in and seat into opening pressing against pedal. Once seated secure switch by turning it to the right approximately 45 degrees. This action turns the plunger shoe into the correct position to make contacts operate. |
| 2004 Volkswagen Beetle Cabrio 2.0 |
| Notes: 4 Pin Connector |
| 2004 Volkswagen Beetle Cabrio 2.0 |
| Notes: 4-Pin Special care must be taken during installation to prevent damage and obtain proper electrical contact Prior to installation pull plunger to full extension, use and apply lubricant to plunger. Keep pedal in up position. Push switch in and seat into opening pressing against pedal. Once seated secure switch by turning it to the right approximately 45 degrees. This action turns the plunger shoe into the correct position to make contacts operate. |
| 2004 Volkswagen Beetle GL 1.9 |
| Notes: 4 Pin Connector |
| 2004 Volkswagen Beetle GL 1.9 |
| Notes: 4-Pin Special care must be taken during installation to prevent damage and obtain proper electrical contact Prior to installation pull plunger to full extension, use and apply lubricant to plunger. Keep pedal in up position. Push switch in and seat into opening pressing against pedal. Once seated secure switch by turning it to the right approximately 45 degrees. This action turns the plunger shoe into the correct position to make contacts operate. |
| 2004 Volkswagen Beetle GL 2.0 |
| Notes: 4 Pin Connector |
| 2004 Volkswagen Beetle GL 2.0 |
| Notes: 4-Pin Special care must be taken during installation to prevent damage and obtain proper electrical contact Prior to installation pull plunger to full extension, use and apply lubricant to plunger. Keep pedal in up position. Push switch in and seat into opening pressing against pedal. Once seated secure switch by turning it to the right approximately 45 degrees. This action turns the plunger shoe into the correct position to make contacts operate. |
| 2004 Volkswagen Beetle GLS 1.8 |
| Notes: 4 Pin Connector |
| 2004 Volkswagen Beetle GLS 1.8 |
| Notes: 4-Pin Special care must be taken during installation to prevent damage and obtain proper electrical contact Prior to installation pull plunger to full extension, use and apply lubricant to plunger. Keep pedal in up position. Push switch in and seat into opening pressing against pedal. Once seated secure switch by turning it to the right approximately 45 degrees. This action turns the plunger shoe into the correct position to make contacts operate. |
| 2004 Volkswagen Beetle GLS 1.9 |
| Notes: 4 Pin Connector |
| 2004 Volkswagen Beetle GLS 1.9 |
| Notes: 4-Pin Special care must be taken during installation to prevent damage and obtain proper electrical contact Prior to installation pull plunger to full extension, use and apply lubricant to plunger. Keep pedal in up position. Push switch in and seat into opening pressing against pedal. Once seated secure switch by turning it to the right approximately 45 degrees. This action turns the plunger shoe into the correct position to make contacts operate. |
| 2004 Volkswagen Beetle GLS 2.0 |
| Notes: 4 Pin Connector |
| 2004 Volkswagen Beetle GLS 2.0 |
| Notes: 4-Pin Special care must be taken during installation to prevent damage and obtain proper electrical contact Prior to installation pull plunger to full extension, use and apply lubricant to plunger. Keep pedal in up position. Push switch in and seat into opening pressing against pedal. Once seated secure switch by turning it to the right approximately 45 degrees. This action turns the plunger shoe into the correct position to make contacts operate. |
| 2004 Volkswagen Beetle GLS Sport Turbo 1.8 |
| Notes: 4 Pin Connector |
| 2004 Volkswagen Beetle GLS Sport Turbo 1.8 |
| Notes: 4-Pin Special care must be taken during installation to prevent damage and obtain proper electrical contact Prior to installation pull plunger to full extension, use and apply lubricant to plunger. Keep pedal in up position. Push switch in and seat into opening pressing against pedal. Once seated secure switch by turning it to the right approximately 45 degrees. This action turns the plunger shoe into the correct position to make contacts operate. |
| 2004 Volkswagen Beetle GLX 1.8 |
| Notes: 4 Pin Connector |
| 2004 Volkswagen Beetle GLX 1.8 |
| Notes: 4-Pin Special care must be taken during installation to prevent damage and obtain proper electrical contact Prior to installation pull plunger to full extension, use and apply lubricant to plunger. Keep pedal in up position. Push switch in and seat into opening pressing against pedal. Once seated secure switch by turning it to the right approximately 45 degrees. This action turns the plunger shoe into the correct position to make contacts operate. |
| 2004 Volkswagen Beetle GLX Sport Turbo 1.8 |
| Notes: 4 Pin Connector |
| 2004 Volkswagen Beetle GLX Sport Turbo 1.8 |
| Notes: 4-Pin Special care must be taken during installation to prevent damage and obtain proper electrical contact Prior to installation pull plunger to full extension, use and apply lubricant to plunger. Keep pedal in up position. Push switch in and seat into opening pressing against pedal. Once seated secure switch by turning it to the right approximately 45 degrees. This action turns the plunger shoe into the correct position to make contacts operate. |
| 2004 Volkswagen Beetle Turbo S 1.8 |
| Notes: 4 Pin Connector |
| 2004 Volkswagen Beetle Turbo S 1.8 |
| Notes: 4-Pin Special care must be taken during installation to prevent damage and obtain proper electrical contact Prior to installation pull plunger to full extension, use and apply lubricant to plunger. Keep pedal in up position. Push switch in and seat into opening pressing against pedal. Once seated secure switch by turning it to the right approximately 45 degrees. This action turns the plunger shoe into the correct position to make contacts operate. |
| 2004 Volkswagen Golf Comfortline 2.0 |
| Notes: 4-Pin Special care must be taken during installation to prevent damage and obtain proper electrical contact Prior to installation pull plunger to full extension, use and apply lubricant to plunger. Keep pedal in up position. Push switch in and seat into opening pressing against pedal. Once seated secure switch by turning it to the right approximately 45 degrees. This action turns the plunger shoe into the correct position to make contacts operate. |
| 2004 Volkswagen Golf Europa 2.0 |
| Notes: 4-Pin Special care must be taken during installation to prevent damage and obtain proper electrical contact Prior to installation pull plunger to full extension, use and apply lubricant to plunger. Keep pedal in up position. Push switch in and seat into opening pressing against pedal. Once seated secure switch by turning it to the right approximately 45 degrees. This action turns the plunger shoe into the correct position to make contacts operate. |
| 2004 Volkswagen Golf GL 2.0 |
| Notes: 4 Pin Connector |
| 2004 Volkswagen Golf GL 2.0 |
| Notes: 4-Pin Special care must be taken during installation to prevent damage and obtain proper electrical contact Prior to installation pull plunger to full extension, use and apply lubricant to plunger. Keep pedal in up position. Push switch in and seat into opening pressing against pedal. Once seated secure switch by turning it to the right approximately 45 degrees. This action turns the plunger shoe into the correct position to make contacts operate. |
| 2004 Volkswagen Golf GL TDI 1.9 |
| Notes: 4 Pin Connector |
| 2004 Volkswagen Golf GL TDI 1.9 |
| Notes: 4-Pin Special care must be taken during installation to prevent damage and obtain proper electrical contact Prior to installation pull plunger to full extension, use and apply lubricant to plunger. Keep pedal in up position. Push switch in and seat into opening pressing against pedal. Once seated secure switch by turning it to the right approximately 45 degrees. This action turns the plunger shoe into the correct position to make contacts operate. |
| 2004 Volkswagen Golf GLS 2.0 |
| Notes: 4 Pin Connector |
| 2004 Volkswagen Golf GLS 2.0 |
| Notes: 4-Pin Special care must be taken during installation to prevent damage and obtain proper electrical contact Prior to installation pull plunger to full extension, use and apply lubricant to plunger. Keep pedal in up position. Push switch in and seat into opening pressing against pedal. Once seated secure switch by turning it to the right approximately 45 degrees. This action turns the plunger shoe into the correct position to make contacts operate. |
| 2004 Volkswagen Golf GLS TDI 1.9 |
| Notes: 4 Pin Connector |
| 2004 Volkswagen Golf GLS TDI 1.9 |
| Notes: 4-Pin Special care must be taken during installation to prevent damage and obtain proper electrical contact Prior to installation pull plunger to full extension, use and apply lubricant to plunger. Keep pedal in up position. Push switch in and seat into opening pressing against pedal. Once seated secure switch by turning it to the right approximately 45 degrees. This action turns the plunger shoe into the correct position to make contacts operate. |
| 2004 Volkswagen Golf GTI 1.8 |
| Notes: 4-Pin Special care must be taken during installation to prevent damage and obtain proper electrical contact Prior to installation pull plunger to full extension, use and apply lubricant to plunger. Keep pedal in up position. Push switch in and seat into opening pressing against pedal. Once seated secure switch by turning it to the right approximately 45 degrees. This action turns the plunger shoe into the correct position to make contacts operate. |
| 2004 Volkswagen Golf GTI 1.8T 1.8 |
| Notes: 4 Pin Connector |
| 2004 Volkswagen Golf GTI 1.8T 1.8 |
| Notes: 4-Pin Special care must be taken during installation to prevent damage and obtain proper electrical contact Prior to installation pull plunger to full extension, use and apply lubricant to plunger. Keep pedal in up position. Push switch in and seat into opening pressing against pedal. Once seated secure switch by turning it to the right approximately 45 degrees. This action turns the plunger shoe into the correct position to make contacts operate. |
| 2004 Volkswagen Golf GTI VR6 2.8 |
| Notes: 4 Pin Connector |
| 2004 Volkswagen Golf GTI VR6 2.8 |
| Notes: 4-Pin Special care must be taken during installation to prevent damage and obtain proper electrical contact Prior to installation pull plunger to full extension, use and apply lubricant to plunger. Keep pedal in up position. Push switch in and seat into opening pressing against pedal. Once seated secure switch by turning it to the right approximately 45 degrees. This action turns the plunger shoe into the correct position to make contacts operate. |
| 2004 Volkswagen Golf Trendline 2.0 |
| Notes: 4-Pin Special care must be taken during installation to prevent damage and obtain proper electrical contact Prior to installation pull plunger to full extension, use and apply lubricant to plunger. Keep pedal in up position. Push switch in and seat into opening pressing against pedal. Once seated secure switch by turning it to the right approximately 45 degrees. This action turns the plunger shoe into the correct position to make contacts operate. |
| 2004 Volkswagen Jetta Comfortline 2.0 |
| Notes: 4-Pin Special care must be taken during installation to prevent damage and obtain proper electrical contact Prior to installation pull plunger to full extension, use and apply lubricant to plunger. Keep pedal in up position. Push switch in and seat into opening pressing against pedal. Once seated secure switch by turning it to the right approximately 45 degrees. This action turns the plunger shoe into the correct position to make contacts operate. |
| 2004 Volkswagen Jetta Europa 2.0 |
| Notes: 4-Pin Special care must be taken during installation to prevent damage and obtain proper electrical contact Prior to installation pull plunger to full extension, use and apply lubricant to plunger. Keep pedal in up position. Push switch in and seat into opening pressing against pedal. Once seated secure switch by turning it to the right approximately 45 degrees. This action turns the plunger shoe into the correct position to make contacts operate. |
| 2004 Volkswagen Jetta Europa 50 Aniversario 2.0 |
| Notes: 4-Pin Special care must be taken during installation to prevent damage and obtain proper electrical contact Prior to installation pull plunger to full extension, use and apply lubricant to plunger. Keep pedal in up position. Push switch in and seat into opening pressing against pedal. Once seated secure switch by turning it to the right approximately 45 degrees. This action turns the plunger shoe into the correct position to make contacts operate. |
| 2004 Volkswagen Jetta GL 1.8 |
| Notes: 4 Pin Connector |
| 2004 Volkswagen Jetta GL 1.8 |
| Notes: 4-Pin Special care must be taken during installation to prevent damage and obtain proper electrical contact Prior to installation pull plunger to full extension, use and apply lubricant to plunger. Keep pedal in up position. Push switch in and seat into opening pressing against pedal. Once seated secure switch by turning it to the right approximately 45 degrees. This action turns the plunger shoe into the correct position to make contacts operate. |
| 2004 Volkswagen Jetta GL 2.0 |
| Notes: 4 Pin Connector |
| 2004 Volkswagen Jetta GL 2.0 |
| Notes: 4-Pin Special care must be taken during installation to prevent damage and obtain proper electrical contact Prior to installation pull plunger to full extension, use and apply lubricant to plunger. Keep pedal in up position. Push switch in and seat into opening pressing against pedal. Once seated secure switch by turning it to the right approximately 45 degrees. This action turns the plunger shoe into the correct position to make contacts operate. |
| 2004 Volkswagen Jetta GLI 1.8 |
| Notes: 4 Pin Connector |
| 2004 Volkswagen Jetta GLI 1.8 |
| Notes: 4-Pin Special care must be taken during installation to prevent damage and obtain proper electrical contact Prior to installation pull plunger to full extension, use and apply lubricant to plunger. Keep pedal in up position. Push switch in and seat into opening pressing against pedal. Once seated secure switch by turning it to the right approximately 45 degrees. This action turns the plunger shoe into the correct position to make contacts operate. |
| 2004 Volkswagen Jetta GLI 2.8 |
| Notes: 4 Pin Connector |
| 2004 Volkswagen Jetta GLI 2.8 |
| Notes: 4-Pin Special care must be taken during installation to prevent damage and obtain proper electrical contact Prior to installation pull plunger to full extension, use and apply lubricant to plunger. Keep pedal in up position. Push switch in and seat into opening pressing against pedal. Once seated secure switch by turning it to the right approximately 45 degrees. This action turns the plunger shoe into the correct position to make contacts operate. |
| 2004 Volkswagen Jetta GLI 50 Aniversario 1.8 |
| Notes: 4-Pin Special care must be taken during installation to prevent damage and obtain proper electrical contact Prior to installation pull plunger to full extension, use and apply lubricant to plunger. Keep pedal in up position. Push switch in and seat into opening pressing against pedal. Once seated secure switch by turning it to the right approximately 45 degrees. This action turns the plunger shoe into the correct position to make contacts operate. |
| 2004 Volkswagen Jetta GLS 1.8 |
| Notes: 4 Pin Connector |
| 2004 Volkswagen Jetta GLS 1.8 |
| Notes: 4-Pin Special care must be taken during installation to prevent damage and obtain proper electrical contact Prior to installation pull plunger to full extension, use and apply lubricant to plunger. Keep pedal in up position. Push switch in and seat into opening pressing against pedal. Once seated secure switch by turning it to the right approximately 45 degrees. This action turns the plunger shoe into the correct position to make contacts operate. |
| 2004 Volkswagen Jetta GLS 2.0 |
| Notes: 4 Pin Connector |
| 2004 Volkswagen Jetta GLS 2.0 |
| Notes: 4-Pin Special care must be taken during installation to prevent damage and obtain proper electrical contact Prior to installation pull plunger to full extension, use and apply lubricant to plunger. Keep pedal in up position. Push switch in and seat into opening pressing against pedal. Once seated secure switch by turning it to the right approximately 45 degrees. This action turns the plunger shoe into the correct position to make contacts operate. |
| 2004 Volkswagen Jetta GLS 2.8 |
| Notes: 4 Pin Connector |
| 2004 Volkswagen Jetta GLS 2.8 |
| Notes: 4-Pin Special care must be taken during installation to prevent damage and obtain proper electrical contact Prior to installation pull plunger to full extension, use and apply lubricant to plunger. Keep pedal in up position. Push switch in and seat into opening pressing against pedal. Once seated secure switch by turning it to the right approximately 45 degrees. This action turns the plunger shoe into the correct position to make contacts operate. |
| 2004 Volkswagen Jetta Sportline 1.8 |
| Notes: 4-Pin Special care must be taken during installation to prevent damage and obtain proper electrical contact Prior to installation pull plunger to full extension, use and apply lubricant to plunger. Keep pedal in up position. Push switch in and seat into opening pressing against pedal. Once seated secure switch by turning it to the right approximately 45 degrees. This action turns the plunger shoe into the correct position to make contacts operate. |
| 2004 Volkswagen Jetta TDI 1.9 |
| Notes: 4 Pin Connector |
| 2004 Volkswagen Jetta TDI 1.9 |
| Notes: 4-Pin Special care must be taken during installation to prevent damage and obtain proper electrical contact Prior to installation pull plunger to full extension, use and apply lubricant to plunger. Keep pedal in up position. Push switch in and seat into opening pressing against pedal. Once seated secure switch by turning it to the right approximately 45 degrees. This action turns the plunger shoe into the correct position to make contacts operate. |
| 2004 Volkswagen Jetta Trendline 2.0 |
| Notes: 4-Pin Special care must be taken during installation to prevent damage and obtain proper electrical contact Prior to installation pull plunger to full extension, use and apply lubricant to plunger. Keep pedal in up position. Push switch in and seat into opening pressing against pedal. Once seated secure switch by turning it to the right approximately 45 degrees. This action turns the plunger shoe into the correct position to make contacts operate. |
| 2004 Volkswagen R32 Base 3.2 |
| Notes: 4 Pin Connector |
| 2004 Volkswagen Touareg TDI 4.9 |
| Notes: 4-Pin Special care must be taken during installation to prevent damage and obtain proper electrical contact Prior to installation pull plunger to full extension, use and apply lubricant to plunger. Keep pedal in up position. Push switch in and seat into opening pressing against pedal. Once seated secure switch by turning it to the right approximately 45 degrees. This action turns the plunger shoe into the correct position to make contacts operate. |
| 2004 Volkswagen Touareg V6 3.2 |
| Notes: 4-Pin Special care must be taken during installation to prevent damage and obtain proper electrical contact Prior to installation pull plunger to full extension, use and apply lubricant to plunger. Keep pedal in up position. Push switch in and seat into opening pressing against pedal. Once seated secure switch by turning it to the right approximately 45 degrees. This action turns the plunger shoe into the correct position to make contacts operate. |
| 2004 Volkswagen Touareg V6 Premium 3.2 |
| Notes: 4-Pin Special care must be taken during installation to prevent damage and obtain proper electrical contact Prior to installation pull plunger to full extension, use and apply lubricant to plunger. Keep pedal in up position. Push switch in and seat into opening pressing against pedal. Once seated secure switch by turning it to the right approximately 45 degrees. This action turns the plunger shoe into the correct position to make contacts operate. |
| 2004 Volkswagen Touareg V8 4.2 |
| Notes: 4-Pin Special care must be taken during installation to prevent damage and obtain proper electrical contact Prior to installation pull plunger to full extension, use and apply lubricant to plunger. Keep pedal in up position. Push switch in and seat into opening pressing against pedal. Once seated secure switch by turning it to the right approximately 45 degrees. This action turns the plunger shoe into the correct position to make contacts operate. |
| 2005 Audi TT Base 1.8 |
| Notes: 4 Pin Connector |
| 2005 Audi TT Base 1.8 |
| Notes: 4-Pin Special care must be taken during installation to prevent damage and obtain proper electrical contact Prior to installation pull plunger to full extension, use and apply lubricant to plunger. Keep pedal in up position. Push switch in and seat into opening pressing against pedal. Once seated secure switch by turning it to the right approximately 45 degrees. This action turns the plunger shoe into the correct position to make contacts operate. |
| 2005 Audi TT Sport 1.8 |
| Notes: 4 Pin Connector |
| 2005 Audi TT Sport 1.8 |
| Notes: 4-Pin Special care must be taken during installation to prevent damage and obtain proper electrical contact Prior to installation pull plunger to full extension, use and apply lubricant to plunger. Keep pedal in up position. Push switch in and seat into opening pressing against pedal. Once seated secure switch by turning it to the right approximately 45 degrees. This action turns the plunger shoe into the correct position to make contacts operate. |
| 2005 Audi TT Quattro Base 1.8 |
| Notes: 4 Pin Connector |
| 2005 Audi TT Quattro Base 1.8 |
| Notes: 4-Pin Special care must be taken during installation to prevent damage and obtain proper electrical contact Prior to installation pull plunger to full extension, use and apply lubricant to plunger. Keep pedal in up position. Push switch in and seat into opening pressing against pedal. Once seated secure switch by turning it to the right approximately 45 degrees. This action turns the plunger shoe into the correct position to make contacts operate. |
| 2005 Audi TT Quattro Base 3.2 |
| Notes: 4 Pin Connector |
| 2005 Audi TT Quattro Base 3.2 |
| Notes: 4-Pin Special care must be taken during installation to prevent damage and obtain proper electrical contact Prior to installation pull plunger to full extension, use and apply lubricant to plunger. Keep pedal in up position. Push switch in and seat into opening pressing against pedal. Once seated secure switch by turning it to the right approximately 45 degrees. This action turns the plunger shoe into the correct position to make contacts operate. |
| 2005 Audi TT Quattro S Line 1.8 |
| Notes: 4 Pin Connector |
| 2005 Audi TT Quattro S Line 1.8 |
| Notes: 4-Pin Special care must be taken during installation to prevent damage and obtain proper electrical contact Prior to installation pull plunger to full extension, use and apply lubricant to plunger. Keep pedal in up position. Push switch in and seat into opening pressing against pedal. Once seated secure switch by turning it to the right approximately 45 degrees. This action turns the plunger shoe into the correct position to make contacts operate. |
| 2005 Volkswagen Beetle Cabrio 2.0 |
| Notes: 4 Pin Connector |
| 2005 Volkswagen Beetle Cabrio 2.0 |
| Notes: 4-Pin Special care must be taken during installation to prevent damage and obtain proper electrical contact Prior to installation pull plunger to full extension, use and apply lubricant to plunger. Keep pedal in up position. Push switch in and seat into opening pressing against pedal. Once seated secure switch by turning it to the right approximately 45 degrees. This action turns the plunger shoe into the correct position to make contacts operate. |
| 2005 Volkswagen Beetle GL 2.0 |
| Notes: 4 Pin Connector |
| 2005 Volkswagen Beetle GL 2.0 |
| Notes: 4-Pin Special care must be taken during installation to prevent damage and obtain proper electrical contact Prior to installation pull plunger to full extension, use and apply lubricant to plunger. Keep pedal in up position. Push switch in and seat into opening pressing against pedal. Once seated secure switch by turning it to the right approximately 45 degrees. This action turns the plunger shoe into the correct position to make contacts operate. |
| 2005 Volkswagen Beetle GLS 1.8 |
| Notes: 4 Pin Connector |
| 2005 Volkswagen Beetle GLS 1.8 |
| Notes: 4-Pin Special care must be taken during installation to prevent damage and obtain proper electrical contact Prior to installation pull plunger to full extension, use and apply lubricant to plunger. Keep pedal in up position. Push switch in and seat into opening pressing against pedal. Once seated secure switch by turning it to the right approximately 45 degrees. This action turns the plunger shoe into the correct position to make contacts operate. |
| 2005 Volkswagen Beetle GLS 2.0 |
| Notes: 4 Pin Connector |
| 2005 Volkswagen Beetle GLS 2.0 |
| Notes: 4-Pin Special care must be taken during installation to prevent damage and obtain proper electrical contact Prior to installation pull plunger to full extension, use and apply lubricant to plunger. Keep pedal in up position. Push switch in and seat into opening pressing against pedal. Once seated secure switch by turning it to the right approximately 45 degrees. This action turns the plunger shoe into the correct position to make contacts operate. |
| 2005 Volkswagen Beetle GLS Sport Turbo 1.8 |
| Notes: 4 Pin Connector |
| 2005 Volkswagen Beetle GLS Sport Turbo 1.8 |
| Notes: 4-Pin Special care must be taken during installation to prevent damage and obtain proper electrical contact Prior to installation pull plunger to full extension, use and apply lubricant to plunger. Keep pedal in up position. Push switch in and seat into opening pressing against pedal. Once seated secure switch by turning it to the right approximately 45 degrees. This action turns the plunger shoe into the correct position to make contacts operate. |
| 2005 Volkswagen Beetle GLS TDI 1.9 |
| Notes: 4 Pin Connector |
| 2005 Volkswagen Beetle GLS TDI 1.9 |
| Notes: 4-Pin Special care must be taken during installation to prevent damage and obtain proper electrical contact Prior to installation pull plunger to full extension, use and apply lubricant to plunger. Keep pedal in up position. Push switch in and seat into opening pressing against pedal. Once seated secure switch by turning it to the right approximately 45 degrees. This action turns the plunger shoe into the correct position to make contacts operate. |
| 2005 Volkswagen Beetle GLX Sport Turbo 1.8 |
| Notes: 4 Pin Connector |
| 2005 Volkswagen Beetle GLX Sport Turbo 1.8 |
| Notes: 4-Pin Special care must be taken during installation to prevent damage and obtain proper electrical contact Prior to installation pull plunger to full extension, use and apply lubricant to plunger. Keep pedal in up position. Push switch in and seat into opening pressing against pedal. Once seated secure switch by turning it to the right approximately 45 degrees. This action turns the plunger shoe into the correct position to make contacts operate. |
| 2005 Volkswagen Beetle Turbo S 1.8 |
| Notes: 4 Pin Connector |
| 2005 Volkswagen Beetle Turbo S 1.8 |
| Notes: 4-Pin Special care must be taken during installation to prevent damage and obtain proper electrical contact Prior to installation pull plunger to full extension, use and apply lubricant to plunger. Keep pedal in up position. Push switch in and seat into opening pressing against pedal. Once seated secure switch by turning it to the right approximately 45 degrees. This action turns the plunger shoe into the correct position to make contacts operate. |
| 2005 Volkswagen Golf Comfortline 2.0 |
| Notes: 4 Pin Connector |
| 2005 Volkswagen Golf Comfortline 2.0 |
| Notes: 4-Pin Special care must be taken during installation to prevent damage and obtain proper electrical contact Prior to installation pull plunger to full extension, use and apply lubricant to plunger. Keep pedal in up position. Push switch in and seat into opening pressing against pedal. Once seated secure switch by turning it to the right approximately 45 degrees. This action turns the plunger shoe into the correct position to make contacts operate. |
| 2005 Volkswagen Golf Europa 2.0 |
| Notes: 4 Pin Connector |
| 2005 Volkswagen Golf Europa 2.0 |
| Notes: 4-Pin Special care must be taken during installation to prevent damage and obtain proper electrical contact Prior to installation pull plunger to full extension, use and apply lubricant to plunger. Keep pedal in up position. Push switch in and seat into opening pressing against pedal. Once seated secure switch by turning it to the right approximately 45 degrees. This action turns the plunger shoe into the correct position to make contacts operate. |
| 2005 Volkswagen Golf GL 2.0 |
| Notes: 4 Pin Connector |
| 2005 Volkswagen Golf GL 2.0 |
| Notes: 4-Pin Special care must be taken during installation to prevent damage and obtain proper electrical contact Prior to installation pull plunger to full extension, use and apply lubricant to plunger. Keep pedal in up position. Push switch in and seat into opening pressing against pedal. Once seated secure switch by turning it to the right approximately 45 degrees. This action turns the plunger shoe into the correct position to make contacts operate. |
| 2005 Volkswagen Golf GLS 2.0 |
| Notes: 4 Pin Connector |
| 2005 Volkswagen Golf GLS 2.0 |
| Notes: 4-Pin Special care must be taken during installation to prevent damage and obtain proper electrical contact Prior to installation pull plunger to full extension, use and apply lubricant to plunger. Keep pedal in up position. Push switch in and seat into opening pressing against pedal. Once seated secure switch by turning it to the right approximately 45 degrees. This action turns the plunger shoe into the correct position to make contacts operate. |
| 2005 Volkswagen Golf GTI 1.8 |
| Notes: 4 Pin Connector |
| 2005 Volkswagen Golf GTI 1.8 |
| Notes: 4-Pin Special care must be taken during installation to prevent damage and obtain proper electrical contact Prior to installation pull plunger to full extension, use and apply lubricant to plunger. Keep pedal in up position. Push switch in and seat into opening pressing against pedal. Once seated secure switch by turning it to the right approximately 45 degrees. This action turns the plunger shoe into the correct position to make contacts operate. |
| 2005 Volkswagen Golf GTI 1.8T 1.8 |
| Notes: 4 Pin Connector |
| 2005 Volkswagen Golf GTI 1.8T 1.8 |
| Notes: 4-Pin Special care must be taken during installation to prevent damage and obtain proper electrical contact Prior to installation pull plunger to full extension, use and apply lubricant to plunger. Keep pedal in up position. Push switch in and seat into opening pressing against pedal. Once seated secure switch by turning it to the right approximately 45 degrees. This action turns the plunger shoe into the correct position to make contacts operate. |
| 2005 Volkswagen Golf GTI VR6 2.8 |
| Notes: 4 Pin Connector |
| 2005 Volkswagen Golf GTI VR6 2.8 |
| Notes: 4-Pin Special care must be taken during installation to prevent damage and obtain proper electrical contact Prior to installation pull plunger to full extension, use and apply lubricant to plunger. Keep pedal in up position. Push switch in and seat into opening pressing against pedal. Once seated secure switch by turning it to the right approximately 45 degrees. This action turns the plunger shoe into the correct position to make contacts operate. |
| 2005 Volkswagen Golf TDI 1.9 |
| Notes: 4 Pin Connector |
| 2005 Volkswagen Golf TDI 1.9 |
| Notes: 4-Pin Special care must be taken during installation to prevent damage and obtain proper electrical contact Prior to installation pull plunger to full extension, use and apply lubricant to plunger. Keep pedal in up position. Push switch in and seat into opening pressing against pedal. Once seated secure switch by turning it to the right approximately 45 degrees. This action turns the plunger shoe into the correct position to make contacts operate. |
| 2005 Volkswagen Golf Trendline 2.0 |
| Notes: 4 Pin Connector |
| 2005 Volkswagen Golf Trendline 2.0 |
| Notes: 4-Pin Special care must be taken during installation to prevent damage and obtain proper electrical contact Prior to installation pull plunger to full extension, use and apply lubricant to plunger. Keep pedal in up position. Push switch in and seat into opening pressing against pedal. Once seated secure switch by turning it to the right approximately 45 degrees. This action turns the plunger shoe into the correct position to make contacts operate. |
| 2005 Volkswagen Jetta 2.5 2.5 |
| Notes: 4-Pin Special care must be taken during installation to prevent damage and obtain proper electrical contact Prior to installation pull plunger to full extension, use and apply lubricant to plunger. Keep pedal in up position. Push switch in and seat into opening pressing against pedal. Once seated secure switch by turning it to the right approximately 45 degrees. This action turns the plunger shoe into the correct position to make contacts operate. |
| 2005 Volkswagen Jetta Comfortline 2.0 |
| Notes: 4-Pin Special care must be taken during installation to prevent damage and obtain proper electrical contact Prior to installation pull plunger to full extension, use and apply lubricant to plunger. Keep pedal in up position. Push switch in and seat into opening pressing against pedal. Once seated secure switch by turning it to the right approximately 45 degrees. This action turns the plunger shoe into the correct position to make contacts operate. |
| 2005 Volkswagen Jetta Europa 2.0 |
| Notes: 4-Pin Special care must be taken during installation to prevent damage and obtain proper electrical contact Prior to installation pull plunger to full extension, use and apply lubricant to plunger. Keep pedal in up position. Push switch in and seat into opening pressing against pedal. Once seated secure switch by turning it to the right approximately 45 degrees. This action turns the plunger shoe into the correct position to make contacts operate. |
| 2005 Volkswagen Jetta GL 1.8 |
| Notes: 4 Pin Connector |
| 2005 Volkswagen Jetta GL 1.8 |
| Notes: 4-Pin Special care must be taken during installation to prevent damage and obtain proper electrical contact Prior to installation pull plunger to full extension, use and apply lubricant to plunger. Keep pedal in up position. Push switch in and seat into opening pressing against pedal. Once seated secure switch by turning it to the right approximately 45 degrees. This action turns the plunger shoe into the correct position to make contacts operate. |
| 2005 Volkswagen Jetta GL 2.0 |
| Notes: 4 Pin Connector |
| 2005 Volkswagen Jetta GL 2.0 |
| Notes: 4-Pin Special care must be taken during installation to prevent damage and obtain proper electrical contact Prior to installation pull plunger to full extension, use and apply lubricant to plunger. Keep pedal in up position. Push switch in and seat into opening pressing against pedal. Once seated secure switch by turning it to the right approximately 45 degrees. This action turns the plunger shoe into the correct position to make contacts operate. |
| 2005 Volkswagen Jetta GL TDI 1.9 |
| Notes: 4 Pin Connector |
| 2005 Volkswagen Jetta GL TDI 1.9 |
| Notes: 4-Pin Special care must be taken during installation to prevent damage and obtain proper electrical contact Prior to installation pull plunger to full extension, use and apply lubricant to plunger. Keep pedal in up position. Push switch in and seat into opening pressing against pedal. Once seated secure switch by turning it to the right approximately 45 degrees. This action turns the plunger shoe into the correct position to make contacts operate. |
| 2005 Volkswagen Jetta GLI 1.8 |
| Notes: 4 Pin Connector |
| 2005 Volkswagen Jetta GLI 1.8 |
| Notes: 4-Pin Special care must be taken during installation to prevent damage and obtain proper electrical contact Prior to installation pull plunger to full extension, use and apply lubricant to plunger. Keep pedal in up position. Push switch in and seat into opening pressing against pedal. Once seated secure switch by turning it to the right approximately 45 degrees. This action turns the plunger shoe into the correct position to make contacts operate. |
| 2005 Volkswagen Jetta GLS 1.8 |
| Notes: 4 Pin Connector |
| 2005 Volkswagen Jetta GLS 1.8 |
| Notes: 4-Pin Special care must be taken during installation to prevent damage and obtain proper electrical contact Prior to installation pull plunger to full extension, use and apply lubricant to plunger. Keep pedal in up position. Push switch in and seat into opening pressing against pedal. Once seated secure switch by turning it to the right approximately 45 degrees. This action turns the plunger shoe into the correct position to make contacts operate. |
| 2005 Volkswagen Jetta GLS 2.0 |
| Notes: 4 Pin Connector |
| 2005 Volkswagen Jetta GLS 2.0 |
| Notes: 4-Pin Special care must be taken during installation to prevent damage and obtain proper electrical contact Prior to installation pull plunger to full extension, use and apply lubricant to plunger. Keep pedal in up position. Push switch in and seat into opening pressing against pedal. Once seated secure switch by turning it to the right approximately 45 degrees. This action turns the plunger shoe into the correct position to make contacts operate. |
| 2005 Volkswagen Jetta GLS TDI 1.9 |
| Notes: 4 Pin Connector |
| 2005 Volkswagen Jetta GLS TDI 1.9 |
| Notes: 4-Pin Special care must be taken during installation to prevent damage and obtain proper electrical contact Prior to installation pull plunger to full extension, use and apply lubricant to plunger. Keep pedal in up position. Push switch in and seat into opening pressing against pedal. Once seated secure switch by turning it to the right approximately 45 degrees. This action turns the plunger shoe into the correct position to make contacts operate. |
| 2005 Volkswagen Jetta Limited Edition 2.0 |
| Notes: 4-Pin Special care must be taken during installation to prevent damage and obtain proper electrical contact Prior to installation pull plunger to full extension, use and apply lubricant to plunger. Keep pedal in up position. Push switch in and seat into opening pressing against pedal. Once seated secure switch by turning it to the right approximately 45 degrees. This action turns the plunger shoe into the correct position to make contacts operate. |
| 2005 Volkswagen Jetta Special Edition 2.0 |
| Notes: 4-Pin Special care must be taken during installation to prevent damage and obtain proper electrical contact Prior to installation pull plunger to full extension, use and apply lubricant to plunger. Keep pedal in up position. Push switch in and seat into opening pressing against pedal. Once seated secure switch by turning it to the right approximately 45 degrees. This action turns the plunger shoe into the correct position to make contacts operate. |
| 2005 Volkswagen Jetta Sportline 1.8 |
| Notes: 4-Pin Special care must be taken during installation to prevent damage and obtain proper electrical contact Prior to installation pull plunger to full extension, use and apply lubricant to plunger. Keep pedal in up position. Push switch in and seat into opening pressing against pedal. Once seated secure switch by turning it to the right approximately 45 degrees. This action turns the plunger shoe into the correct position to make contacts operate. |
| 2005 Volkswagen Jetta Summer Edition 2.0 |
| Notes: 4-Pin Special care must be taken during installation to prevent damage and obtain proper electrical contact Prior to installation pull plunger to full extension, use and apply lubricant to plunger. Keep pedal in up position. Push switch in and seat into opening pressing against pedal. Once seated secure switch by turning it to the right approximately 45 degrees. This action turns the plunger shoe into the correct position to make contacts operate. |
| 2005 Volkswagen Jetta TDI 1.9 |
| Notes: 4-Pin Special care must be taken during installation to prevent damage and obtain proper electrical contact Prior to installation pull plunger to full extension, use and apply lubricant to plunger. Keep pedal in up position. Push switch in and seat into opening pressing against pedal. Once seated secure switch by turning it to the right approximately 45 degrees. This action turns the plunger shoe into the correct position to make contacts operate. |
| 2005 Volkswagen Jetta Trendline 2.0 |
| Notes: 4-Pin Special care must be taken during installation to prevent damage and obtain proper electrical contact Prior to installation pull plunger to full extension, use and apply lubricant to plunger. Keep pedal in up position. Push switch in and seat into opening pressing against pedal. Once seated secure switch by turning it to the right approximately 45 degrees. This action turns the plunger shoe into the correct position to make contacts operate. |
| 2005 Volkswagen Touareg Base 3.2 |
| Notes: 4-Pin Special care must be taken during installation to prevent damage and obtain proper electrical contact Prior to installation pull plunger to full extension, use and apply lubricant to plunger. Keep pedal in up position. Push switch in and seat into opening pressing against pedal. Once seated secure switch by turning it to the right approximately 45 degrees. This action turns the plunger shoe into the correct position to make contacts operate. |
| 2005 Volkswagen Touareg Base 4.2 |
| Notes: 4-Pin Special care must be taken during installation to prevent damage and obtain proper electrical contact Prior to installation pull plunger to full extension, use and apply lubricant to plunger. Keep pedal in up position. Push switch in and seat into opening pressing against pedal. Once seated secure switch by turning it to the right approximately 45 degrees. This action turns the plunger shoe into the correct position to make contacts operate. |
| 2005 Volkswagen Touareg V6 3.2 |
| Notes: 4-Pin Special care must be taken during installation to prevent damage and obtain proper electrical contact Prior to installation pull plunger to full extension, use and apply lubricant to plunger. Keep pedal in up position. Push switch in and seat into opening pressing against pedal. Once seated secure switch by turning it to the right approximately 45 degrees. This action turns the plunger shoe into the correct position to make contacts operate. |
| 2005 Volkswagen Touareg V6 Premium 3.2 |
| Notes: 4-Pin Special care must be taken during installation to prevent damage and obtain proper electrical contact Prior to installation pull plunger to full extension, use and apply lubricant to plunger. Keep pedal in up position. Push switch in and seat into opening pressing against pedal. Once seated secure switch by turning it to the right approximately 45 degrees. This action turns the plunger shoe into the correct position to make contacts operate. |
| 2005 Volkswagen Touareg V8 4.2 |
| Notes: 4-Pin Special care must be taken during installation to prevent damage and obtain proper electrical contact Prior to installation pull plunger to full extension, use and apply lubricant to plunger. Keep pedal in up position. Push switch in and seat into opening pressing against pedal. Once seated secure switch by turning it to the right approximately 45 degrees. This action turns the plunger shoe into the correct position to make contacts operate. |
| 2006 Audi TT Base 1.8 |
| Notes: 4 Pin Connector |
| 2006 Audi TT Base 1.8 |
| Notes: 4-Pin Special care must be taken during installation to prevent damage and obtain proper electrical contact Prior to installation pull plunger to full extension, use and apply lubricant to plunger. Keep pedal in up position. Push switch in and seat into opening pressing against pedal. Once seated secure switch by turning it to the right approximately 45 degrees. This action turns the plunger shoe into the correct position to make contacts operate. |
| 2006 Audi TT Classic Edition 1.8 |
| Notes: 4 Pin Connector |
| 2006 Audi TT Classic Edition 1.8 |
| Notes: 4-Pin Special care must be taken during installation to prevent damage and obtain proper electrical contact Prior to installation pull plunger to full extension, use and apply lubricant to plunger. Keep pedal in up position. Push switch in and seat into opening pressing against pedal. Once seated secure switch by turning it to the right approximately 45 degrees. This action turns the plunger shoe into the correct position to make contacts operate. |
| 2006 Audi TT Sport 1.8 |
| Notes: 4 Pin Connector |
| 2006 Audi TT Sport 1.8 |
| Notes: 4-Pin Special care must be taken during installation to prevent damage and obtain proper electrical contact Prior to installation pull plunger to full extension, use and apply lubricant to plunger. Keep pedal in up position. Push switch in and seat into opening pressing against pedal. Once seated secure switch by turning it to the right approximately 45 degrees. This action turns the plunger shoe into the correct position to make contacts operate. |
| 2006 Audi TT Quattro Base 1.8 |
| Notes: 4 Pin Connector |
| 2006 Audi TT Quattro Base 1.8 |
| Notes: 4-Pin Special care must be taken during installation to prevent damage and obtain proper electrical contact Prior to installation pull plunger to full extension, use and apply lubricant to plunger. Keep pedal in up position. Push switch in and seat into opening pressing against pedal. Once seated secure switch by turning it to the right approximately 45 degrees. This action turns the plunger shoe into the correct position to make contacts operate. |
| 2006 Audi TT Quattro Base 3.2 |
| Notes: 4 Pin Connector |
| 2006 Audi TT Quattro Base 3.2 |
| Notes: 4-Pin Special care must be taken during installation to prevent damage and obtain proper electrical contact Prior to installation pull plunger to full extension, use and apply lubricant to plunger. Keep pedal in up position. Push switch in and seat into opening pressing against pedal. Once seated secure switch by turning it to the right approximately 45 degrees. This action turns the plunger shoe into the correct position to make contacts operate. |
| 2006 Audi TT Quattro S Line 1.8 |
| Notes: 4 Pin Connector |
| 2006 Audi TT Quattro S Line 1.8 |
| Notes: 4-Pin Special care must be taken during installation to prevent damage and obtain proper electrical contact Prior to installation pull plunger to full extension, use and apply lubricant to plunger. Keep pedal in up position. Push switch in and seat into opening pressing against pedal. Once seated secure switch by turning it to the right approximately 45 degrees. This action turns the plunger shoe into the correct position to make contacts operate. |
| 2006 Audi TT Quattro Special Edition 3.2 |
| Notes: 4 Pin Connector |
| 2006 Audi TT Quattro Special Edition 3.2 |
| Notes: 4-Pin Special care must be taken during installation to prevent damage and obtain proper electrical contact Prior to installation pull plunger to full extension, use and apply lubricant to plunger. Keep pedal in up position. Push switch in and seat into opening pressing against pedal. Once seated secure switch by turning it to the right approximately 45 degrees. This action turns the plunger shoe into the correct position to make contacts operate. |
| 2006 Volkswagen Beetle 2.5 2.5 |
| Notes: 4 Pin Connector |
| 2006 Volkswagen Beetle 2.5 2.5 |
| Notes: 4-Pin Special care must be taken during installation to prevent damage and obtain proper electrical contact Prior to installation pull plunger to full extension, use and apply lubricant to plunger. Keep pedal in up position. Push switch in and seat into opening pressing against pedal. Once seated secure switch by turning it to the right approximately 45 degrees. This action turns the plunger shoe into the correct position to make contacts operate. |
| 2006 Volkswagen Beetle Cabrio 2.0 |
| Notes: 4 Pin Connector |
| 2006 Volkswagen Beetle Cabrio 2.0 |
| Notes: 4-Pin Special care must be taken during installation to prevent damage and obtain proper electrical contact Prior to installation pull plunger to full extension, use and apply lubricant to plunger. Keep pedal in up position. Push switch in and seat into opening pressing against pedal. Once seated secure switch by turning it to the right approximately 45 degrees. This action turns the plunger shoe into the correct position to make contacts operate. |
| 2006 Volkswagen Beetle GLS 2.0 |
| Notes: 4 Pin Connector |
| 2006 Volkswagen Beetle GLS 2.0 |
| Notes: 4-Pin Special care must be taken during installation to prevent damage and obtain proper electrical contact Prior to installation pull plunger to full extension, use and apply lubricant to plunger. Keep pedal in up position. Push switch in and seat into opening pressing against pedal. Once seated secure switch by turning it to the right approximately 45 degrees. This action turns the plunger shoe into the correct position to make contacts operate. |
| 2006 Volkswagen Beetle Sport 2.0 |
| Notes: 4 Pin Connector |
| 2006 Volkswagen Beetle Sport 2.0 |
| Notes: 4-Pin Special care must be taken during installation to prevent damage and obtain proper electrical contact Prior to installation pull plunger to full extension, use and apply lubricant to plunger. Keep pedal in up position. Push switch in and seat into opening pressing against pedal. Once seated secure switch by turning it to the right approximately 45 degrees. This action turns the plunger shoe into the correct position to make contacts operate. |
| 2006 Volkswagen Beetle Sport GLX 2.0 |
| Notes: 4 Pin Connector |
| 2006 Volkswagen Beetle Sport GLX 2.0 |
| Notes: 4-Pin Special care must be taken during installation to prevent damage and obtain proper electrical contact Prior to installation pull plunger to full extension, use and apply lubricant to plunger. Keep pedal in up position. Push switch in and seat into opening pressing against pedal. Once seated secure switch by turning it to the right approximately 45 degrees. This action turns the plunger shoe into the correct position to make contacts operate. |
| 2006 Volkswagen Beetle TDI 1.9 |
| Notes: 4 Pin Connector |
| 2006 Volkswagen Beetle TDI 1.9 |
| Notes: 4-Pin Special care must be taken during installation to prevent damage and obtain proper electrical contact Prior to installation pull plunger to full extension, use and apply lubricant to plunger. Keep pedal in up position. Push switch in and seat into opening pressing against pedal. Once seated secure switch by turning it to the right approximately 45 degrees. This action turns the plunger shoe into the correct position to make contacts operate. |
| 2006 Volkswagen Golf Europa 2.0 |
| Notes: 4 Pin Connector |
| 2006 Volkswagen Golf Europa 2.0 |
| Notes: 4-Pin Special care must be taken during installation to prevent damage and obtain proper electrical contact Prior to installation pull plunger to full extension, use and apply lubricant to plunger. Keep pedal in up position. Push switch in and seat into opening pressing against pedal. Once seated secure switch by turning it to the right approximately 45 degrees. This action turns the plunger shoe into the correct position to make contacts operate. |
| 2006 Volkswagen Golf GL 2.0 |
| Notes: 4 Pin Connector |
| 2006 Volkswagen Golf GL 2.0 |
| Notes: 4-Pin Special care must be taken during installation to prevent damage and obtain proper electrical contact Prior to installation pull plunger to full extension, use and apply lubricant to plunger. Keep pedal in up position. Push switch in and seat into opening pressing against pedal. Once seated secure switch by turning it to the right approximately 45 degrees. This action turns the plunger shoe into the correct position to make contacts operate. |
| 2006 Volkswagen Golf GLS 2.0 |
| Notes: 4 Pin Connector |
| 2006 Volkswagen Golf GLS 2.0 |
| Notes: 4-Pin Special care must be taken during installation to prevent damage and obtain proper electrical contact Prior to installation pull plunger to full extension, use and apply lubricant to plunger. Keep pedal in up position. Push switch in and seat into opening pressing against pedal. Once seated secure switch by turning it to the right approximately 45 degrees. This action turns the plunger shoe into the correct position to make contacts operate. |
| 2006 Volkswagen Golf GLS TDI 1.9 |
| Notes: 4 Pin Connector |
| 2006 Volkswagen Golf GLS TDI 1.9 |
| Notes: 4-Pin Special care must be taken during installation to prevent damage and obtain proper electrical contact Prior to installation pull plunger to full extension, use and apply lubricant to plunger. Keep pedal in up position. Push switch in and seat into opening pressing against pedal. Once seated secure switch by turning it to the right approximately 45 degrees. This action turns the plunger shoe into the correct position to make contacts operate. |
| 2006 Volkswagen Golf GTI 1.8T 1.8 |
| Notes: 4 Pin Connector |
| 2006 Volkswagen Golf GTI 1.8T 1.8 |
| Notes: 4-Pin Special care must be taken during installation to prevent damage and obtain proper electrical contact Prior to installation pull plunger to full extension, use and apply lubricant to plunger. Keep pedal in up position. Push switch in and seat into opening pressing against pedal. Once seated secure switch by turning it to the right approximately 45 degrees. This action turns the plunger shoe into the correct position to make contacts operate. |
| 2007 Volkswagen Beetle 2.5 2.5 |
| Notes: 4 Pin Connector |
| 2007 Volkswagen Beetle 2.5 2.5 |
| Notes: 4-Pin Special care must be taken during installation to prevent damage and obtain proper electrical contact Prior to installation pull plunger to full extension, use and apply lubricant to plunger. Keep pedal in up position. Push switch in and seat into opening pressing against pedal. Once seated secure switch by turning it to the right approximately 45 degrees. This action turns the plunger shoe into the correct position to make contacts operate. |
| 2007 Volkswagen Beetle Cabrio 2.0 |
| Notes: 4 Pin Connector |
| 2007 Volkswagen Beetle Cabrio 2.0 |
| Notes: 4-Pin Special care must be taken during installation to prevent damage and obtain proper electrical contact Prior to installation pull plunger to full extension, use and apply lubricant to plunger. Keep pedal in up position. Push switch in and seat into opening pressing against pedal. Once seated secure switch by turning it to the right approximately 45 degrees. This action turns the plunger shoe into the correct position to make contacts operate. |
| 2007 Volkswagen Beetle GLS 2.0 |
| Notes: 4 Pin Connector |
| 2007 Volkswagen Beetle GLS 2.0 |
| Notes: 4-Pin Special care must be taken during installation to prevent damage and obtain proper electrical contact Prior to installation pull plunger to full extension, use and apply lubricant to plunger. Keep pedal in up position. Push switch in and seat into opening pressing against pedal. Once seated secure switch by turning it to the right approximately 45 degrees. This action turns the plunger shoe into the correct position to make contacts operate. |
| 2007 Volkswagen Beetle Sport 2.0 |
| Notes: 4 Pin Connector |
| 2007 Volkswagen Beetle Sport 2.0 |
| Notes: 4-Pin Special care must be taken during installation to prevent damage and obtain proper electrical contact Prior to installation pull plunger to full extension, use and apply lubricant to plunger. Keep pedal in up position. Push switch in and seat into opening pressing against pedal. Once seated secure switch by turning it to the right approximately 45 degrees. This action turns the plunger shoe into the correct position to make contacts operate. |
| 2007 Volkswagen Beetle Sport GLX 2.0 |
| Notes: 4 Pin Connector |
| 2007 Volkswagen Beetle Sport GLX 2.0 |
| Notes: 4-Pin Special care must be taken during installation to prevent damage and obtain proper electrical contact Prior to installation pull plunger to full extension, use and apply lubricant to plunger. Keep pedal in up position. Push switch in and seat into opening pressing against pedal. Once seated secure switch by turning it to the right approximately 45 degrees. This action turns the plunger shoe into the correct position to make contacts operate. |
| 2007 Volkswagen Touareg TDI 4.9 |
| Notes: 4-Pin Special care must be taken during installation to prevent damage and obtain proper electrical contact Prior to installation pull plunger to full extension, use and apply lubricant to plunger. Keep pedal in up position. Push switch in and seat into opening pressing against pedal. Once seated secure switch by turning it to the right approximately 45 degrees. This action turns the plunger shoe into the correct position to make contacts operate. |
| 2007 Volkswagen Touareg TDI 5.0 |
| Notes: 4-Pin Special care must be taken during installation to prevent damage and obtain proper electrical contact Prior to installation pull plunger to full extension, use and apply lubricant to plunger. Keep pedal in up position. Push switch in and seat into opening pressing against pedal. Once seated secure switch by turning it to the right approximately 45 degrees. This action turns the plunger shoe into the correct position to make contacts operate. |
| 2008 Volkswagen Beetle 10 Anos 2.0 |
| Notes: 4 Pin Connector |
| 2008 Volkswagen Beetle 10 Anos 2.0 |
| Notes: 4-Pin Special care must be taken during installation to prevent damage and obtain proper electrical contact Prior to installation pull plunger to full extension, use and apply lubricant to plunger. Keep pedal in up position. Push switch in and seat into opening pressing against pedal. Once seated secure switch by turning it to the right approximately 45 degrees. This action turns the plunger shoe into the correct position to make contacts operate. |
| 2008 Volkswagen Beetle 10 Anos 2.5 |
| Notes: 4 Pin Connector |
| 2008 Volkswagen Beetle 10 Anos 2.5 |
| Notes: 4-Pin Special care must be taken during installation to prevent damage and obtain proper electrical contact Prior to installation pull plunger to full extension, use and apply lubricant to plunger. Keep pedal in up position. Push switch in and seat into opening pressing against pedal. Once seated secure switch by turning it to the right approximately 45 degrees. This action turns the plunger shoe into the correct position to make contacts operate. |
| 2008 Volkswagen Beetle 2.5 2.5 |
| Notes: 4 Pin Connector |
| 2008 Volkswagen Beetle 2.5 2.5 |
| Notes: 4-Pin Special care must be taken during installation to prevent damage and obtain proper electrical contact Prior to installation pull plunger to full extension, use and apply lubricant to plunger. Keep pedal in up position. Push switch in and seat into opening pressing against pedal. Once seated secure switch by turning it to the right approximately 45 degrees. This action turns the plunger shoe into the correct position to make contacts operate. |
| 2008 Volkswagen Beetle Cabrio 2.0 |
| Notes: 4 Pin Connector |
| 2008 Volkswagen Beetle Cabrio 2.0 |
| Notes: 4-Pin Special care must be taken during installation to prevent damage and obtain proper electrical contact Prior to installation pull plunger to full extension, use and apply lubricant to plunger. Keep pedal in up position. Push switch in and seat into opening pressing against pedal. Once seated secure switch by turning it to the right approximately 45 degrees. This action turns the plunger shoe into the correct position to make contacts operate. |
| 2008 Volkswagen Beetle GLS 2.0 |
| Notes: 4 Pin Connector |
| 2008 Volkswagen Beetle GLS 2.0 |
| Notes: 4-Pin Special care must be taken during installation to prevent damage and obtain proper electrical contact Prior to installation pull plunger to full extension, use and apply lubricant to plunger. Keep pedal in up position. Push switch in and seat into opening pressing against pedal. Once seated secure switch by turning it to the right approximately 45 degrees. This action turns the plunger shoe into the correct position to make contacts operate. |
| 2008 Volkswagen Beetle Hot Wheels 2.0 |
| Notes: 4 Pin Connector |
| 2008 Volkswagen Beetle Hot Wheels 2.0 |
| Notes: 4-Pin Special care must be taken during installation to prevent damage and obtain proper electrical contact Prior to installation pull plunger to full extension, use and apply lubricant to plunger. Keep pedal in up position. Push switch in and seat into opening pressing against pedal. Once seated secure switch by turning it to the right approximately 45 degrees. This action turns the plunger shoe into the correct position to make contacts operate. |
| 2008 Volkswagen Beetle Hot Wheels 2.5 |
| Notes: 4 Pin Connector |
| 2008 Volkswagen Beetle Hot Wheels 2.5 |
| Notes: 4-Pin Special care must be taken during installation to prevent damage and obtain proper electrical contact Prior to installation pull plunger to full extension, use and apply lubricant to plunger. Keep pedal in up position. Push switch in and seat into opening pressing against pedal. Once seated secure switch by turning it to the right approximately 45 degrees. This action turns the plunger shoe into the correct position to make contacts operate. |
| 2008 Volkswagen Beetle S 2.5 |
| Notes: 4 Pin Connector |
| 2008 Volkswagen Beetle S 2.5 |
| Notes: 4-Pin Special care must be taken during installation to prevent damage and obtain proper electrical contact Prior to installation pull plunger to full extension, use and apply lubricant to plunger. Keep pedal in up position. Push switch in and seat into opening pressing against pedal. Once seated secure switch by turning it to the right approximately 45 degrees. This action turns the plunger shoe into the correct position to make contacts operate. |
| 2008 Volkswagen Beetle SE 2.5 |
| Notes: 4 Pin Connector |
| 2008 Volkswagen Beetle SE 2.5 |
| Notes: 4-Pin Special care must be taken during installation to prevent damage and obtain proper electrical contact Prior to installation pull plunger to full extension, use and apply lubricant to plunger. Keep pedal in up position. Push switch in and seat into opening pressing against pedal. Once seated secure switch by turning it to the right approximately 45 degrees. This action turns the plunger shoe into the correct position to make contacts operate. |
| 2008 Volkswagen Beetle Sport 2.5 |
| Notes: 4 Pin Connector |
| 2008 Volkswagen Beetle Sport 2.5 |
| Notes: 4-Pin Special care must be taken during installation to prevent damage and obtain proper electrical contact Prior to installation pull plunger to full extension, use and apply lubricant to plunger. Keep pedal in up position. Push switch in and seat into opening pressing against pedal. Once seated secure switch by turning it to the right approximately 45 degrees. This action turns the plunger shoe into the correct position to make contacts operate. |
| 2008 Volkswagen Beetle Sport GLX 2.5 |
| Notes: 4 Pin Connector |
| 2008 Volkswagen Beetle Sport GLX 2.5 |
| Notes: 4-Pin Special care must be taken during installation to prevent damage and obtain proper electrical contact Prior to installation pull plunger to full extension, use and apply lubricant to plunger. Keep pedal in up position. Push switch in and seat into opening pressing against pedal. Once seated secure switch by turning it to the right approximately 45 degrees. This action turns the plunger shoe into the correct position to make contacts operate. |
| 2008 Volkswagen Touareg TDI 5.0 |
| Notes: 4-Pin Special care must be taken during installation to prevent damage and obtain proper electrical contact Prior to installation pull plunger to full extension, use and apply lubricant to plunger. Keep pedal in up position. Push switch in and seat into opening pressing against pedal. Once seated secure switch by turning it to the right approximately 45 degrees. This action turns the plunger shoe into the correct position to make contacts operate. |
| 2009 Volkswagen Beetle Base 2.5 |
| Notes: 4 Pin Connector |
| 2009 Volkswagen Beetle Cabrio 2.0 |
| Notes: 4 Pin Connector |
| 2009 Volkswagen Beetle Comfortline 2.5 |
| Notes: 4 Pin Connector |
| 2009 Volkswagen Beetle GLS 2.0 |
| Notes: 4 Pin Connector |
| 2009 Volkswagen Beetle Sport 2.5 |
| Notes: 4 Pin Connector |
| 2009 Volkswagen Beetle Sport GLX 2.5 |
| Notes: 4 Pin Connector |
| 2009 Volkswagen Beetle Trendline 2.5 |
| Notes: 4 Pin Connector |
| 2010 Volkswagen Beetle Base 2.5 |
| Notes: 4 Pin Connector |
| 2010 Volkswagen Beetle Comfortline 2.5 |
| Notes: 4 Pin Connector |
| 2010 Volkswagen Beetle GLS 2.0 |
| Notes: 4 Pin Connector |
| 2010 Volkswagen Beetle Sport 2.5 |
| Notes: 4 Pin Connector |
| 2010 Volkswagen Beetle Sport GLX 2.5 |
| Notes: 4 Pin Connector |
